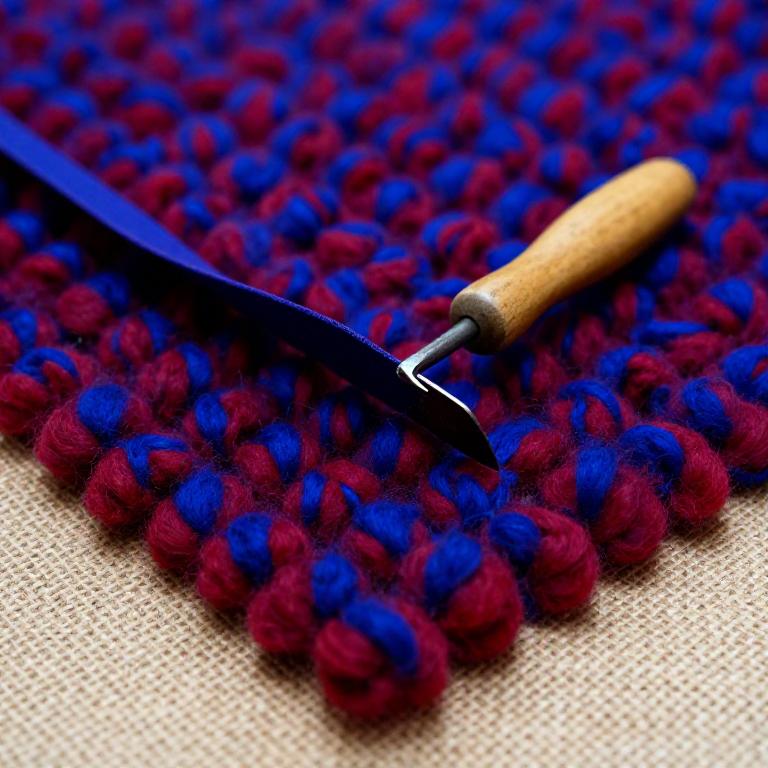


Rug Hooking
A hooked rug is made of loops. A hook goes down through an open-weave backing, catches a strip of cloth held underneath, and pulls a loop up to the surface. Repeat a few thousand times and the loops stand together as a dense pile.
Nothing is knotted and nothing is sewn. The rug holds together because the loops are packed tightly enough to grip each other — which is why spacing is the whole craft. Too far apart and the rug sheds loops underfoot; too close and the backing distorts and buckles.
It began as a way of making a floor covering out of worn clothes and empty feed sacks, by people who could not buy a carpet. Every material in it was free.
ہدایات
Cut an open-weave backing
Cut an open-weave backing
Cut jute burlap or monk's cloth 400 x 300 mm plus 75 mm spare all round. The weave must be open enough for a hook to pass between threads without cutting them.
اس مرحلے کے لیے مواد:
 پٹ سن کا ٹاٹ (۲ گز)1 ٹکڑا
Bind the raw edges
Bind the raw edges
Turn and stitch the edges, or tape them. Burlap unravels continuously as you work and an unbound edge loses the outer rows of loops.
Mount it drum tight in a frame
Mount it drum tight in a frame
Stretch the backing on a frame until it is taut. Tension is what keeps the loop height even — a slack backing gives long loops in the sag and short ones at the edges.
Draw the design on the backing
Draw the design on the backing
Mark the design straight onto the backing with a marker. Keep the shapes simple and bold; fine detail disappears entirely into a loop pile.
درکار اوزار:
 درزی کی کھڑیا
Cut strips of even width
Cut strips of even width
Cut wool cloth into strips 6 mm wide, along the grain, as long as you can manage. Even width matters more than the colour: uneven strips give a lumpy, uneven pile.
اس مرحلے کے لیے مواد:
 ابھی بُنا اونی کپڑا1 sqm
Use wool if you can
Use wool if you can
Wool holds a loop, resists dirt and wears for decades. Cotton and synthetics flatten and go limp. Traditional rugs used whatever the household had, but wool is what survives in museums.
Hold the strip underneath
Hold the strip underneath
Sit with the frame in your lap, hook above the backing and the strip held below in your other hand. The lower hand feeds; it never pushes.
درکار اوزار:
 قالین بننے کی کنڈی
Pull the first tail right through
Pull the first tail right through
Push the hook down, catch the end of the strip and pull the tail all the way up to the surface. Both ends of every strip finish on top and are trimmed level later — never left dangling underneath.
Pull loops to an even height
Pull loops to an even height
Go down through the next hole and pull up a loop about 6 mm high. Aim for loop height roughly equal to strip width — that ratio gives a pile that stands upright instead of leaning.
Skip a hole between loops
Skip a hole between loops
Work into every second hole rather than every one. Loops packed into adjacent holes force the backing threads apart and the finished rug buckles like a bowl.
Check the back as you go
Check the back as you go
Turn the frame over occasionally. The back should show flat, tight strip with no loops and no crossings. Loops on the back mean you are pulling too much strip through.
Outline shapes first, then fill
Outline shapes first, then fill
Hook the outline of each shape, then fill inward following the shape's own contour rather than in straight rows. Contour filling is what makes a hooked shape read as a form rather than a patch.
Trim the tails level
Trim the tails level
Cut all the standing tails down to the height of the loops. Done properly, you cannot find where one strip ended and the next began.
Finish the edges and back
Finish the edges and back
Turn the spare backing under, whip the edge with wool yarn and stitch it down. A hooked rug fails at the edge first, every time.
Test it underfoot
Test it underfoot
Put it on the floor and walk on it for a week, then look for loops working loose. Any that pull out mark places where the spacing was too generous — and that is information for the next rug.
History & Context
History & Context
Where and when. Rug hooking as it is now practised developed along the eastern seaboard of North America in the nineteenth century — New England, the Canadian Maritimes, Newfoundland and Labrador, and French Quebec — with most authorities putting the earliest hooked rugs around 1840.
It ran on free materials. Jute burlap reached Europe from India around 1820 and arrived in North American households as grain and feed sacking. Washed, stretched and sometimes pieced together, those sacks became the backing; worn-out clothing became the strips; hooks were made from bent nails, forks and wire. Early rugs were also hooked on linen, which is closer woven. Hooked rugs were called the craft of the poor, and that is straightforwardly what they were — floor coverings made by people who could not buy the machine-woven carpets being imported from England.
Old burlap tells on itself. Nineteenth-century backing is coarse and uneven, and printed sack branding often shows through on the reverse. It is one of the ways a genuinely old hooked rug is distinguished from a later revival piece — the evidence of poverty is now the evidence of authenticity, which is a strange turn for an object to take.
Why loops and not knots. A knotted pile rug is far more durable and takes many times longer. Hooking is fast, needs one simple tool, requires no loom, and can be picked up and put down between other work. It trades longevity for accessibility — and enough of the rugs survived anyway that museums now collect them as folk art.
The revival changed what it is for. From the early twentieth century, rug hooking was taken up as a craft rather than a necessity, with commercial patterns, dyed wool sold by the yard, and cut strips of standardised width. The technique is unchanged. What changed is that the materials stopped being free — which is worth noticing, because it is the same arc that runs through nearly every craft that started as thrift.
مواد
2- 1 ٹکڑاپلیس ہولڈر
- 1 sqmپلیس ہولڈر
درکار اوزار
2- پلیس ہولڈر
- پلیس ہولڈر
CC0 پبلک ڈومین
یہ بلیو پرنٹ CC0 کے تحت جاری کیا گیا ہے۔ آپ اجازت لیے بغیر اس کام کو نقل، ترمیم، تقسیم اور کسی بھی مقصد کے لیے استعمال کرنے کے لیے آزاد ہیں۔
میکر کی حمایت کریں ان کے بلیو پرنٹ کے ذریعے پروڈکٹس خرید کر جہاں وہ میکر کمیشن وینڈرز کی طرف سے مقرر، کماتے ہیں، یا اس بلیو پرنٹ کی نئی تکرار بنائیں اور آمدنی شیئر کرنے کے لیے اسے اپنے بلیو پرنٹ میں کنکشن کے طور پر شامل کریں۔