فن
خوبصورتی اور تندرستی
دستکاری
ثقافت اور تاریخ
تفریح
ماحول
خوراک اور مشروبات
ریورس انجینئرنگ
سائنسز
کھیل
ٹیکنالوجی
پہننے والے آلات
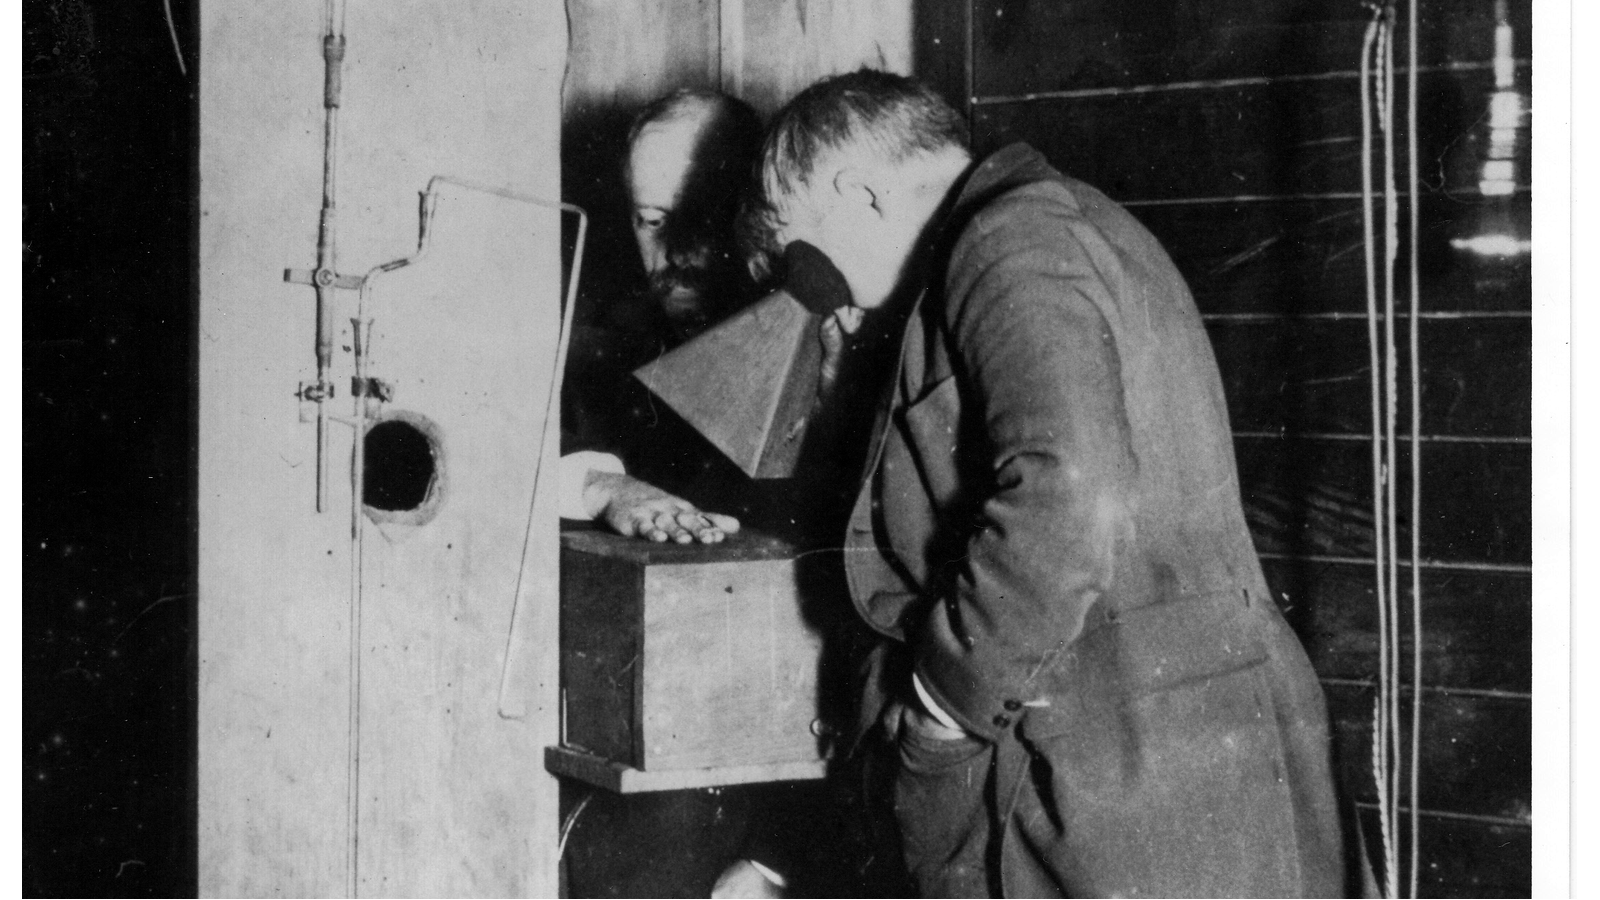


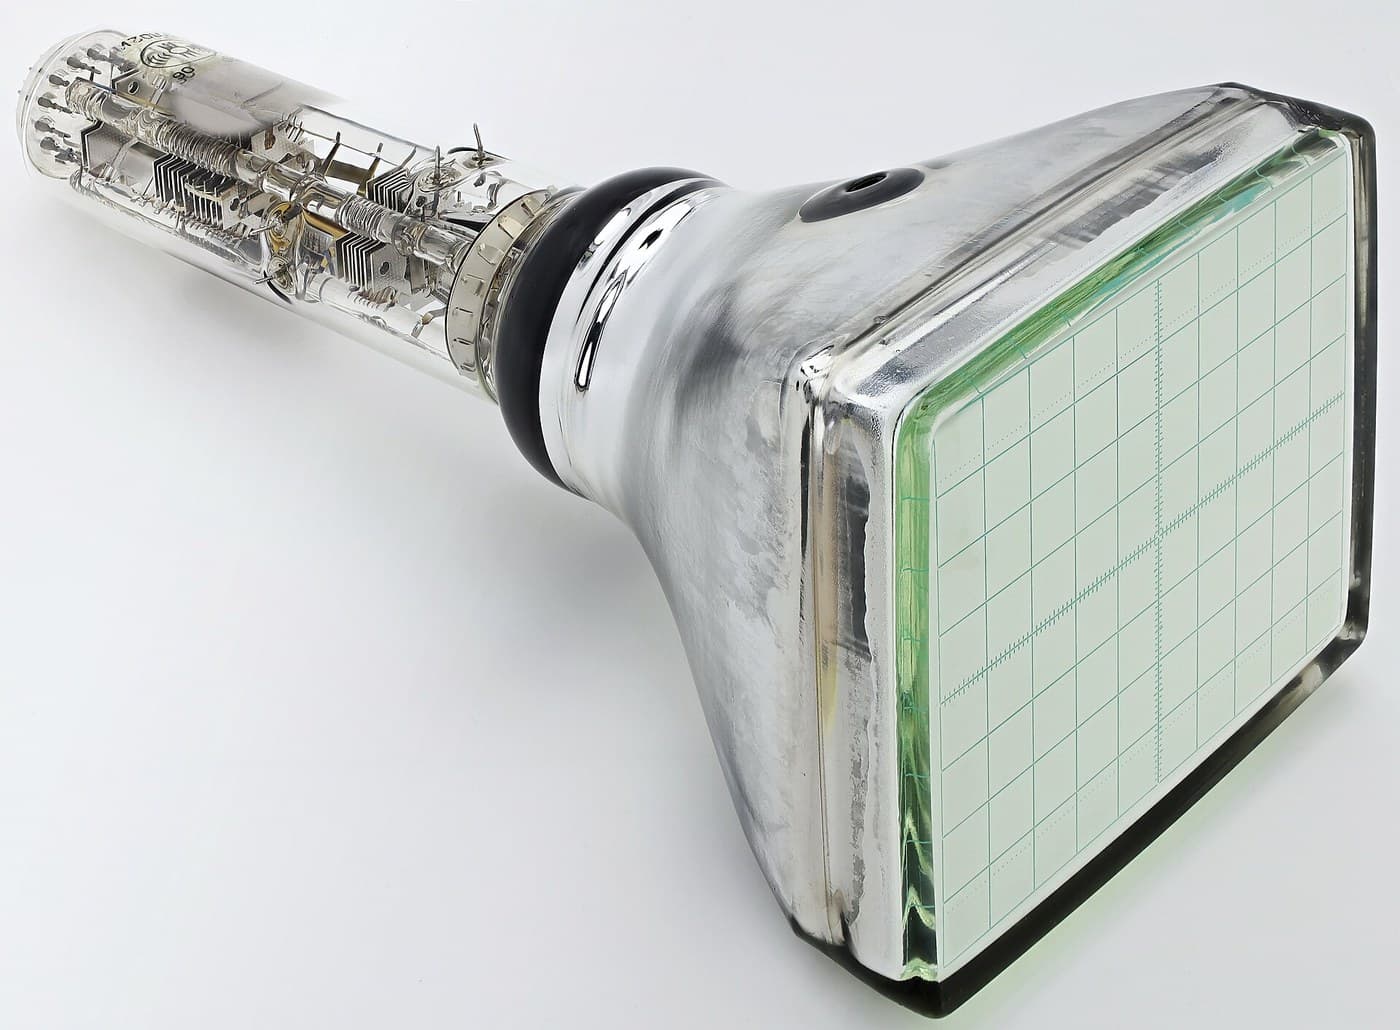
X-Ray Fluorescent Screen
Röntgen did not discover X-rays by seeing them. On 8. November 1895 he saw a screen of barium platinocyanide glowing on a bench, several feet from a covered tube, and worked backwards from the glow. The screen came first, and everything else in medical imaging is built on the same trick: **take radiation you cannot see, and make it emit light you can.**
Within months Thomas Edison had gone looking for something better than barium platinocyanide, and found that **calcium tungstate** screens were far brighter. By the turn of the century he had a fluoroscope good enough to sell. That screen stayed the standard for the better part of seventy years.
**The design problem you will measure here has never gone away.** A thicker phosphor layer catches more radiation and glows brighter - but the light is made deeper inside the layer, so it spreads further before it escapes, and the image blurs. Bright or sharp: every screen ever made is a chosen point on that trade, and it comes back in the image intensifier and in CT later in this chain.
**You will build this with ultraviolet, not X-rays.** No blueprint in this batch asks anyone to make ionising radiation - it is dangerous and in most places illegal without a licence. The substitution costs you nothing that matters: a phosphor screen is a device that takes invisible radiation in and gives visible light out, and the coating weight, the grain size, the binder and the brightness-against-sharpness curve behave the same way under a 365 nm lamp as under a tube. What changes is only what excites the grains.
**And the cost, which belongs in the first blueprint of this batch.** Clarence Dally, Edison's glassblower, made and tested these screens with his hands in the beam for years. He developed radiation injuries, then an aggressive cancer, and died of it. Edison damaged an eye and abandoned fluoroscopy in 1903. Nobody understood the dose; the screens were bright and the danger was invisible and slow. That is exactly why the modern versions of every instrument in this batch are operated by licensed people behind shielding.
نیا سیکھنے والا
45 minutes, plus overnight drying
ہدایات
1
1
Grind and grade the phosphor
Grind and grade the phosphor
Grain size sets the ceiling on sharpness before you have coated anything. A coarse grain scatters light sideways; a very fine one packs densely and glows less per gram because more of the light is reabsorbed by its neighbours. There is a middle, and finding it is the work.
Take about 10 g of zinc sulphide phosphor and grind a third of it in a mortar for two minutes, a third for five, and leave a third as it comes. Keep the three separate and labelled.
If you have a set of sieves, pass each through and note what fraction passes. If not, a usable substitute is to shake a pinch into a tall glass of water and time how long it takes to settle: coarser grains land first, and the three samples should visibly differ.
Zinc sulphide is the phosphor Mason and Coltman name in their intensifier patent later in this chain - "an X-ray responsive fluorescent screen of the zinc sulphide type" - so this is the material the period actually used, not a stand-in.
اس مرحلے کے لیے مواد:
 زنک سلفائیڈ فاسفر10 گرام
درکار اوزار:
 ہاون دستہ
 ڈیجیٹل باورچی خانہ ترازو
 شیشے کا بیکر
 اسٹاپ واچ
 نائٹرائل ربڑ کے دستانے
 گرد کا ماسک
2
2
Bind it to a substrate without killing it
Bind it to a substrate without killing it
The binder holds the grains down and is the commonest reason a first screen barely glows. Anything that absorbs ultraviolet, or that goes milky when it dries, is eating the excitation before it ever reaches a grain.
Use a clear PVA glue thinned about one part glue to two parts water. Mix in phosphor until it is a thin cream that just pours - roughly 1 part binder to 2 parts powder by volume, though this varies with the grade you ground.
Coat white card or clear acrylic in THIN passes with a foam brush or a card squeegee, letting each dry to touch before the next. Three thin coats beat one thick one every time: a thick wet layer cracks as it dries and settles unevenly, and both faults show up as mottling under the lamp.
White card reflects light forward and makes the screen brighter; clear acrylic lets you look through from behind, which is what a fluoroscope screen actually does. Make one of each if you have the material.
اس مرحلے کے لیے مواد:
زنک سلفائیڈ فاسفر20 گرام پی وی اے لکڑی کا گوند50 ملی لیٹر
 ایکریلک شیٹ1 ٹکڑا
 نالی دار گتے کی چادریں1 شیٹ
 کشید کیا ہوا پانی100 ملی لیٹر
درکار اوزار:
شیشے کا بیکر بوروسِلیکیٹ شیشے کی سلاخ
 جھاگ کا برش
 ڈیجیٹل ورنیئر کیلیپر ۶ انچنائٹرائل ربڑ کے دستانے
3
3
Build a coating-weight series, because one screen tells you nothing
Build a coating-weight series, because one screen tells you nothing
A single screen gives you one number and no curve. Make five.
Cut five identical 60 x 60 mm pieces of substrate and weigh each one dry, to the milligram if your scale allows. Coat them with 1, 2, 4, 8 and 16 passes of the same mix, drying between. Weigh each again when fully dry.
The difference divided by the area is your **coating weight in mg per square centimetre**, and it is the number the industry actually specified screens by. Write it on the back of each one in pencil.
Keep everything else identical - same mix, same brush, same drying place. You are trying to vary exactly one thing, and a screen coated on a colder day with a thicker mix is a different experiment wearing the same label.
اس مرحلے کے لیے مواد:
ایکریلک شیٹ1 ٹکڑانالی دار گتے کی چادریں1 شیٹدرکار اوزار:
ڈیجیٹل باورچی خانہ ترازو دستکاری کا چاقوڈیجیٹل ورنیئر کیلیپر ۶ انچ
4
4
Measure brightness and sharpness on the same screens
Measure brightness and sharpness on the same screens
**Brightness.** In a dark room, hold a 365 nm UV lamp at a fixed distance - clamp it, do not hold it - and read each screen with a lux meter or a phone light-meter app at a fixed distance and angle. Same geometry every time; the numbers are only comparable to each other.
Use 365 nm and not 395 nm. Most cheap "UV" torches are 395 nm, which is mostly violet visible light: it will make the screen look purple and excite it feebly, and it will swamp your meter with its own light.
**Sharpness.** Print a resolution target - groups of black bars at decreasing spacing - onto transparency film, or simply cut a comb of card with 1 mm slots. Lay it directly on the screen, illuminate from above, and photograph the screen from behind. Note the finest group whose bars you can still count.
Do both for all five screens. You now have brightness against coating weight, and sharpness against coating weight, measured on the same objects - which is the entire trade-off in two columns.
درکار اوزار:
 بالائے بنفشی ٹارچ
 روشنی ناپنے والا آلہ (وارد/منعکس)
 پیمانہ
 تپائی (کاربن فائبر، گیند نما سر)
 انک جیٹ ٹرانسپیرنسی فلم
5
5
Bright or sharp: the curve you just measured
Bright or sharp: the curve you just measured
Jupyter نوٹ بک لوڈ ہو رہی ہے…
6
6
When the screen barely glows
When the screen barely glows
Four checks, and the first two catch nearly everything. Work down in order - each is answerable in under a minute.
Flow
Loading...
درکار اوزار:
بالائے بنفشی ٹارچ7
7
Compendium: what a screen is for, and what it cost
Compendium: what a screen is for, and what it cost
**Two different jobs, often confused.** A FLUOROSCOPIC screen is looked at directly, live, by a human eye - so it must be bright above all. An INTENSIFYING screen is pressed against photographic film in a cassette, and its job is to let the film be exposed with far less radiation than the film alone would need. Same physics, opposite priorities: the fluoroscopic screen may be grainy, the intensifying screen may be dim if it is sharp.
**Why the intensifying screen mattered more.** Film is a poor absorber of X-rays - most of the beam goes straight through the emulsion without being recorded. A screen absorbs far more of it and converts each absorbed photon into a great many light photons, which the film records well. Sandwiching film between two screens cut patient dose by more than an order of magnitude. It is the single largest dose reduction in the history of radiography, and it is a materials problem, not a machine one.
**Why caesium iodide is the interesting one.** It grows as a dense forest of parallel needles, and each needle pipes its own light straight down to the detector like an optical fibre. The layer can be thick - catching most of the beam - without the light spreading sideways. It is the only approach that genuinely escapes the trade-off in the notebook rather than picking a point on it, and it is why it is inside modern detectors.
**The price, again.** Clarence Dally spent years testing screens with his hands in the beam. He lost fingers, then a hand, then an arm, and died in 1904. There is a reason this blueprint uses a UV torch, and the reason is not squeamishness about regulation: the men who did it the direct way in 1896 did not survive it, and they had no way of knowing until it was far too late.
مواد
5- 20 گرامپلیس ہولڈر
- 50 ملی لیٹرپلیس ہولڈر
- 1 ٹکڑاپلیس ہولڈر
- پلیس ہولڈر
- 100 ملی لیٹرپلیس ہولڈر
درکار اوزار
15- پلیس ہولڈر
- پلیس ہولڈر
- پلیس ہولڈر
- پلیس ہولڈر
- پلیس ہولڈر
- پلیس ہولڈر
- پلیس ہولڈر
- پلیس ہولڈر
- پلیس ہولڈر
- پلیس ہولڈر
- پلیس ہولڈر
- پلیس ہولڈر
- پلیس ہولڈر
- پلیس ہولڈر
- پلیس ہولڈر
متعلقہ بلیو پرنٹ
یہ بلیو پرنٹ علم بانٹتے ہیں — تکنیک، مواد یا اصول


CC0 پبلک ڈومین
یہ بلیو پرنٹ CC0 کے تحت جاری کیا گیا ہے۔ آپ اجازت لیے بغیر اس کام کو نقل، ترمیم، تقسیم اور کسی بھی مقصد کے لیے استعمال کرنے کے لیے آزاد ہیں۔
میکر کی حمایت کریں ان کے بلیو پرنٹ کے ذریعے پروڈکٹس خرید کر جہاں وہ میکر کمیشن وینڈرز کی طرف سے مقرر، کماتے ہیں، یا اس بلیو پرنٹ کی نئی تکرار بنائیں اور آمدنی شیئر کرنے کے لیے اسے اپنے بلیو پرنٹ میں کنکشن کے طور پر شامل کریں۔