تعاون
فن
خوبصورتی اور تندرستی
دستکاری
ثقافت اور تاریخ
تفریح
ماحول
خوراک اور مشروبات
ریورس انجینئرنگ
سائنسز
کھیل
ٹیکنالوجی
پہننے والے آلات
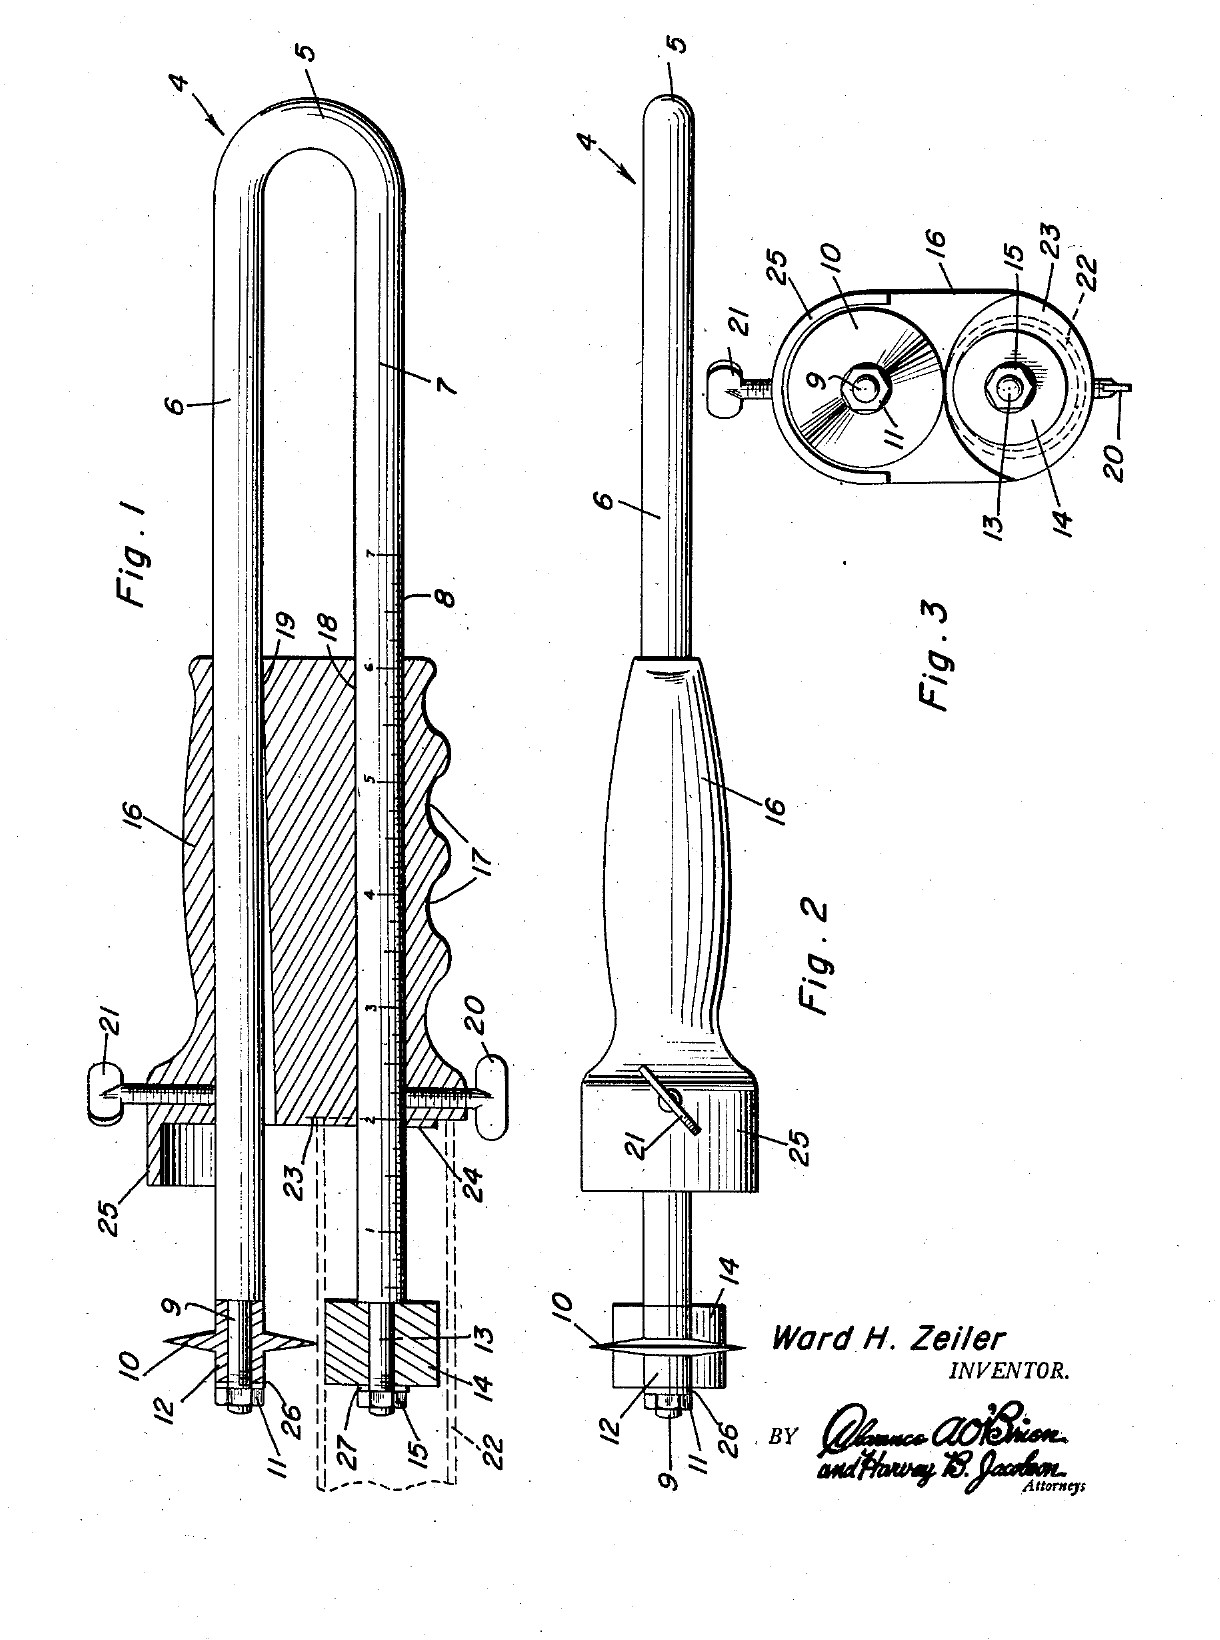

Sprung-Leg Tubing Cutter: a Bent Rod With a Disk Outside and a Roller Inside, the Handle's Screw Bends One Leg In (Zeiler, 1958)
Ward H. Zeiler of Holyoke, Colorado, received US 2,821,781, dated 4 February 1958, for a plumber's tubing cutter that cuts a tube square, to length, near its end. The frame is one springy rod bent into a U. The lower leg goes into the tube and carries a roller. The upper leg carries a cutting disk outside the tube. A handle slides along both legs. Its front end stops against the tube end, so the cut length is read off a scale on the lower leg. A screw in the handle bends the upper leg in and presses the disk onto the tube, and turning the tool cuts it off.
All sizes are ours.
درمیانہ
About 2 days
ہدایات
1
1
Why the frame must spring
Why the frame must spring
Jupyter نوٹ بک لوڈ ہو رہی ہے…
2
2
Read US 2,821,781
Read US 2,821,781
"The leg 7 is then inserted in the tube 22 and the roller 14 and the projection 24 are engaged in the upper portion of said tube. The screw 21 is then tightened for bending the leg 6 of the frame 4, thus engaging the knife 10 with the periphery of the tube 22."
3
3
Print the template
Print the template
The bent frame, its ends, the disk, roller and handle at 1:1, with the oval bore, the screws and the scale. print at 100 % (check the 50 mm bar).
4
4
Bend the frame
Bend the frame
Cut 470 mm of 6 mm spring steel wire. Heat the middle 40 mm red with the torch and bend it round a 10 mm bar into a U with the legs 16 mm apart, and straighten the legs parallel. Heat the last 25 mm of each leg red and let it cool slowly in the dying forge, so the ends are soft enough to file and thread. Leave the rest of the legs as they are: they must spring.
اس مرحلے کے لیے مواد:
 کمانی فولاد کا تار1 ٹکڑا
درکار اوزار:
 بریزنگ کا شعلہ
 لوہار کی بھٹی
 لوہار کی چمٹی
 میز کا شکنجہ
 گول سر والا ہتھوڑا
 لوہا کاٹنے کی آری
 ویلڈنگ کے دستانے
 حفاظتی عینک
5
5
Thread the leg ends
Thread the leg ends
Turn or file the last 24 mm of each leg to 5 mm, leaving a square shoulder, and cut an M5 thread on the last 8 mm with the die.
درکار اوزار:
 دھات کی خراد
 تین جبڑوں والا خراد چک
 خراد کا کاٹنے کا اوزار
 ریتیوں کا سیٹ
 چُوڑی کاٹنے کا سیٹ
 ڈیجیٹل ورنیئر کیلیپر ۶ انچ
 کٹائی کا تیل
6
6
Turn the disk and the roller
Turn the disk and the roller
Disk: chuck a tool steel bar, turn 12 mm of it to 18 mm, drill it 5 mm, and turn the front 6 mm to a 50 degree edge, sharp in its middle. Turn the next 4 mm down to a 10 mm hub and part it off. Roller: turn 10 mm mild steel bar 16 mm long and drill it 5.2 mm, so it spins freely on the leg.
اس مرحلے کے لیے مواد:
 اوزاری فولاد کی سلاخ1 ٹکڑا
 نرم فولاد کی گول سلاخ1 ٹکڑا
درکار اوزار:
دھات کی خرادتین جبڑوں والا خراد چکخراد کا کاٹنے کا اوزار کاٹنے کی چھینی (خراد)
 سینٹر ڈرل سیٹ
 مشقوں کا سیٹڈیجیٹل ورنیئر کیلیپر ۶ انچحفاظتی عینک
7
7
Harden and temper
Harden and temper
Heat the disk to a cherry red, until a magnet no longer sticks, and quench it in water, moving it about. Rub it bright with a stone, warm it on a piece of steel plate over the fire, and quench again as soon as it turns a light straw colour.
درکار اوزار:
لوہار کی بھٹیلوہار کی چمٹی چھوٹا مقناطیس
 آب دینے کی بالٹی
 پانی
 سان کا پتھرویلڈنگ کے دستانےحفاظتی عینک
8
8
Make the handle
Make the handle
Saw 90 mm of 32 mm aluminium bar and face the ends. Drill two 6.2 mm holes through it lengthways, 16 mm apart, each 8 mm off the centre. With a round file, open the front 70 mm of the upper hole towards the lower one, 1.8 mm at the front face, tapering to nothing. Drill and tap M6 into the upper hole from the top, 12 mm from the front, and into the lower hole from below, 14 mm from the front. Saw and file away the lower half of the front 8 mm, leaving a 10 mm round boss round the lower hole. File three finger grooves underneath.
اس مرحلے کے لیے مواد:
 ایلومینیم کی گول سلاخ1 ٹکڑا
درکار اوزار:
لوہا کاٹنے کی آریدھات کی خرادتین جبڑوں والا خراد چک ستون والی مشق مشین
 مشین کا شکنجہمشقوں کا سیٹچُوڑی کاٹنے کا سیٹریتیوں کا سیٹ
 باریک ریتیوں کا سیٹڈیجیٹل ورنیئر کیلیپر ۶ انچ
9
9
Make the guard
Make the guard
Cut a strip of brass sheet 12 mm wide and 50 mm long, bend it into a half round hood that reaches 12 mm past the handle's front over the disk, and fix its back end on top of the handle with two small screws.
اس مرحلے کے لیے مواد:
 پیتل کی چادر1 ٹکڑا
 چھ گوشہ سوراخ والا بیلن سر پیچ2 ٹکڑے
درکار اوزار:
لوہا کاٹنے کی آریریتیوں کا سیٹستون والی مشق مشینمشقوں کا سیٹچُوڑی کاٹنے کا سیٹمیز کا شکنجہ10
10
Assemble
Assemble
Slide the handle onto the legs from the open end, the upper leg in the oval bore. Put the disk on the upper leg's end, hub outwards, then a washer and an M5 nut, snug enough that the disk still turns. Fit the roller the same way on the lower leg. Screw in the M6 feed screw on top and the setscrew below.
اس مرحلے کے لیے مواد:
 چپٹا چھلا2 ٹکڑے
 چھ گوشہ ڈھبری2 ٹکڑےچھ گوشہ سوراخ والا بیلن سر پیچ1 ٹکڑا
 پیالہ نما سرے والا سیٹ اسکرو1 ٹکڑا
درکار اوزار:
 انگریزی پانا
 ایلن کنجی سیٹ
11
11
Mark the scale
Mark the scale
Slide the handle so its recess face is 20 mm from the disk's edge and lock it. File a nick across the lower leg at the handle's back face and mark it 20. File a nick every 10 mm towards the bend, deeper every 50 mm. The handle's back face now reads the cut length.
درکار اوزار:
باریک ریتیوں کا سیٹڈیجیٹل ورنیئر کیلیپر ۶ انچ12
12
Cut a tube to length
Cut a tube to length
Set the handle to the length you want and lock the setscrew. Push the lower leg into the tube until the end bears in the recess, with the roller and boss against the inside. Tighten the feed screw until the disk touches. Turn the tool round the tube, giving the screw a little more each turn, until the end drops off. Clean the cut with a deburring tool.
اس مرحلے کے لیے مواد:
 تانبے کی نلکی1 ٹکڑا
درکار اوزار:
میز کا شکنجہ گڑ اتارنے کا اوزارایلن کنجی سیٹڈیجیٹل ورنیئر کیلیپر ۶ انچ
13
13
Troubleshooting
Troubleshooting
Sprung-leg tubing cutter troubleshooting.
Flow
Loading...
14
14
History and honest limits
History and honest limits
**Ward H. Zeiler** of Holyoke, Colorado, US 2,821,781, dated 4 February 1958, filed 23 November 1956. He claimed "a substantially U-shaped resilient frame including legs extending slidably through the bores" and "a feed screw ... for bending said one leg within the confines of the handle for engaging the cutting disk with the tube". His frame was "suitable resilient metal"; ours is spring steel wire. His handle was a metal sleeve with a guard formed on it; ours is aluminium bar with a brass guard. The patent gives no sizes; all of ours are ours.
مواد
10- 1 ٹکڑاپلیس ہولڈر
- 1 ٹکڑاپلیس ہولڈر
- 1 ٹکڑاپلیس ہولڈر
- 1 ٹکڑاپلیس ہولڈر
- 1 ٹکڑاپلیس ہولڈر
- پلیس ہولڈر
- 2 ٹکڑےپلیس ہولڈر
- 2 ٹکڑےپلیس ہولڈر
- پلیس ہولڈر
- 1 ٹکڑاپلیس ہولڈر
درکار اوزار
28- پلیس ہولڈر
- پلیس ہولڈر
- پلیس ہولڈر
- پلیس ہولڈر
- پلیس ہولڈر
- پلیس ہولڈر
- پلیس ہولڈر
- پلیس ہولڈر
- پلیس ہولڈر
- پلیس ہولڈر
- پلیس ہولڈر
- پلیس ہولڈر
- پلیس ہولڈر
- پلیس ہولڈر
- پلیس ہولڈر
- پلیس ہولڈر
- پلیس ہولڈر
- پلیس ہولڈر
- پلیس ہولڈر
- پلیس ہولڈر
- پلیس ہولڈر
- پلیس ہولڈر
- پلیس ہولڈر
- پلیس ہولڈر
- پلیس ہولڈر
- پلیس ہولڈر
- پلیس ہولڈر
- پلیس ہولڈر
ڈیزائن فائلیں
1یہ بلوپرنٹ بناتا ہے
متعلقہ بلیو پرنٹ
یہ بلیو پرنٹ علم بانٹتے ہیں — تکنیک، مواد یا اصول
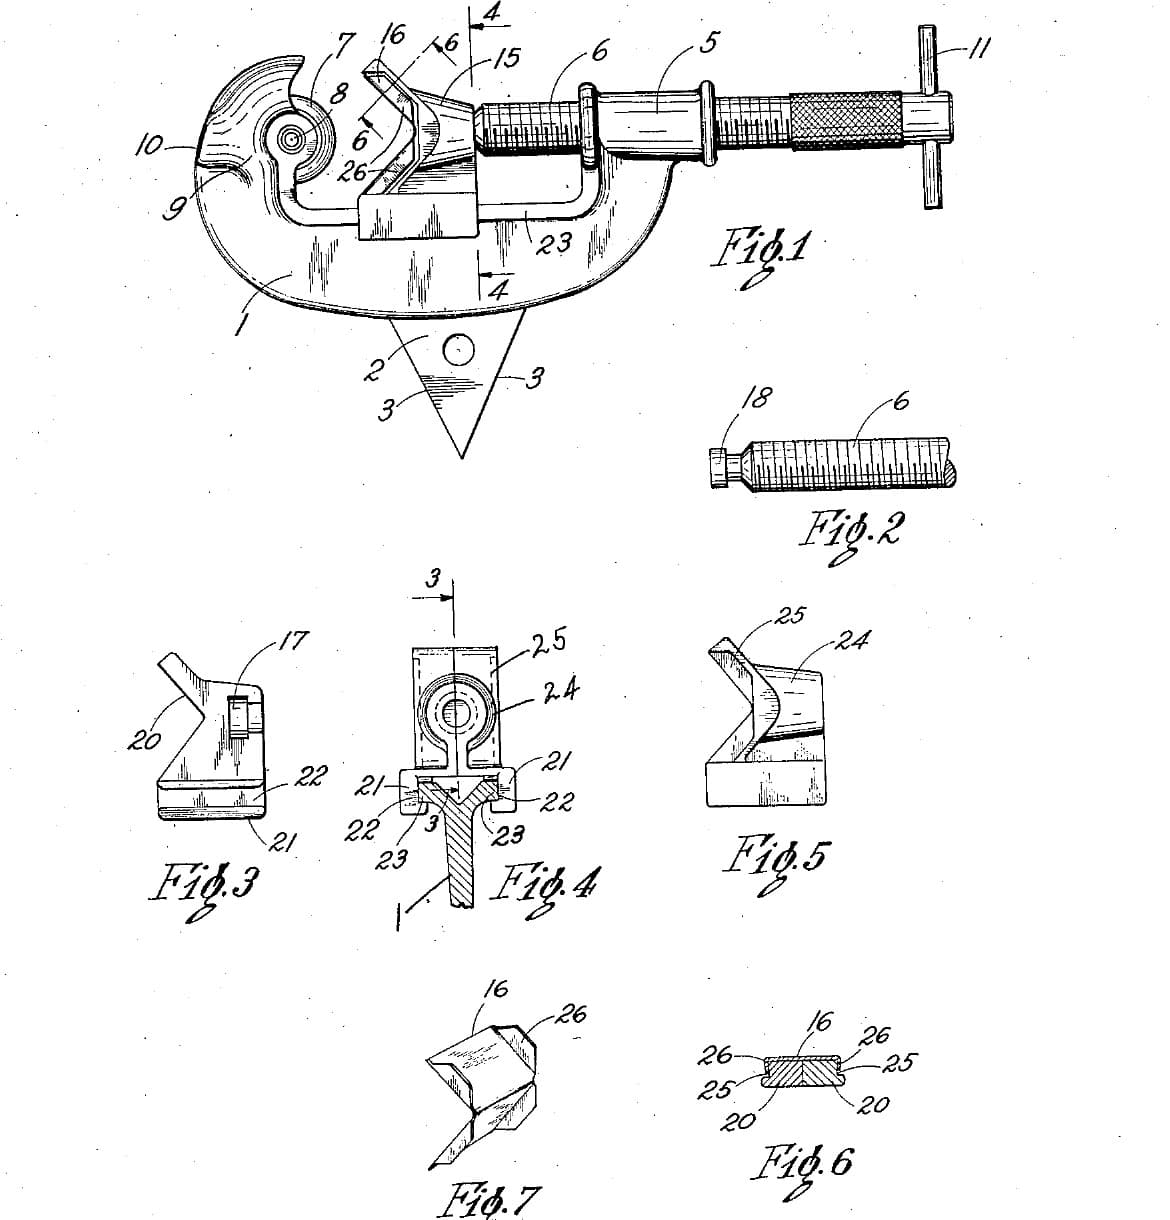
V-Slide Tubing Cutter: Two Slide Halves Held on the Ways by One Spring Clip, a Reamer on the Frame (Thewes, 1938)
Forge کی طرف سے
دھات کاری
0
0
0
0
0
0
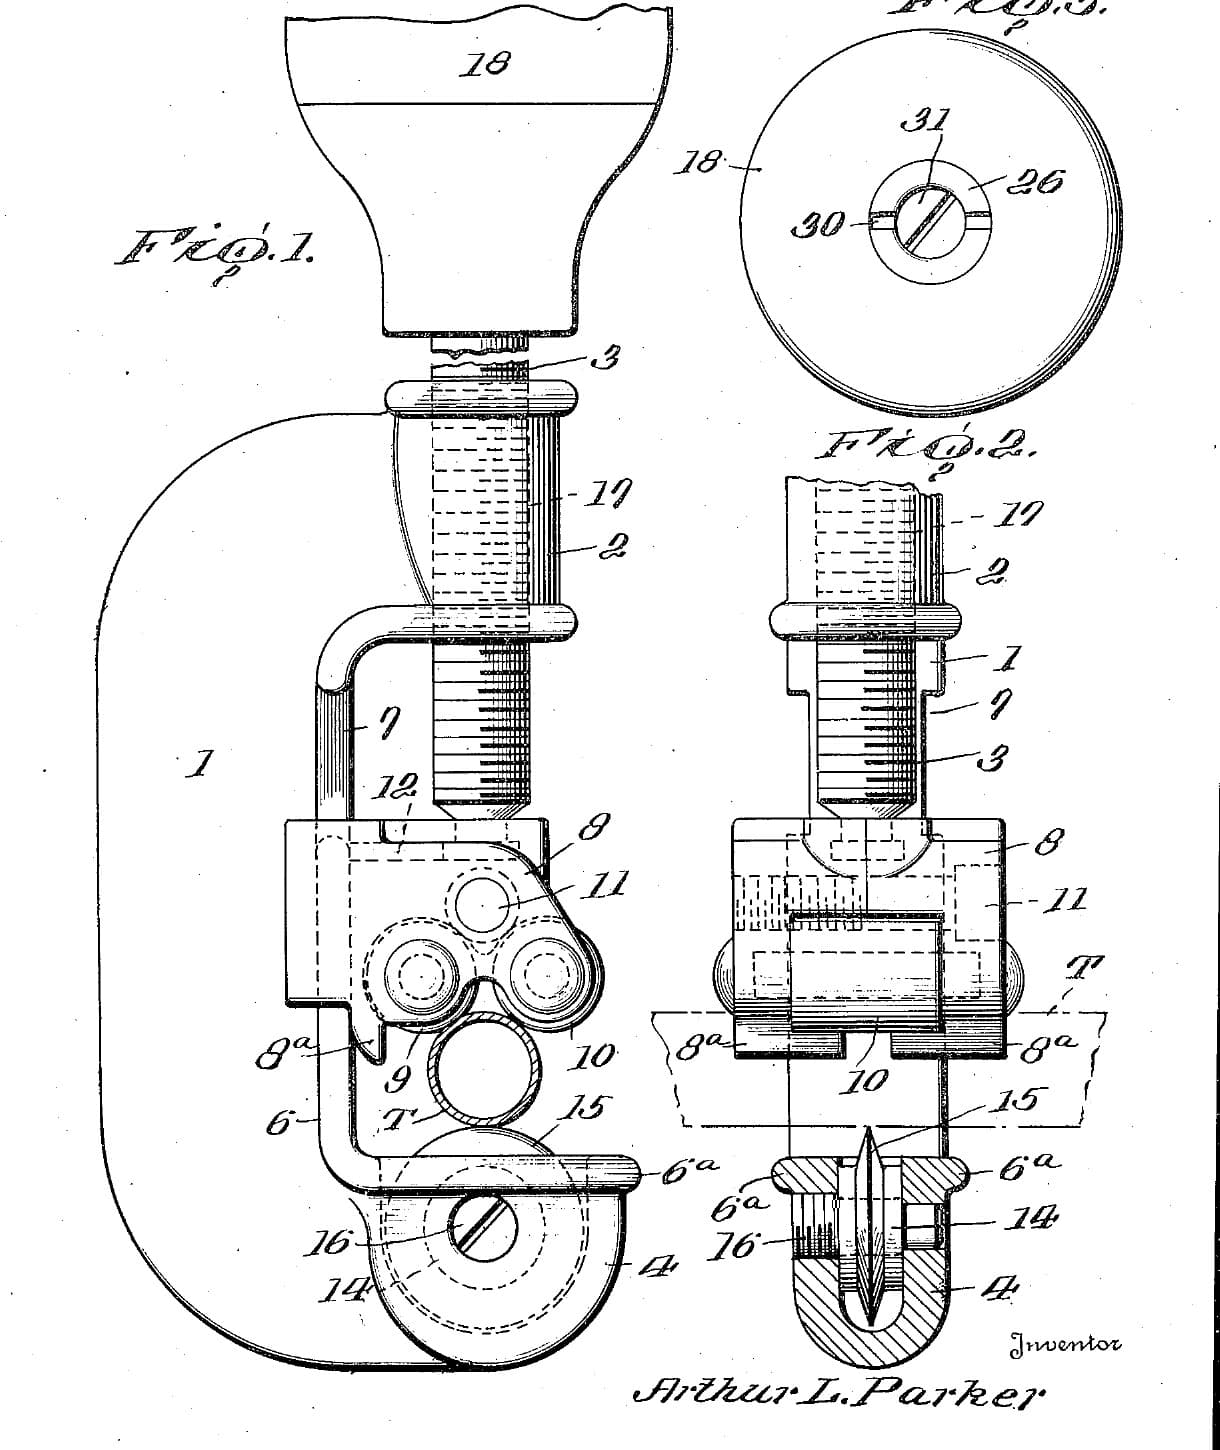
Slip-Knob Tube Cutter: the Feed Knob Turns the Screw Through Spring-Loaded Plates and Slips Before the Tube Is Crushed (Parker, 1944)
Forge کی طرف سے
دھات کاری
0
0
0
0
0
0

Taps and Dies Cut on the Lathe, with Wrench and Stock
Martin کی طرف سے
دھات کاری
25
0
0
0
6
0
CC0 پبلک ڈومین
یہ بلیو پرنٹ CC0 کے تحت جاری کیا گیا ہے۔ آپ اجازت لیے بغیر اس کام کو نقل، ترمیم، تقسیم اور کسی بھی مقصد کے لیے استعمال کرنے کے لیے آزاد ہیں۔
میکر کی حمایت کریں ان کے بلیو پرنٹ کے ذریعے پروڈکٹس خرید کر جہاں وہ میکر کمیشن وینڈرز کی طرف سے مقرر، کماتے ہیں، یا اس بلیو پرنٹ کی نئی تکرار بنائیں اور آمدنی شیئر کرنے کے لیے اسے اپنے بلیو پرنٹ میں کنکشن کے طور پر شامل کریں۔