SZTUKA
Piękno i dobre samopoczucie
RZEMIOSŁO
KULTURA I HISTORIA
ROZRYWKA
ŚRODOWISKO
JEDZENIE I NAPOJE
INŻYNIERIA ODWROTNA
NAUKI
LEKKOATLETYKA
TECHNOLOGIA
URZĄDZENIA DO NOSZENIA
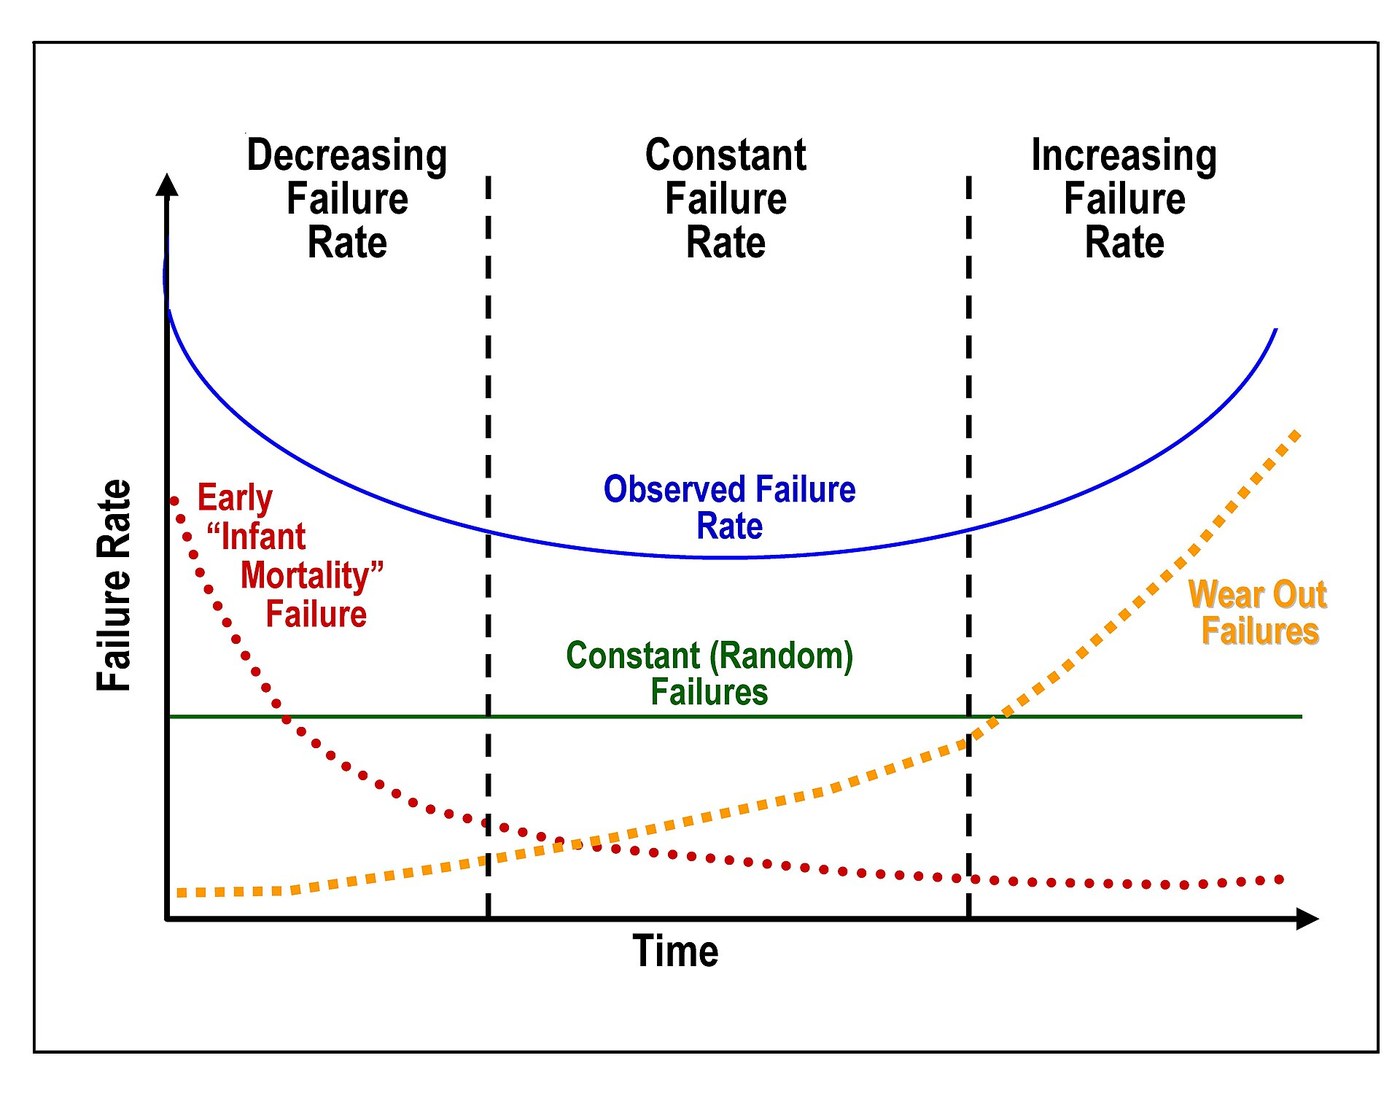


Burn-in and the Bathtub Curve
Every packaging step in this batch introduced a way to fail. A wire bond can be under-welded. A die attach can have a void. A solder joint can be starved of paste. Every one of those defects produces a part that WORKS when tested and fails weeks later, and none of them is visible.
That is the shape of the problem, and it produces the shape everyone knows: the bathtub curve.
Early on the failure rate is high and FALLING, because a small population of parts carries latent defects and those parts die quickly. That is infant mortality. Then the rate settles to a low, roughly constant level of random failures. Then eventually it rises again as genuine wear-out mechanisms — electromigration, intermetallic growth, solder fatigue, oxide damage — accumulate.
The crucial fact is that the first arm is a POPULATION effect, not a property of any individual part. A good part is not slightly weak at first and then fine; it is fine throughout. What changes is that the weak minority is progressively removed from the population by dying.
So burn-in is not a treatment that improves parts. It is a filter that finds the weak ones on the factory floor rather than in the customer's product, by running everything hot and powered for a few hours and discarding whatever dies.
And it has a real cost, which the enthusiastic version leaves out. The same stress that kills the weak parts also consumes some of the good parts' life. Burn in too long and you have shipped parts already partway up the wear-out arm, and you have paid for the electricity and the oven and the handling to do it. Deciding how long to burn in is an optimisation with a genuine minimum, not a case of more being better.
You will build a burn-in chamber, stress a batch of parts, watch the failures cluster early, and fit the distribution that describes them.
Średniozaawansowany
5 hours plus an overnight run
Instrukcje
1
1
The three arms, and what causes each
The three arms, and what causes each
The bathtub is three separate mechanisms drawn on one axis, and treating it as one curve is where people go wrong. Each arm has different causes, responds to different action, and appears at a different time.
The diagram separates them, and traces each arm back to the specific assembly steps earlier in this batch that produce it.
What is worth noticing is that almost every infant-mortality cause in the left-hand column is a defect in a process from blueprints six to nine — an under-welded bond, a voided die attach, a starved solder joint, a missed dam-bar cut. Burn-in is the last net beneath all of those, and its existence is an admission that no amount of process control catches everything.
And notice what burn-in does NOT help with. It cannot touch the random middle arm, which is by definition not caused by anything a stress would reveal. It actively HURTS the right-hand arm, because every hour of stress is an hour of wear-out consumed. Burn-in is a tool for exactly one of the three regions, and applying it to the others is worse than useless.
Flow
Loading...
2
2
Build a chamber and stress a batch
Build a chamber and stress a batch
A burn-in chamber is a heated enclosure, a power supply for the parts under test, and something recording what happens. The recording is the part that matters — a chamber without logging tells you only how many survived, and the interesting information is in WHEN each one died.
THE CHAMBER. An insulated box with a resistive heater — a few power resistors or a small PTC element — driven by a MOSFET, with a DS18B20 inside. 85 degrees is a standard burn-in temperature and is safely below anything that melts. Add a fan for uniformity: a chamber with a 20-degree gradient across it is stressing its parts by different amounts and the results mean nothing.
THE PARTS. Choose something that degrades measurably rather than merely failing: LEDs lose output progressively, electrolytic capacitors lose capacitance and gain ESR, and resistors run near their rating drift. LEDs are the easiest — put a photodiode or an LDR opposite each one and the ADC reads its output directly.
Use at least twenty parts. Reliability is a population statistic and six parts cannot show you a distribution.
THE SKETCH does four things: holds temperature with hysteresis, baselines every device against ITSELF before the stress begins, samples each one every minute, and records the time at which each falls below 80 percent of its own baseline.
BASELINING PER DEVICE IS THE IMPORTANT DETAIL. Parts vary between units by more than they degrade over a burn-in run, so an absolute threshold would condemn good-but-dim parts and pass weak-but-bright ones. Every device is measured against its own starting point.
THE ABORT PATH IS NOT OPTIONAL. This runs unattended overnight with a heater in a closed box. The sketch cuts the heater and the device power if the chamber exceeds the target by 25 degrees, and latches off rather than retrying. Test that path before you leave it running: unplug the temperature sensor and confirm it aborts.
RUN IT OVERNIGHT and collect the CSV. What you should see is failures clustering EARLY — several in the first hours, then a long quiet stretch. That clustering is infant mortality, in your own data, and it is the entire justification for the practice.
burnin.inocpp
Materiały do tego kroku:
 Płytka rozwojowa ESP321 sztuka
 Czujnik temperatury DS18B202 sztuk
 Zestaw diod LED1 zestaw
 Fotorezystor LDR1 zestaw
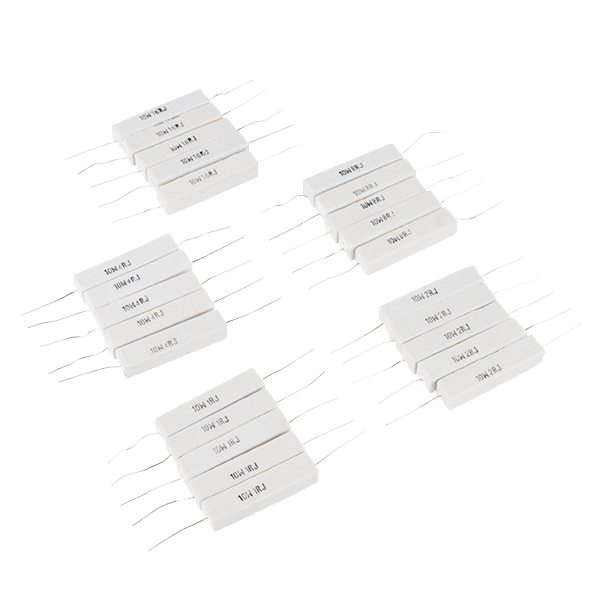 Power Resistor Kit - 10W (25 pack)1 zestaw
 Tranzystor MOSFET z kanałem N IRF540N2 sztuk
 Obudowa aluminiowa1 sztuka
Potrzebne narzędzia:
 Zasilacz laboratoryjny
 Multimetr cyfrowy klasy laboratoryjnej
 Stacja lutownicza
 Termometr na podczerwień
 Komputer stacjonarny
3
3
Fit the Weibull, and find the optimum burn-in time
Fit the Weibull, and find the optimum burn-in time
Wczytywanie notatnika Jupyter…
Potrzebne narzędzia:
Komputer stacjonarnyMateriały
7- 1 sztukaZastępnik
- 2 sztukZastępnik
- 1 zestawZastępnik
- 1 zestawZastępnik
- Power Resistor Kit - 10W (25 pack)10% prowizji1 zestaw$5.69
- Zastępnik
- 1 sztukaZastępnik
Wymagane narzędzia
5- Zastępnik
- Zastępnik
- Zastępnik
- Zastępnik
Szacowany koszt
To, co kupił twórca. Materiały bez ceny kupujesz tam, gdzie je znajdziesz.
Powiązane blueprinty
Te blueprinty dzielą się wiedzą — technikami, materiałami lub zasadami


CC0 Domena publiczna
Ten plan jest udostępniany na licencji CC0. Możesz go swobodnie kopiować, modyfikować, rozpowszechniać i wykorzystywać do dowolnych celów, bez konieczności uzyskiwania zgody.
Wesprzyj Makera kupując produkty przez jego plan, za co zarabia Prowizja Makera ustalony przez sprzedawców, lub stwórz nową iterację tego planu i dołącz go jako połączenie w swoim własnym planie, aby dzielić się przychodami.