SZTUKA
Piękno i dobre samopoczucie
RZEMIOSŁO
KULTURA I HISTORIA
ROZRYWKA
ŚRODOWISKO
JEDZENIE I NAPOJE
INŻYNIERIA ODWROTNA
NAUKI
LEKKOATLETYKA
TECHNOLOGIA
URZĄDZENIA DO NOSZENIA
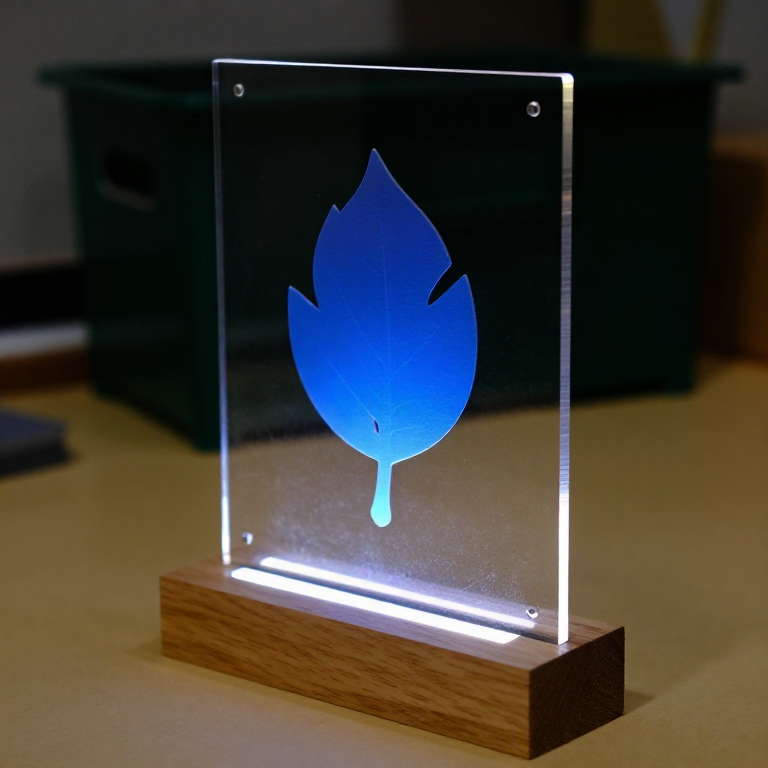


Cast Acrylic Sheet
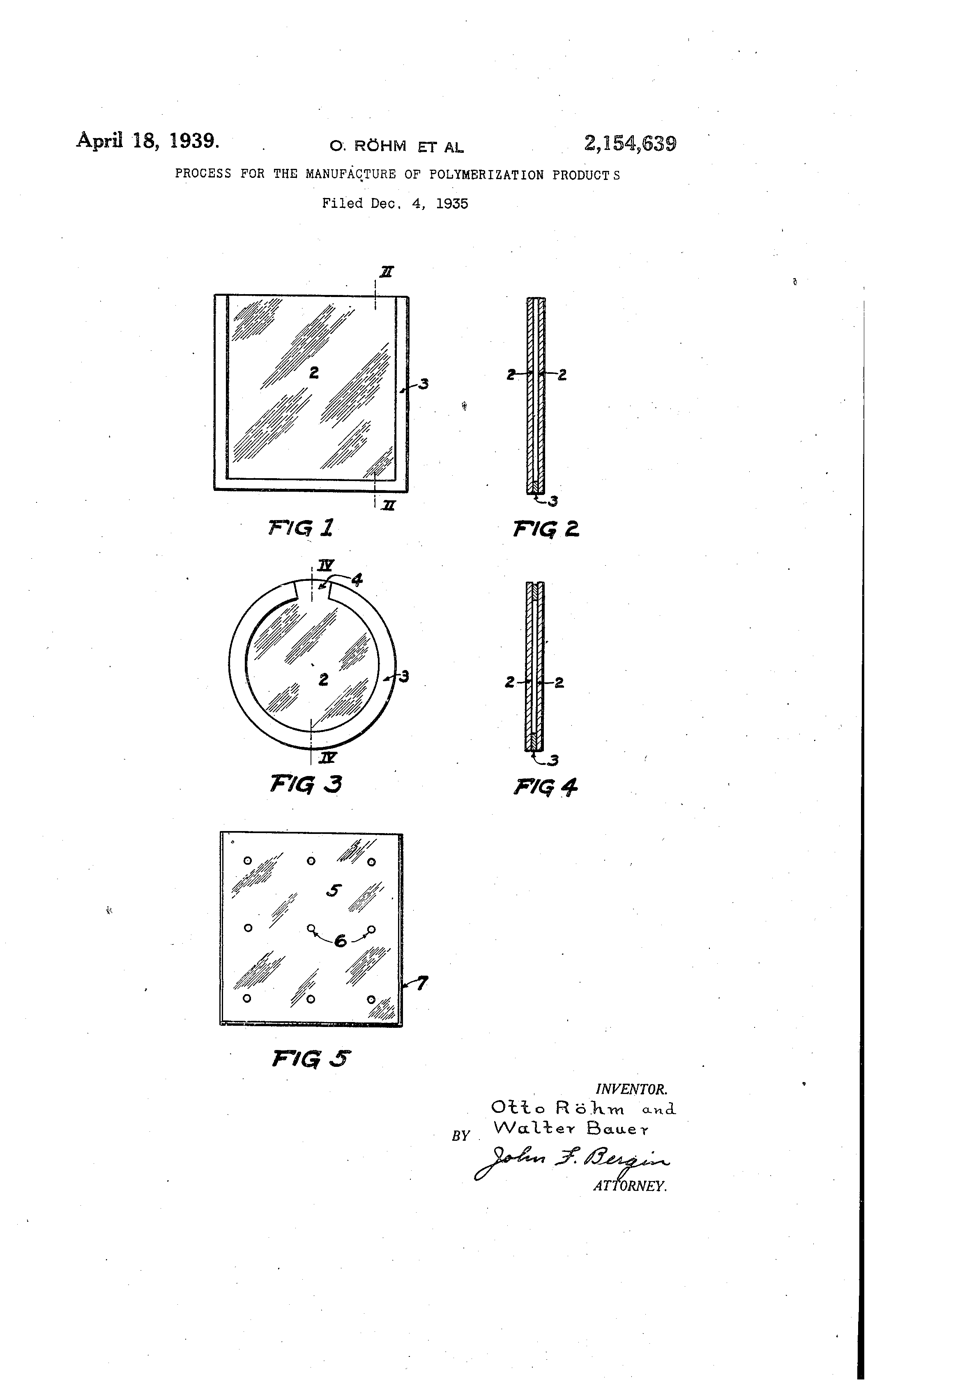
Otto Röhm had worked on acrylic chemistry since his 1901 doctorate. His firm first used polymethacrylate as the sticky middle layer of laminated safety glass - and noticed that the polymer came away from the glass plates cleanly, leaving a clear sheet as smooth as the glass. Sold from 1933 as Plexiglas, the sheet went into aircraft canopies within the decade.
**US 2,154,639**, "Process for the manufacture of polymerization products", Röhm and Bauer, assigned to Röhm & Haas, filed 4. December 1935, granted 18. April 1939: methacrylic esters polymerised between sheets of glass and then separated from them, for "glass substitutes" whose faces are "as highly polished as the surfaces of the glass itself".
**You use that polish**: an edge-lit sign whose engraving glows while the smooth faces stay dark, and two heat-bent offcuts that show how tight a bend the light survives.
Początkujący
3 hours
Instrukcje
1
1
Cut the panel
Cut the panel
Keep the protective film on. Score 3 mm cast acrylic 200 x 120 mm with the utility knife against a ruler, 8 to 10 passes, then snap it over the bench edge. Cut two 100 x 30 mm offcuts the same way.
Materiały do tego kroku:
 Płyta akrylowa1 sztuka
Potrzebne narzędzia:
 Nóż introligatorski
 Linijka stalowa
 Okulary ochronne bezbarwne
2
2
Polish the light edge
Polish the light edge
Sand the 120 mm bottom edge flat, then run the Micro-Mesh grits in order until it is clear. Light enters here; a frosted edge scatters it at the door.
Potrzebne narzędzia:
 Zestaw do szlifowania mikrosiatką (9 gradacji)
3
3
Engrave the back
Engrave the back
Peel the back film. Draw your design on paper, tape it under the sheet, and trace it with the engraving point at medium speed, light pressure.
Potrzebne narzędzia:
 Narzędzie obrotowe (typu Dremel)
 RylecOkulary ochronne bezbarwne
4
4
Slot the base
Slot the base
Cut a pine block 160 x 60 x 40 mm. Saw two parallel kerfs 3.5 mm apart, 15 mm deep, along its length and chisel out between them. Chisel a channel underneath for the LED strip to shine up into the slot.
Materiały do tego kroku:
 Deska sosnowa1 sztuka
Potrzebne narzędzia:
 Piła ręczna
 Komplet dłut do drewna
5
5
Light it
Light it
Strip 5V, GND and DIN to the Uno's 5V, GND and D6. Install the Adafruit NeoPixel library and upload. Stand the panel in the slot.
edge_lit_panel.inocpp
Materiały do tego kroku:
 Taśma LED Neopixel1 sztuka
 Zestaw przewodów Dupont (męsko-żeńskich)1 zestaw
Potrzebne narzędzia:
 Arduino Uno R3
 SparkFun Cerberus USB Cable - 1.8 meter
6
6
Bend two offcuts
Bend two offcuts
Heat an offcut along a line on the strip heater, turning it over every 30 seconds, until it flexes. Bend it 90° round a 6 mm dowel and hold until cool. Bend the second round a 20 mm dowel.
Materiały do tego kroku:
 Kołek drewniany1 sztuka
Potrzebne narzędzia:
 Grzałka listwowa do akrylu
 Rękawice spawalnicze
7
7
Trace the beam
Trace the beam
In a dim room shine the laser pointer into the end of each bent strip, never towards anyone's eyes. See where light escapes at the bend, and compare with the notebook.
Potrzebne narzędzia:
 Wskaźnik laserowy
8
8
Critical angle and bends
Critical angle and bends
Wczytywanie notatnika Jupyter…
9
9
History & Context
History & Context
**What the patent specifies:** methacrylic esters polymerised between glass sheets and separated, giving a glass substitute with glass-polished faces. **Modern build (derived):** commercial cast acrylic sheet, cut and heat-bent.
Cast sheet is still made between glass plates; cheaper extruded sheet came later and is softer and more prone to crazing. The limits: acrylic scratches, cracks if drilled carelessly, crazes when solvents or stress meet, and burns.
Materiały
5- 1 sztukaZastępnik
- 1 sztukaZastępnik
- Taśma LED Neopixel10% prowizji1 sztukaZastępnik
- Zastępnik
- 1 sztukaZastępnik
Wymagane narzędzia
13- Zastępnik
- Zastępnik
- Zastępnik
- Zestaw do szlifowania mikrosiatką (9 gradacji)10% prowizjiZastępnik
- Zastępnik
- Zastępnik
- Zastępnik
- Zastępnik
- Arduino Uno R310% prowizjiMagento Legacy Storeships internationallyZastępnik
- SparkFun Cerberus USB Cable - 1.8 meter10% prowizji$5.70
- Zastępnik
- Rękawice spawalnicze10% prowizjiZastępnik
- Zastępnik
Powiązane blueprinty
Te blueprinty dzielą się wiedzą — technikami, materiałami lub zasadami

CC0 Domena publiczna
Ten plan jest udostępniany na licencji CC0. Możesz go swobodnie kopiować, modyfikować, rozpowszechniać i wykorzystywać do dowolnych celów, bez konieczności uzyskiwania zgody.
Wesprzyj Makera kupując produkty przez jego plan, za co zarabia Prowizja Makera ustalony przez sprzedawców, lub stwórz nową iterację tego planu i dołącz go jako połączenie w swoim własnym planie, aby dzielić się przychodami.