Współpraca
SZTUKA
Piękno i dobre samopoczucie
RZEMIOSŁO
KULTURA I HISTORIA
ROZRYWKA
ŚRODOWISKO
JEDZENIE I NAPOJE
INŻYNIERIA ODWROTNA
NAUKI
LEKKOATLETYKA
TECHNOLOGIA
URZĄDZENIA DO NOSZENIA
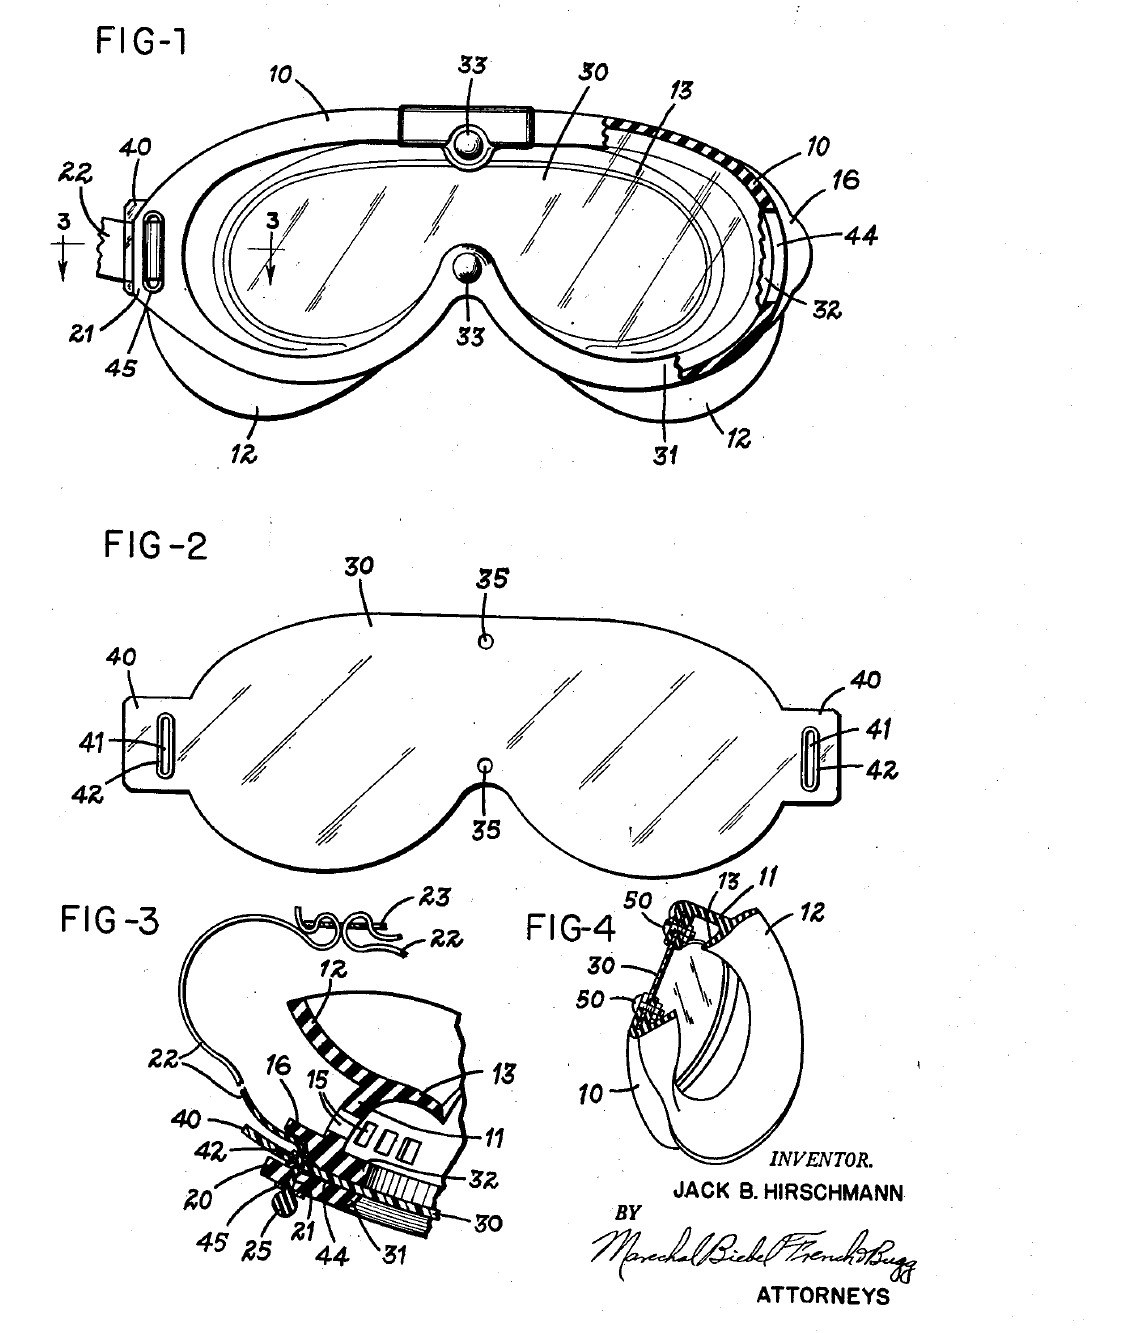


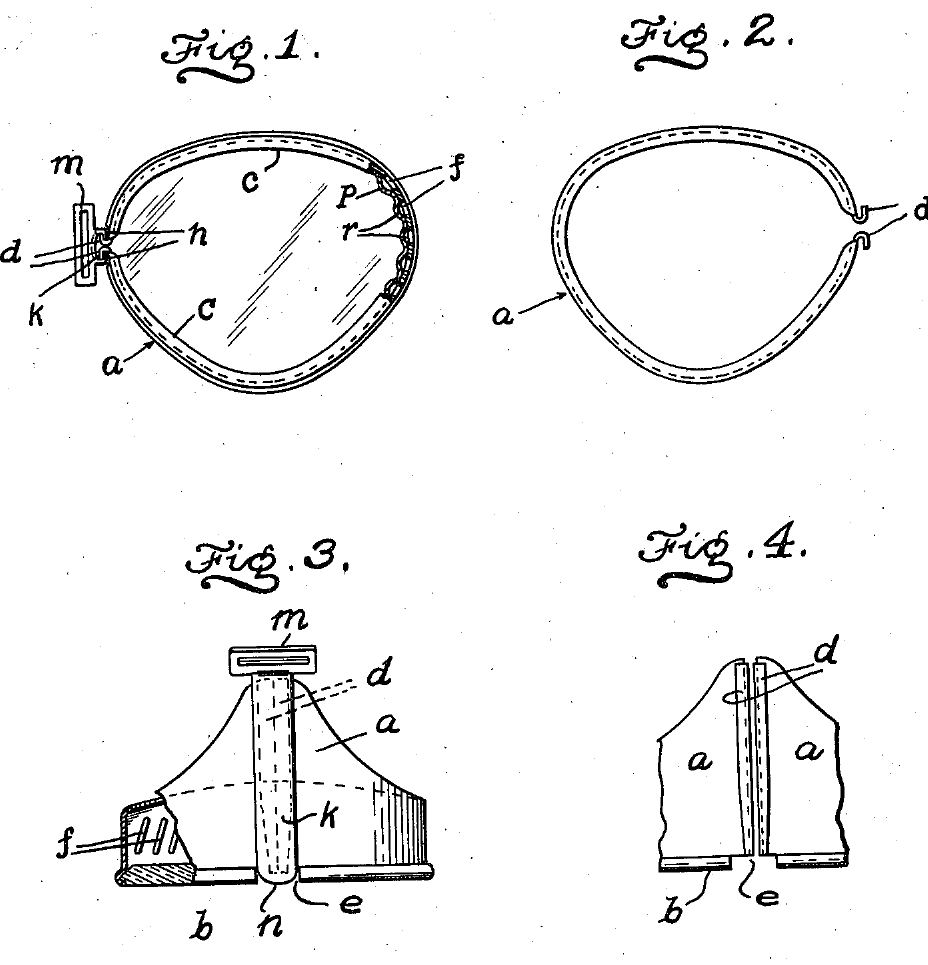
Chemical Splash Goggles: One Sealed Lens in a Moulded Rubber Frame (Hirschmann, 1954)
Goggles for work with corrosive liquids. One clear plastic lens covers both eyes and sits sealed all round in a soft moulded rubber frame that seals against the face. The version for gas and corrosive liquids has no vent holes at all, and the strap passes through tabs outside the lens, so nothing can leak through or around the part you look through.
Result: chemical splash goggles with a lens you can pull out and replace, and a strap pull shared evenly between lens and frame, so neither warps.
Source: J. B. Hirschmann, US Patent 2,680,846 (1954), Fig. 4 version. Unknown: sizes, the rubber compound, the strap material and how the frame is moulded. Ours: the mould; the patent tested a cellulose acetate lens. Picture: patent drawing.
Średniozaawansowany
2 days
Instrukcje
1
1
Mould the rubber frame
Mould the rubber frame
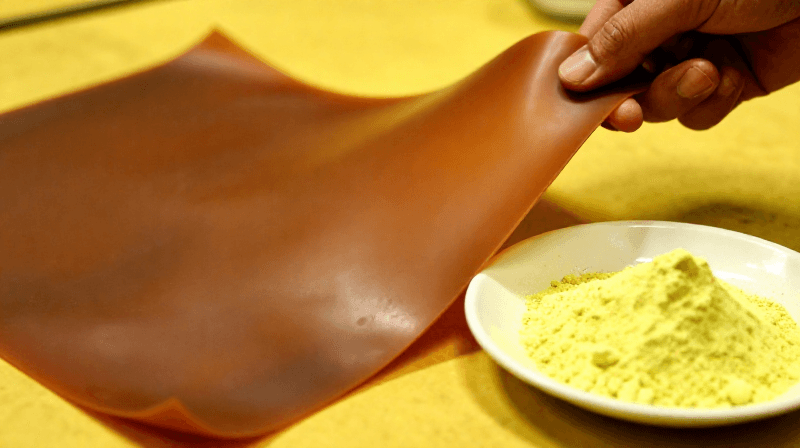
Mould the frame in one piece from rubber. The front rim has one opening shaped for both eyes, narrower above the nose. Behind it, a wall forms the eye chamber and ends in a double flange that seals against the face. Inside the rim, form a channel between an outer and an inner flange to hold the lens edge. At each end, mould a lug with a strap slot and a slit through the channel for the lens tab. For corrosive liquids, leave out all vent holes. Ours: a compression mould.
Materiały do tego kroku:
 Mieszanka gumowa1 frame
Potrzebne narzędzia:
 Forma do prasowania tłocznego
 Nieznane wymiary
2
2
Cut the lens
Cut the lens
Cut one lens from flexible clear plastic, shaped to match the rim. The patent tested cellulose acetate. Leave a tab at each end, outside the area you look through. Cut a closed slot in each tab and line it with a grommet. Make two holes at the centre for the bolts. Leave no other holes in the viewing area.
Materiały do tego kroku:
 Przezroczysta płyta z tworzywa1 lens
 Nitoprzelotka2 tab grommets
Potrzebne narzędzia:
 Nożyce do blachy
 Punktak
3
3
Seal the lens in the frame
Seal the lens in the frame
Spring the lens edge into the channel all the way round, pushing each tab out through its slit so it lies under the lug, slot over slot. Fasten the centre with two stainless-steel bolts and nuts. (The vented version uses snap fasteners here.)
Materiały do tego kroku:
 Śruby maszynowe2 stainless steel
 Nakrętka sześciokątna2 stainless steel
Potrzebne narzędzia:
 Zestaw wkrętaków
4
4
Fit the head strap
Fit the head strap
Use a strap in two halves, joined at the back by a buckle, each half with a thickened end. Slide a slotted plate of metal or plastic onto each half, then thread it from the front through the lug slot and the lens-tab slot. The thick end stops against the plate and lug. The pull of the strap now goes into both lens and frame, holds the lens in, and stays outside the field of view.
Materiały do tego kroku:
 Pasek okularów ochronnych1 two halves
 Klamra mosiężna z kolcem1 sztuka
 Nieznany materiał1 two slotted plates
Potrzebne narzędzia:
Nieznane wymiaryMateriały
8- 1 frameZastępnik
- Zastępnik
- 2 tab grommetsZastępnik
- 2 stainless steelZastępnik
- 2 stainless steelZastępnik
- 1 two halvesZastępnik
- 1 sztukaZastępnik
- 1 two slotted platesZastępnik
Wymagane narzędzia
5- Zastępnik
- Zastępnik
- Zastępnik
- Zastępnik
- Zastępnik
Materiały z połączonych planów
Według tego planu powstaje

Powiązane blueprinty
Te blueprinty dzielą się wiedzą — technikami, materiałami lub zasadami

CC0 Domena publiczna
Ten plan jest udostępniany na licencji CC0. Możesz go swobodnie kopiować, modyfikować, rozpowszechniać i wykorzystywać do dowolnych celów, bez konieczności uzyskiwania zgody.
Wesprzyj Makera kupując produkty przez jego plan, za co zarabia Prowizja Makera ustalony przez sprzedawców, lub stwórz nową iterację tego planu i dołącz go jako połączenie w swoim własnym planie, aby dzielić się przychodami.