Współpraca
SZTUKA
Piękno i dobre samopoczucie
RZEMIOSŁO
KULTURA I HISTORIA
ROZRYWKA
ŚRODOWISKO
JEDZENIE I NAPOJE
INŻYNIERIA ODWROTNA
NAUKI
LEKKOATLETYKA
TECHNOLOGIA
URZĄDZENIA DO NOSZENIA
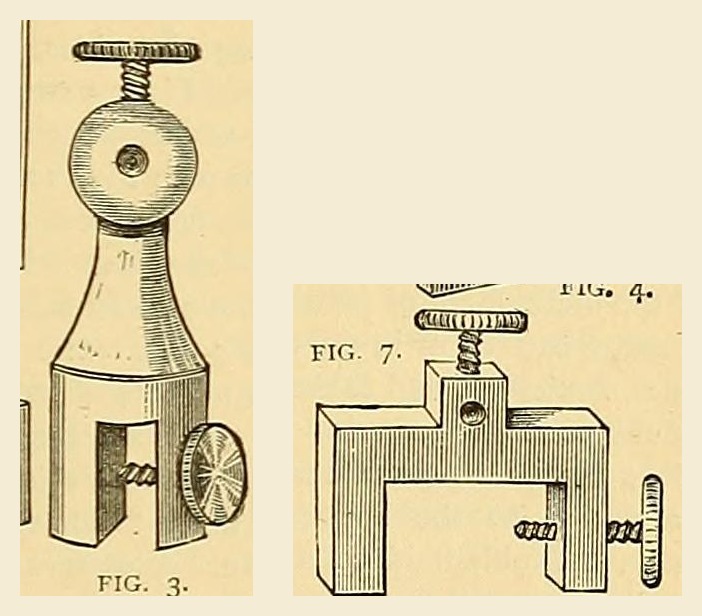


Brass Binding-Screw: Body Turned from 5/8 in. Rod, Thumb Screws from 3/8 in. Rod, and a Bent Brass Clamp (Edwinson, 1881)
The Victorian battery terminal, from George Edwinson's Electro-plating at Home (Amateur Work, 1881): a brass body turned from 1 1/2 in. of 5/8 in. rod, slotted for the plate and bored for the wire, with thumb screws turned from 3/8 in. rod; or a clamp bent hot from a brass strip with a soldered-on wire piece.
Średniozaawansowany
Two hours at the lathe
Instrukcje
1
1
His sizes
His sizes
Wczytywanie notatnika Jupyter…
2
2
Read Edwinson
Read Edwinson
"Those who may have lathes ... may easily turn up a binding-screw ... out of a 1 1/2 in. length of 5/8 in. brass rod."
3
3
Turn the body
Turn the body
Cut 1 1/2 in. (38 mm) of 5/8 in. (16 mm) brass rod and turn the body to shape first (his fig. 3: a round head on a tapering neck over a forked foot).
Materiały do tego kroku:
 Pręt mosiężny1 sztuka
Potrzebne narzędzia:
 Piła do metalu
 Tokarka do metalu
 Przecinak tokarski
4
4
Slot and bore
Slot and bore
Cut the slot that grips the plate. Bore a hole for the wire through the head, then bore the holes for the screws.
Potrzebne narzędzia:
 Imadło warsztatowePiła do metalu
 Pilniki (pilnik ręczny)
 Wiertarka ręczna
5
5
Turn the thumb screws
Turn the thumb screws
Turn the screws from 3/8 in. (9.5 mm) brass rod with plain thumb-screw heads (he says milled heads are a mistake). Cut a fine thread on them and tap the holes to match.
Materiały do tego kroku:
Pręt mosiężny1 sztukaPotrzebne narzędzia:
Tokarka do metaluPrzecinak tokarski Zestaw do gwintowania
6
6
Bent clamp (variant)
Bent clamp (variant)
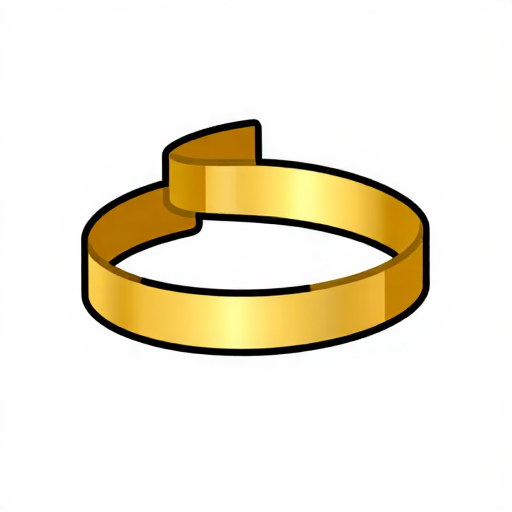
From good malleable brass take a strip 3 in. long, 1/2 in. wide and 1/4 in. thick (76 x 13 x 6 mm). Heat it to a dull red and bend it over a former of hot iron. Cut the piece for the wire and centre screw separately, hard-solder it on and trim it. Fit thumb screws as above. (A clamp may also be cast from a wooden pattern.)
Materiały do tego kroku:
 Taśma mosiężna1 sztuka
 Lut srebrny1 sztuka
Potrzebne narzędzia:
 Kuźnia kowalska
 Szczypce kowalskie
 Młotek
 Palnik do lutowania twardegoPilniki (pilnik ręczny)Wiertarka ręcznaZestaw do gwintowania
7
7
Clean and keep it working
Clean and keep it working
Clean the slot with folded emery cloth and the wire hole with the tang of a file. Now and then oil the screw, work it in and out, and wipe the oil off. Do not screw up too tight.
Potrzebne narzędzia:
Pilniki (pilnik ręczny)8
8
Troubleshooting
Troubleshooting
Binding-screw troubleshooting.
Flow
Loading...
9
9
History and honest limits
History and honest limits
From George Edwinson, "Electro-plating at Home", **Amateur Work, Illustrated**, vol. I (1881), p. 81 figs. 3 and 7 and p. 99 (checked on the archive.org scan amateurworkillus11881lond). He gives no thread size. Modern panel binding posts add an insulating bush and a banana-plug socket; this is the 1881 brass terminal. The metric figures and the tools are ours.
Materiały
3- 1 sztukaZastępnik
- 1 sztukaZastępnik
- 1 sztukaZastępnik
Wymagane narzędzia
11- Zastępnik
- Zastępnik
- Zastępnik
- Zastępnik
- Zastępnik
- Zastępnik
- Zastępnik
- Zastępnik
- Zastępnik
- Zastępnik
- Zastępnik
Według tego planu powstaje

Powiązane blueprinty
Te blueprinty dzielą się wiedzą — technikami, materiałami lub zasadami


CC0 Domena publiczna
Ten plan jest udostępniany na licencji CC0. Możesz go swobodnie kopiować, modyfikować, rozpowszechniać i wykorzystywać do dowolnych celów, bez konieczności uzyskiwania zgody.
Wesprzyj Makera kupując produkty przez jego plan, za co zarabia Prowizja Makera ustalony przez sprzedawców, lub stwórz nową iterację tego planu i dołącz go jako połączenie w swoim własnym planie, aby dzielić się przychodami.