SZTUKA
Piękno i dobre samopoczucie
RZEMIOSŁO
KULTURA I HISTORIA
ROZRYWKA
ŚRODOWISKO
JEDZENIE I NAPOJE
INŻYNIERIA ODWROTNA
NAUKI
LEKKOATLETYKA
TECHNOLOGIA
URZĄDZENIA DO NOSZENIA
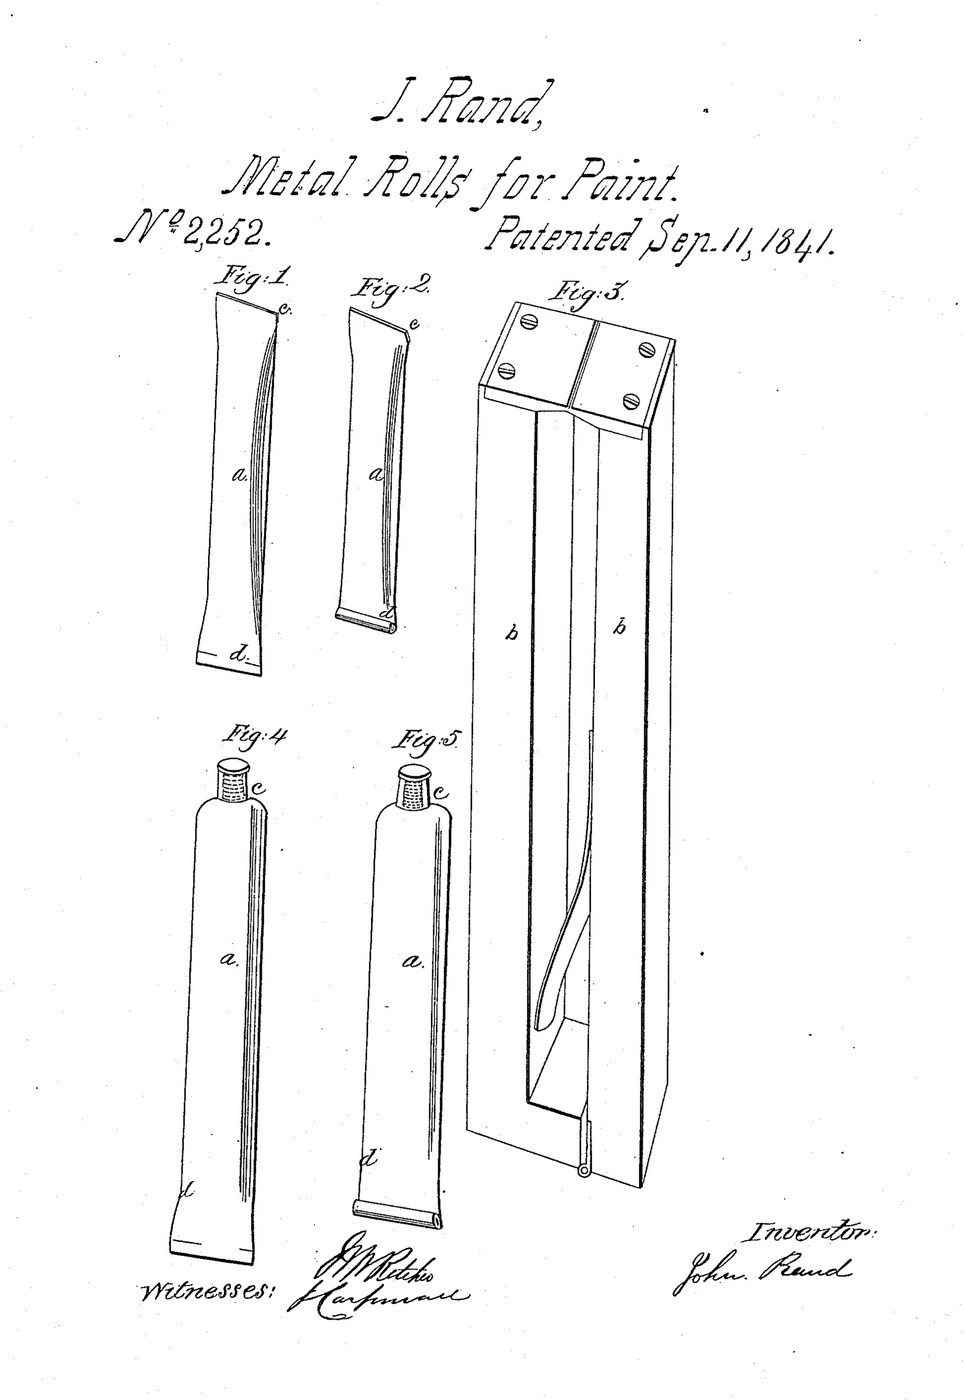


Empty Paint Tube: Soldered Sheet Lead, Rand 1841
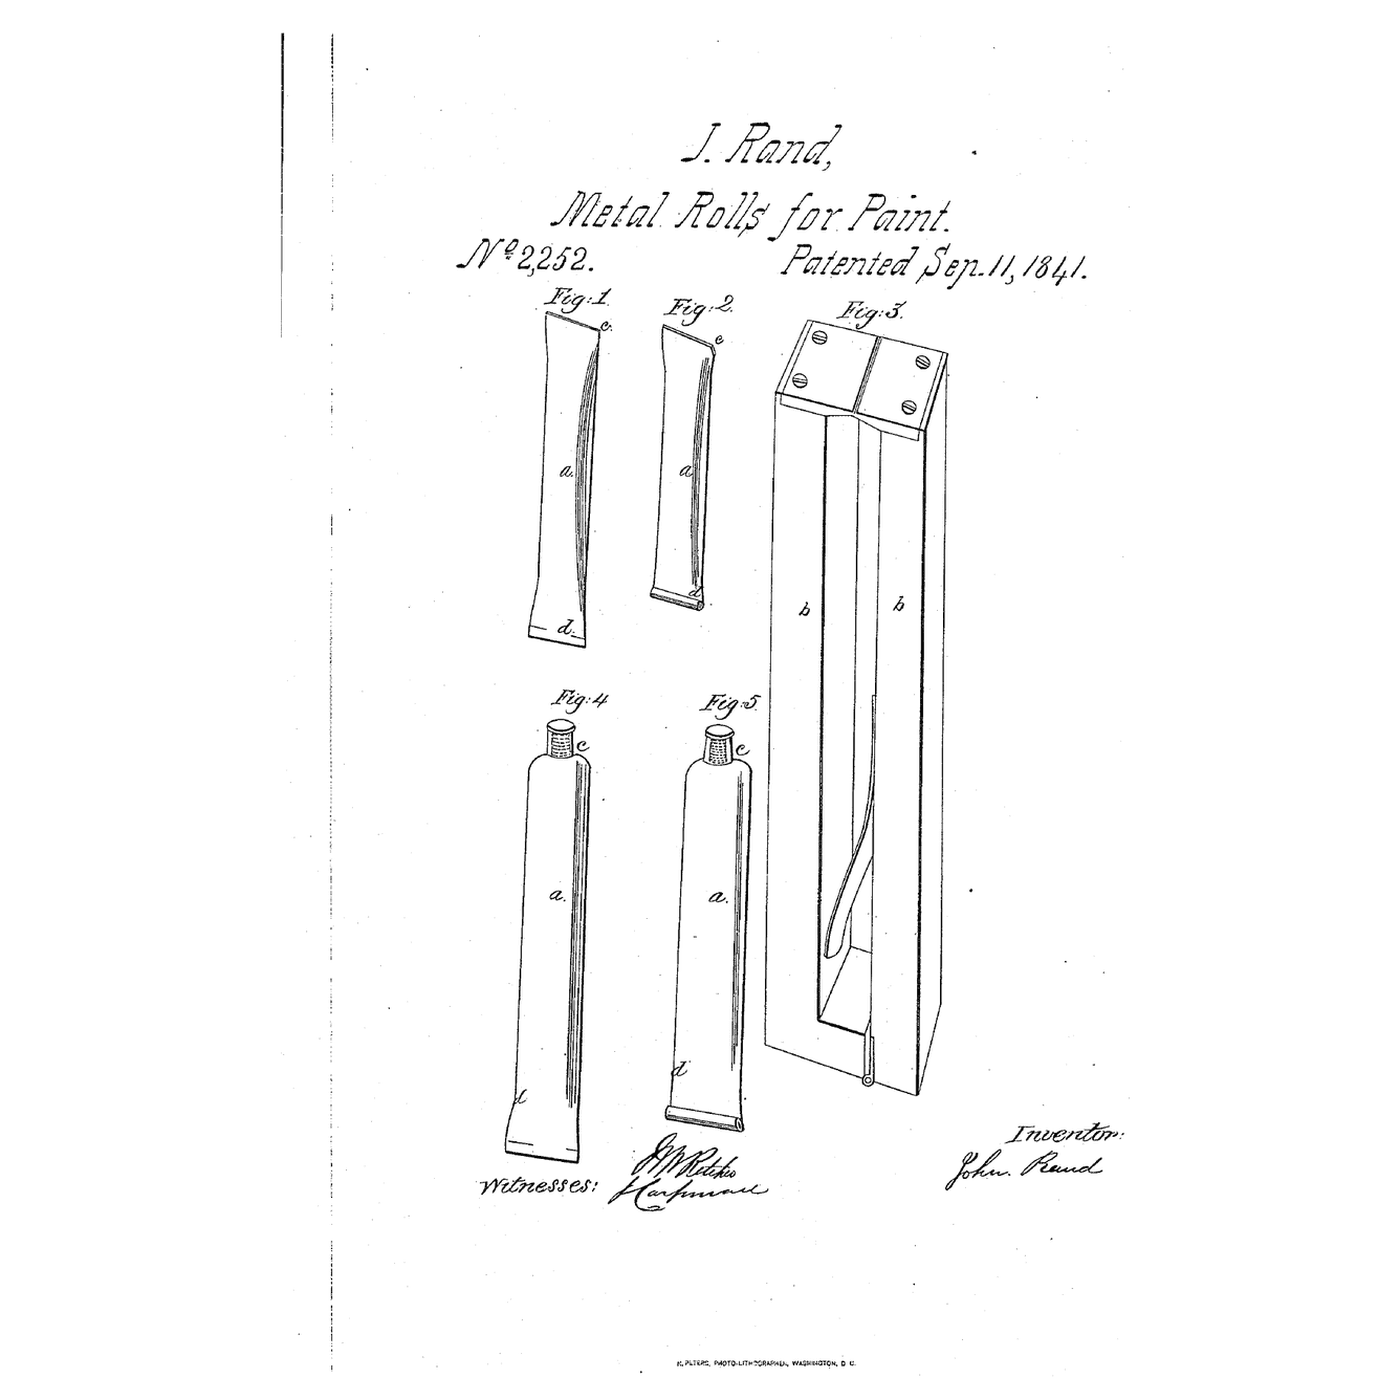
John Rand's 1841 patent names grain-tin, lead and pewter for paint tubes. The metal only has to be thin enough to yield to pressure and stay collapsed. His own tube was drawn tin about 1/75 inch thick, but he writes that a tube of sheet metal with a soldered seam works as well. This is that route in lead: roll a strip round a former, solder the seam, close one end, and leave the other open for filling.
Source: J. Rand, US 2,252 (1841). The sheet thickness, former, flux, size and tools are ours. The picture is the patent's drawing sheet.
Średniozaawansowany
1 hour
Instrukcje
1
1
Cut the strip
Cut the strip
Cut a strip of thin lead sheet as long as the tube and wide enough to go once round the former with a narrow overlap. Rand asks only for metal thin enough to yield to pressure and stay collapsed; ours is Ure's thinner cast sheet, 1/48 in (0.5 mm). Longer tubes need somewhat thicker metal.
Materiały do tego kroku:
 Blacha ołowiana1 as required
Potrzebne narzędzia:
 Nożyce do blachy
 Linijka
2
2
Roll it round a former
Roll it round a former
Roll the strip round a round wooden dowel so the edges overlap, and press the seam flat. The dowel and the overlap are ours.
Potrzebne narzędzia:
 Kołek drewniany
3
3
Solder the seam
Solder the seam
Join the edges by soldering, one of the two ways Rand gives (the other is melting the edges together). Ours: a little rosin flux and tin-lead solder run along the seam with a hot iron, on the dowel. Slide the tube off.
Materiały do tego kroku:
 Lut cynowo-ołowiowy1 as required
 Pasta topnikowa do lutowania (kalafoniowa)1 as required
Potrzebne narzędzia:
 LutownicaKołek drewniany
4
4
Close one end
Close one end
Press the edges of one end together with flat pliers (Rand used forceps that leave a groove along the end). Close it by adding a little solder with a hot iron. Leave the other end open: the tube is filled from there and then closed the same way.
Materiały do tego kroku:
Lut cynowo-ołowiowy1 as requiredPotrzebne narzędzia:
 Szczypce płaskieLutownica
Materiały
3- 1 as requiredZastępnik
- 2 as requiredZastępnik
- 1 as requiredZastępnik
Według tego planu powstaje

Powiązane blueprinty
Te blueprinty dzielą się wiedzą — technikami, materiałami lub zasadami

CC0 Domena publiczna
Ten plan jest udostępniany na licencji CC0. Możesz go swobodnie kopiować, modyfikować, rozpowszechniać i wykorzystywać do dowolnych celów, bez konieczności uzyskiwania zgody.
Wesprzyj Makera kupując produkty przez jego plan, za co zarabia Prowizja Makera ustalony przez sprzedawców, lub stwórz nową iterację tego planu i dołącz go jako połączenie w swoim własnym planie, aby dzielić się przychodami.