
Współpraca
SZTUKA
Piękno i dobre samopoczucie
RZEMIOSŁO
KULTURA I HISTORIA
ROZRYWKA
ŚRODOWISKO
JEDZENIE I NAPOJE
INŻYNIERIA ODWROTNA
NAUKI
LEKKOATLETYKA
TECHNOLOGIA
URZĄDZENIA DO NOSZENIA
Fume Hood (Ducted): Sloping Stone Baffle Set from Outside by a Crank (Liptay, US 2,779,265, 1957)
Penny

Autor

Penny

3. listopad 2026DK
14
0
0
0
0

Fume Hood (Ducted): Sloping Stone Baffle Set from Outside by a Crank (Liptay, US 2,779,265, 1957)

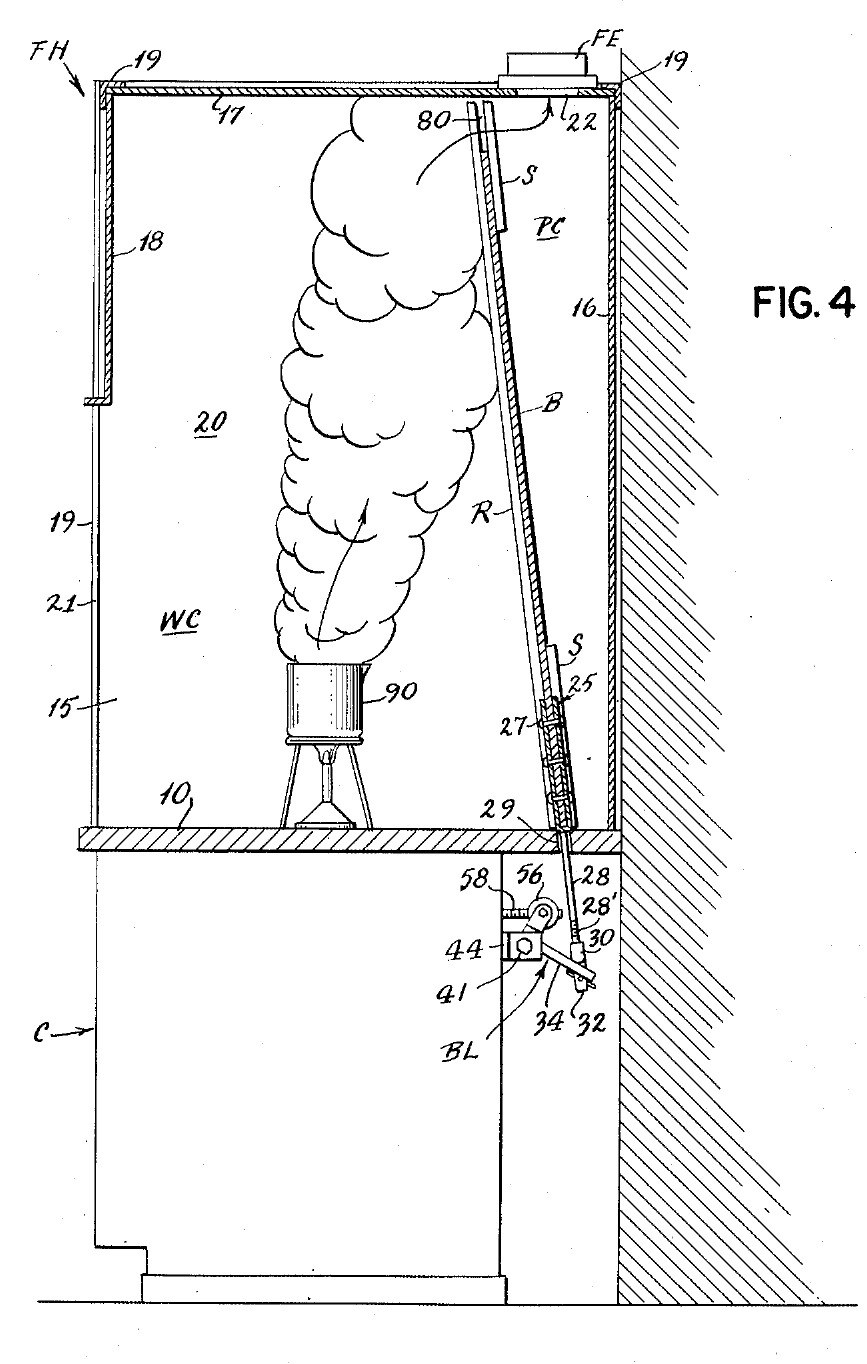
A bench fume hood on a stone counter, drawn off through a duct with a fan. Inside, a sloping stone baffle leaves a gap at the top and one at the bottom. A crank under the counter slides the baffle: one gap grows as the other shrinks, so the air sweeps light fumes out at the top or heavy fumes out at the bottom, with no one reaching inside. Result: a ducted hood whose air flow can be set for light or heavy fumes during work. Source: J. M. Liptay, US 2,779,265 (1957). Unknown: sizes, air flow, the fan and most materials. Picture: the patent drawing.
Zaawansowany
Unknown

Instrukcje

1

Build the cabinet and stone counter

Build a sheet metal cabinet. Fix spaced sheet metal channels to its front panel and rear wall, and lay a stone slab on them as the counter. Bore a hole through the slab near the back, at the middle, for the baffle's lifting rod. Not given: sizes, the metal.

Materiały do tego kroku:

Nieznany metalNieznany metal1 cabinet and channels
Płyta kamiennaPłyta kamienna1 counter

Potrzebne narzędzia:

Nożyce do blachyNożyce do blachy
Wiertarka stołowaWiertarka stołowa
Nieznane wymiaryNieznane wymiary
2

Build the hood

On the counter, make a frame of corner angle irons. Fix to it two sides, a rear wall, a roof and a front panel. Leave the front open below the front panel: this is the large opening where you work and where air comes in. Cut the fume outlet in the roof, towards the back. Not given: the panel material, sizes.

Materiały do tego kroku:

Kątownik ze stali miękkiejKątownik ze stali miękkiej1 corner frame

Nieznany materiałNieznany materiał1 sides, rear wall, roof, front panel

Potrzebne narzędzia:

Piła do metaluPiła do metalu
Nieznane wymiaryNieznane wymiary
3

Fit the exhaust pipe and fan

Fix an exhaust pipe over the roof outlet, with a fan in it, to draw the fumes out. Not given: the pipe, the fan, the air flow.

Materiały do tego kroku:

Kanały wentylacyjneKanały wentylacyjne1 exhaust pipe
DmuchawaDmuchawa1 fan

Potrzebne narzędzia:

Klucz nastawnyKlucz nastawny
4

Fit the sloping baffle

Make a solid stone baffle almost as wide as the hood. Set it sloping up and forward from the rear wall, so it splits the inside into the work space in front and a duct behind that widens upward to the outlet. Guide it on sloping rails in front and strips behind, fixed to the sides, so it can slide. Leave a gap between its top and the roof, and one between its bottom and the counter. Not given: the rails' metal, sizes.

Materiały do tego kroku:

Płyta kamiennaPłyta kamienna1 baffle
Nieznany metalNieznany metal1 rails and strips

Potrzebne narzędzia:

Nieznane wymiaryNieznane wymiary
5

Make the lifting rod

Cut a notch in the middle of the baffle's lower edge. Make a V-shaped yoke whose legs straddle the baffle front and back, rivet the legs to it, and give the yoke a rod that hangs down through the hole in the counter. Thread the rod's lower end. Not given: the metal.

Materiały do tego kroku:

Nieznany metalNieznany metal1 yoke, rod, rivets

Potrzebne narzędzia:

Zestaw nitowniczyZestaw nitowniczy
Zestaw do gwintowaniaZestaw do gwintowania
6

Fit the bell crank

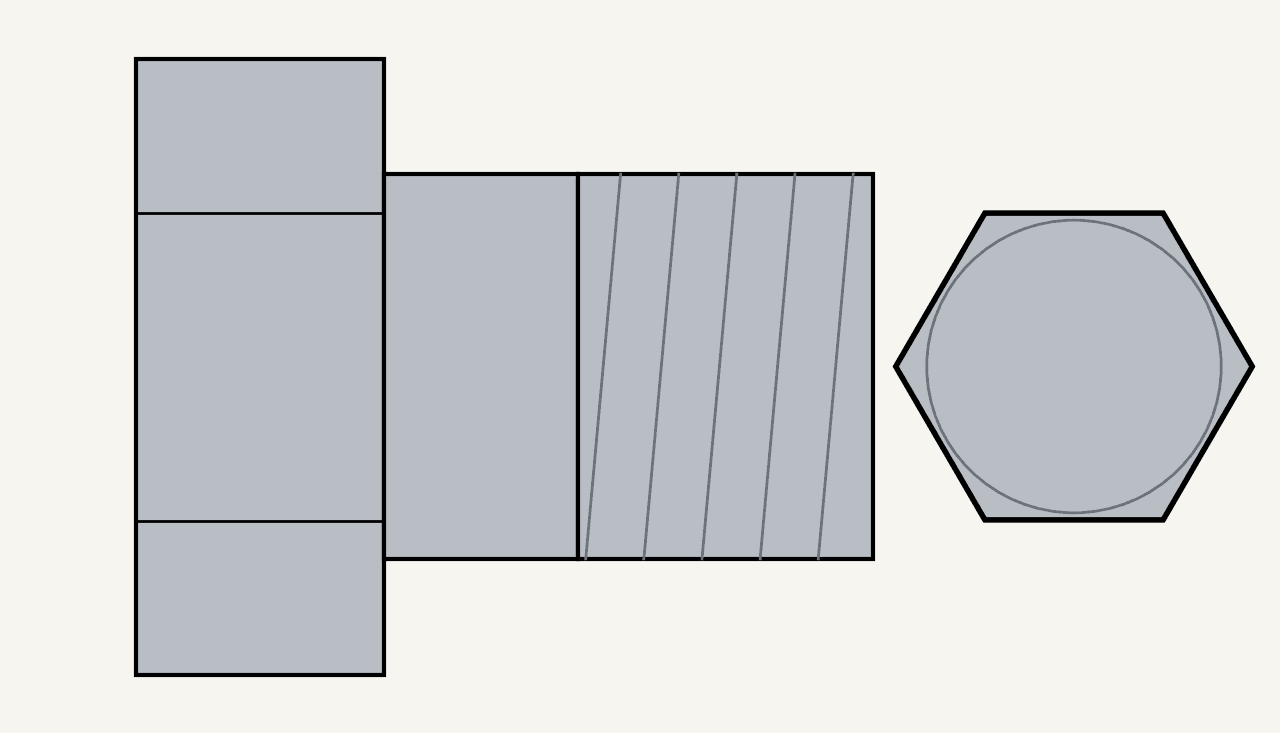
Under the counter, pivot a bell crank lever on a bolt through the lugs of a bracket fixed to the cabinet's rear channel. Screw a coupling onto the rod's threaded end. The coupling's two curved lips rock on the lever's long arm, and its tongue hangs through a slot in the arm, held by a cotter pin. On the short arm, a yoke turns on two bolts set fast in the threaded cross-holes of a round nut. Ours: hex bolts and nuts.

Materiały do tego kroku:

Dźwignia kątowaDźwignia kątowa1 bell crank
Nieznany metalNieznany metal1 bracket, coupling, round nut

Zestaw śrub sześciokątnychZestaw śrub sześciokątnych3 sztuk
Nakrętka sześciokątnaNakrętka sześciokątna1 sztuka
ZawleczkaZawleczka1 sztuka

Potrzebne narzędzia:

Zestaw do gwintowaniaZestaw do gwintowania
Klucz nastawnyKlucz nastawny
7

Fit the crank and set the baffle

Screw a metal operating rod through the round nut and run it forward to the cabinet front. Screw its front socket onto the shaft of a hand crank and pin it with a cotter pin. Weld an angle iron to the inside of the front panel to stiffen it. Clamp a bushing through the panel with a nut, and set a ball bearing between two rings on the shaft, between the bushing and the crank. Turning the crank tips the bell crank, which raises the rod and baffle or lets them slide down by their own weight: as one gap grows the other shrinks. Air comes in at the front; the upper stream carries light fumes to the top gap, the lower stream heavy fumes to the bottom gap. Open the top fully for light fumes, the bottom fully for heavy ones, or set any point between, without reaching inside. A sliding safety sash may be fitted over the front opening, to watch dangerous reactions safely.

Materiały do tego kroku:

Nieznany metalNieznany metal1 operating rod, crank, bushing
ZawleczkaZawleczka1 sztuka
Nakrętka sześciokątnaNakrętka sześciokątna1 sztuka
Kątownik ze stali miękkiejKątownik ze stali miękkiej1 stiffener
Łożysko kulkowe wzdłużneŁożysko kulkowe wzdłużne1 sztuka

Potrzebne narzędzia:

Spawarka łukowaSpawarka łukowa
Zestaw do gwintowaniaZestaw do gwintowania
Klucz nastawnyKlucz nastawny

Materiały

11

Wymagane narzędzia

8

Powiązane blueprinty

Te blueprinty dzielą się wiedzą — technikami, materiałami lub zasadami

CC0 Domena publiczna

Ten plan jest udostępniany na licencji CC0. Możesz go swobodnie kopiować, modyfikować, rozpowszechniać i wykorzystywać do dowolnych celów, bez konieczności uzyskiwania zgody.

Wesprzyj Makera kupując produkty przez jego plan, za co zarabia Prowizja Makera ustalony przez sprzedawców, lub stwórz nową iterację tego planu i dołącz go jako połączenie w swoim własnym planie, aby dzielić się przychodami.

Dyskusja

(0)

Zaloguj się aby dołączyć do dyskusji

Ładowanie komentarzy...