SZTUKA
Piękno i dobre samopoczucie
RZEMIOSŁO
KULTURA I HISTORIA
ROZRYWKA
ŚRODOWISKO
JEDZENIE I NAPOJE
INŻYNIERIA ODWROTNA
NAUKI
LEKKOATLETYKA
TECHNOLOGIA
URZĄDZENIA DO NOSZENIA
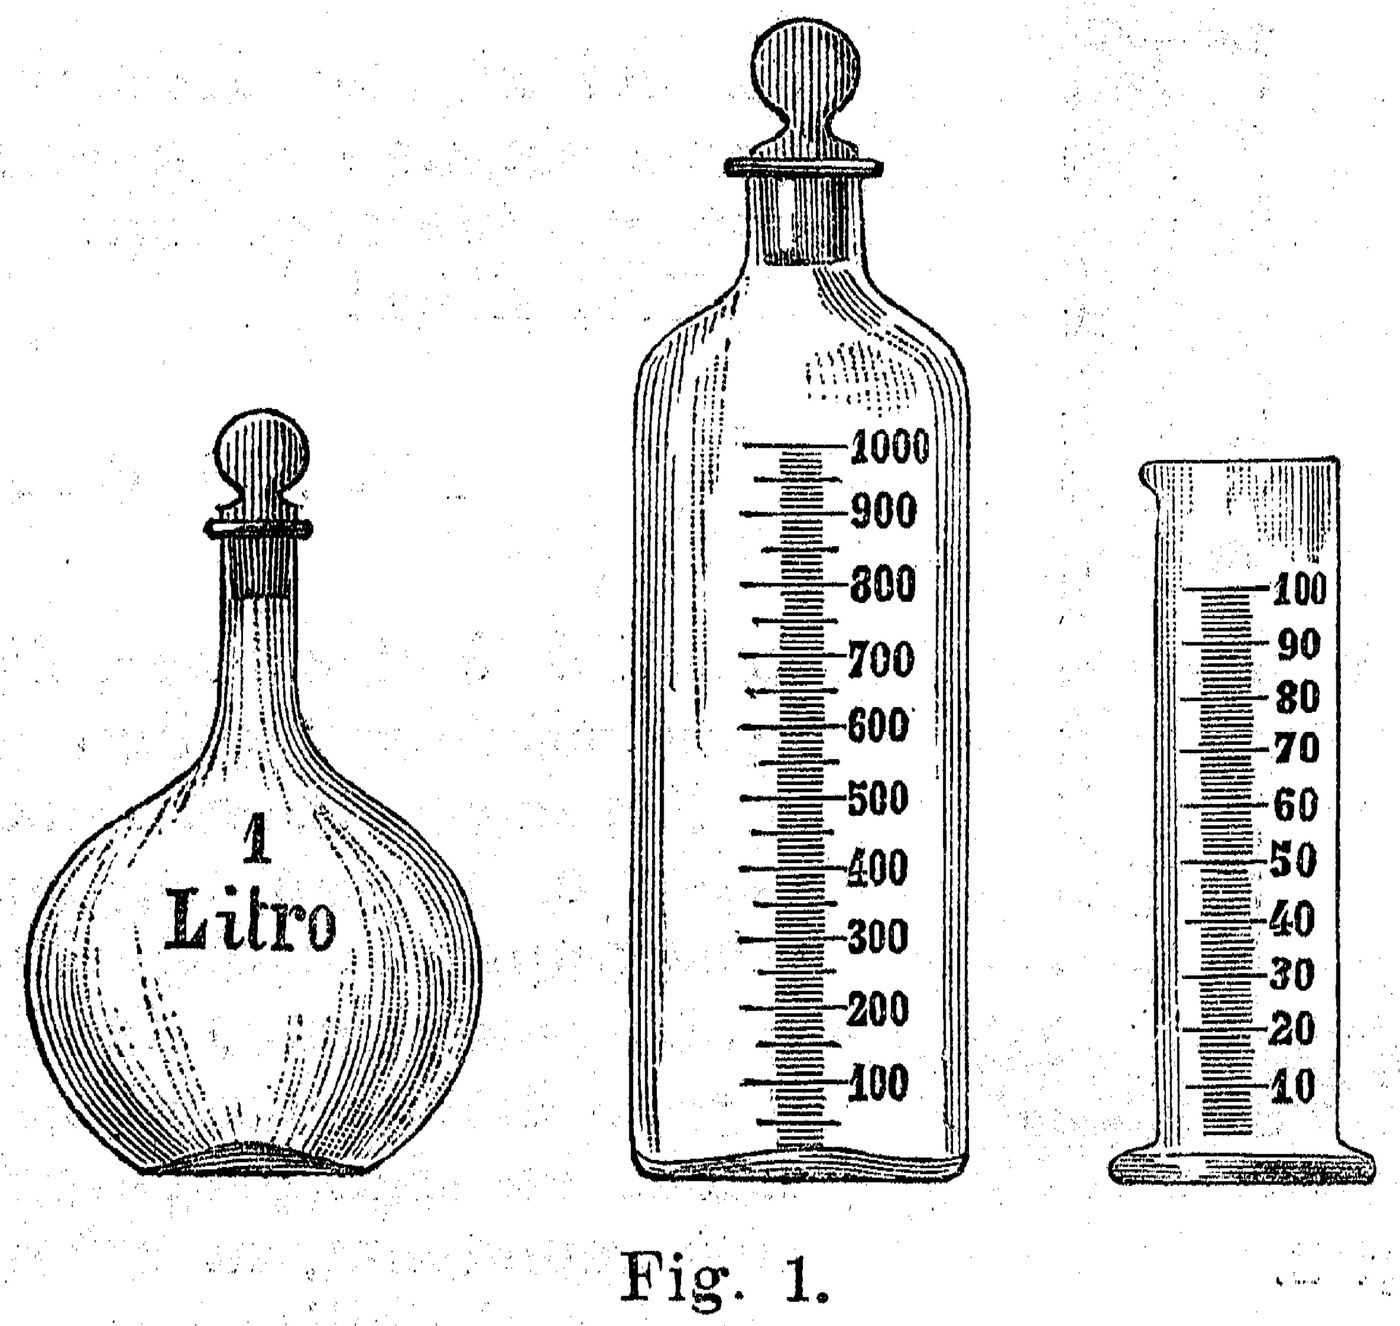


Graduated Cylinders: Glass Tube on a Foot, Marked by Weighing Water
A graduated cylinder is a narrow glass tube standing on a foot, with a lip to pour and lines for volume; it measures more closely than a beaker. Guyton de Morveau introduced it in 1784. Close a straight tube flat, fuse a glass foot under it, pull a lip, anneal, then mark it by weighing in water.
The picture: graduated laboratory glassware engraved in 1895 (Alessandri): a litre flask, a graduated bottle and, on the right, a footed graduated cylinder with a lip.
Zaawansowany
An hour per cylinder, plus annealing
Instrukcje
1
1
Close the bottom
Close the bottom
Cut a straight, even tube to length, close one end in the flame and press it flat on the marver.
Materiały do tego kroku:
 Zestaw rurek szklanych1 sztuka
Potrzebne narzędzia:
 Rysik diamentowy
 Palnik stołowy do dmuchania szkła
 Marwer (płyta do wałkowania szkła)
 Okulary ochronne
 Rękawice żaroodporne
2
2
Fuse on a foot
Fuse on a foot
Melt a gather of rod, press it into a flat disc wider than the tube and, while both are hot, fuse it centred under the bottom so the cylinder stands.
Materiały do tego kroku:
 Pręt ze szkła borokrzemowego1 sztuka
Potrzebne narzędzia:
Palnik stołowy do dmuchania szkłaMarwer (płyta do wałkowania szkła)Rękawice żaroodporne3
3
Rim and lip
Rim and lip
Fire-polish and slightly flare the rim with the jacks and push out a small pouring lip.
Potrzebne narzędzia:
Palnik stołowy do dmuchania szkła Jacks (szczypce szklarskie)
4
4
Anneal
Anneal
Anneal in the kiln at the glass's annealing temperature and cool slowly.
Potrzebne narzędzia:
 Piec ceramiczny
5
5
Graduate by weighing water
Graduate by weighing water
Stand the cylinder on the balance, add water a few grams at a time (1 g is about 1 mL near room temperature) and scratch a line at the bottom of the meniscus at each step with the diamond scriber. Number the main lines.
Materiały do tego kroku:
 Woda0.5 litr
Potrzebne narzędzia:
 Waga szalkowaRysik diamentowy
 Suwmiarka cyfrowa 6 cali
6
6
Spacing of the marks
Spacing of the marks
Wczytywanie notatnika Jupyter…
Materiały
3- 1 sztukaZastępnik
- 1 sztukaZastępnik
- 0.5 litrZastępnik
Wymagane narzędzia
9- Zastępnik
- Zastępnik
- Zastępnik
- Zastępnik
- Zastępnik
- Zastępnik
- Zastępnik
- Zastępnik
- Zastępnik
Według tego planu powstaje

Powiązane blueprinty
Te blueprinty dzielą się wiedzą — technikami, materiałami lub zasadami
CC0 Domena publiczna
Ten plan jest udostępniany na licencji CC0. Możesz go swobodnie kopiować, modyfikować, rozpowszechniać i wykorzystywać do dowolnych celów, bez konieczności uzyskiwania zgody.
Wesprzyj Makera kupując produkty przez jego plan, za co zarabia Prowizja Makera ustalony przez sprzedawców, lub stwórz nową iterację tego planu i dołącz go jako połączenie w swoim własnym planie, aby dzielić się przychodami.