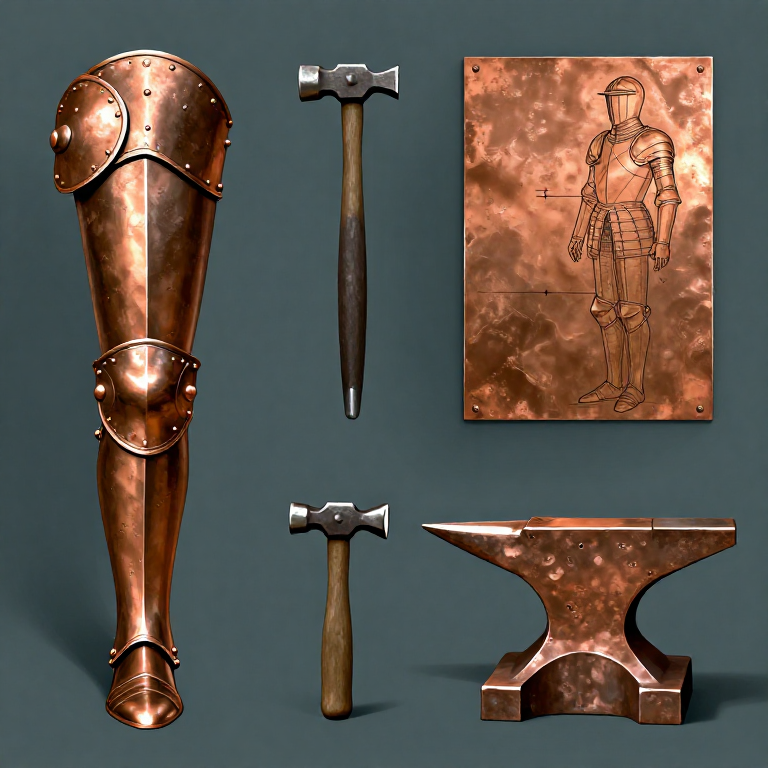
Greek Bronze Greave — Hammering a Bronze Greave (Shin Guard)
Instrukcje
Cut and Prepare the Bronze Sheet
Cut and Prepare the Bronze Sheet
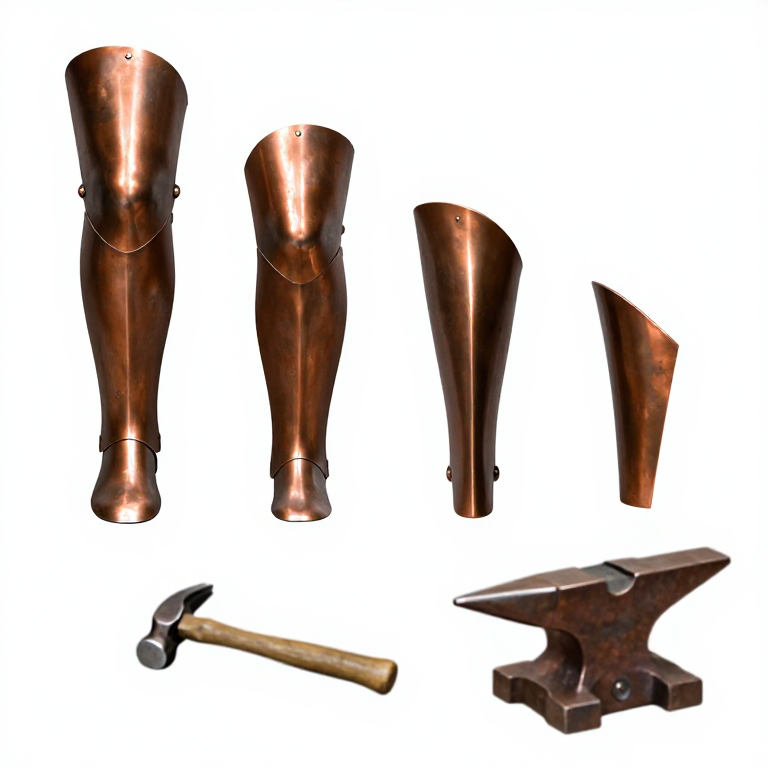
Cut a piece of bronze sheet approximately 40 cm tall and 30 cm wide from 1.5-2 mm thick stock using metal shears. This is enough material for one greave — a pair requires twice the material. Anneal the bronze by heating to dull red (500-600 degrees Celsius) and quenching in water, which softens the metal for forming. Mark the centerline and the approximate outline of the finished greave on the sheet with a scriber. The greave must ultimately wrap around the front and sides of the lower leg with enough spring to grip without straps — this requires careful shaping to create a C-shaped cross-section that matches the leg's contour.
Materiały do tego kroku:
 Phosphor Bronze Sheet1 piece approximately 40x30 cm sztuka
Tools needed:
 Forming Stake
 Forge
Forge Forge Hammer (Cross-Peen)
Raise the Basic Curved Form
Raise the Basic Curved Form
Begin raising the sheet into a curved form by hammering it over a stake anvil (a round-topped metal form clamped in a vise). Work in concentric rows starting from the rim, using a raising hammer with a slightly curved face. Each hammer blow compresses and curves the metal, gradually deepening the C-shaped cross-section. After each complete pass around the workpiece, anneal again — bronze work-hardens quickly and will crack if hammered too far without annealing. The raising process requires 10-20 complete courses with annealing between each, progressively deepening the curve until the greave wraps approximately 270 degrees around a leg-diameter cylinder. This is extremely labor-intensive hand work — a single greave required hours of skilled hammering.
Shape the Anatomical Contours
Shape the Anatomical Contours
Refine the greave shape to follow the anatomy of the lower leg. The shin area (tibial crest) should have a slightly raised ridge, the calf area should be hollowed to accommodate the gastrocnemius muscle, and the top should flare slightly to clear the knee while the bottom curves inward at the ankle. Use various stake profiles and hammer faces to create these compound curves. Compare the piece against an actual leg (or a wooden leg form) frequently. Greek greaves from archaeological finds at Olympia and Delphi show remarkable anatomical accuracy, with some pairs clearly custom-fitted to their owner's legs — the left and right greaves have different contours matching the slight natural asymmetry of human legs.
Planish and Smooth the Surface
Planish and Smooth the Surface
Once the form is correct, planish the entire surface by hammering it with a flat-faced planishing hammer over a smooth stake. Planishing flattens the hammer marks from the raising process, producing a smooth surface. Work systematically in overlapping rows, using light, even blows. The surface should become progressively smoother with each pass. After planishing, the greave can be further smoothed with files and abrasive stones. Trim the edges to the final outline with metal shears and file them smooth — sharp edges against the skin would be intolerable in wear. The rolled or flanged rim visible on many surviving Greek greaves also added stiffness to the edge.
Final Fitting and Polishing
Final Fitting and Polishing
The finished greave should clip onto the lower leg and hold in place through spring tension alone — no straps, hinges, or ties. Test the fit by pressing the greave onto the leg; it should grip firmly enough to stay in place during movement but not so tightly that it restricts blood flow. Adjust the spring tension by gently opening or closing the C-profile with controlled hammer blows. Polish the exterior to a bright golden-bronze finish using fine abrasive and leather with rouge. Some Greek greaves were decorated with incised or embossed designs, particularly at the knee, where relief faces of gorgons or other protective devices were common. The interior was lined with leather or fabric glued to the metal for comfort. A matched pair of greaves, along with a Corinthian helmet, bronze cuirass, and round shield (aspis), constituted the full hoplite panoply.

Materiały
2- 1 piece, 40x30 cm, 1.5-2mm sztukaPlaceholder
Wymagane narzędzia
6- Placeholder
- Placeholder
- Placeholder
- Placeholder
Related blueprints
Other builds that share materials, tools, or techniques with this one.
CC0 Domena publiczna
Ten plan jest udostępniany na licencji CC0. Możesz go swobodnie kopiować, modyfikować, rozpowszechniać i wykorzystywać do dowolnych celów, bez konieczności uzyskiwania zgody.
Wesprzyj Makera kupując produkty przez jego plan, za co zarabia Prowizja Makera ustalony przez sprzedawców, lub stwórz nową iterację tego planu i dołącz go jako połączenie w swoim własnym planie, aby dzielić się przychodami.