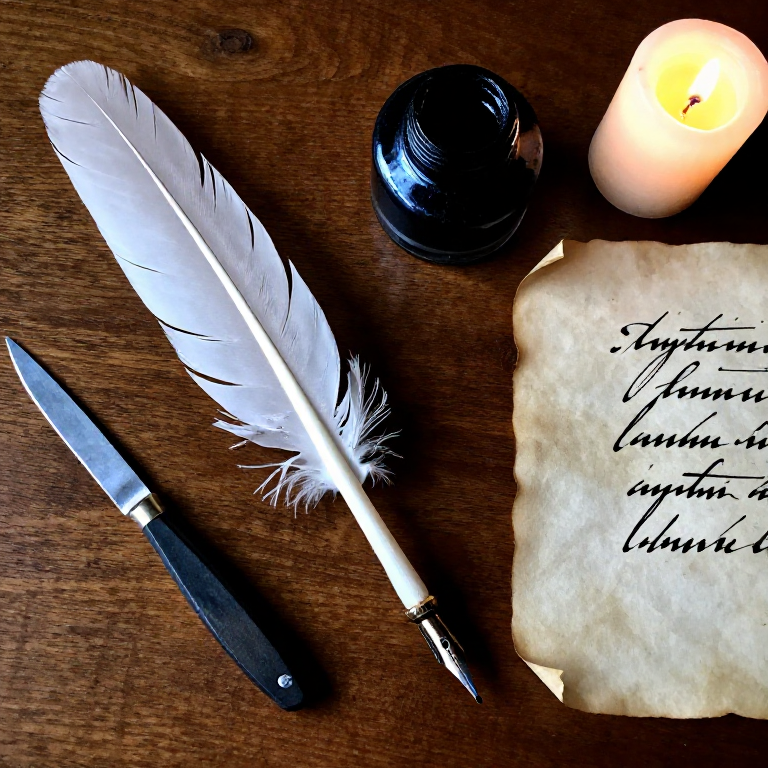
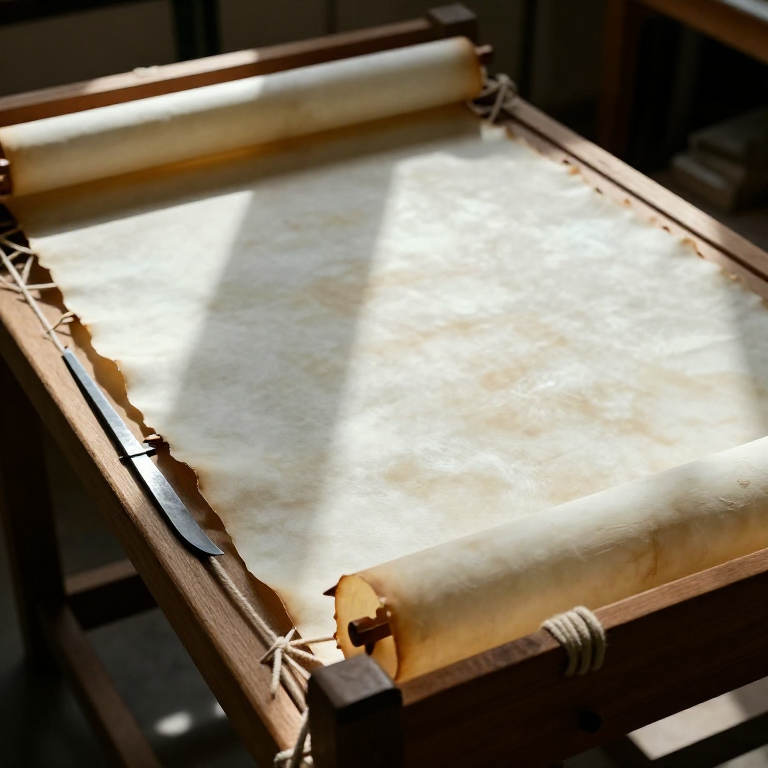
Cutting a Goose Quill Pen — Medieval Writing Instrument
Instrukcje
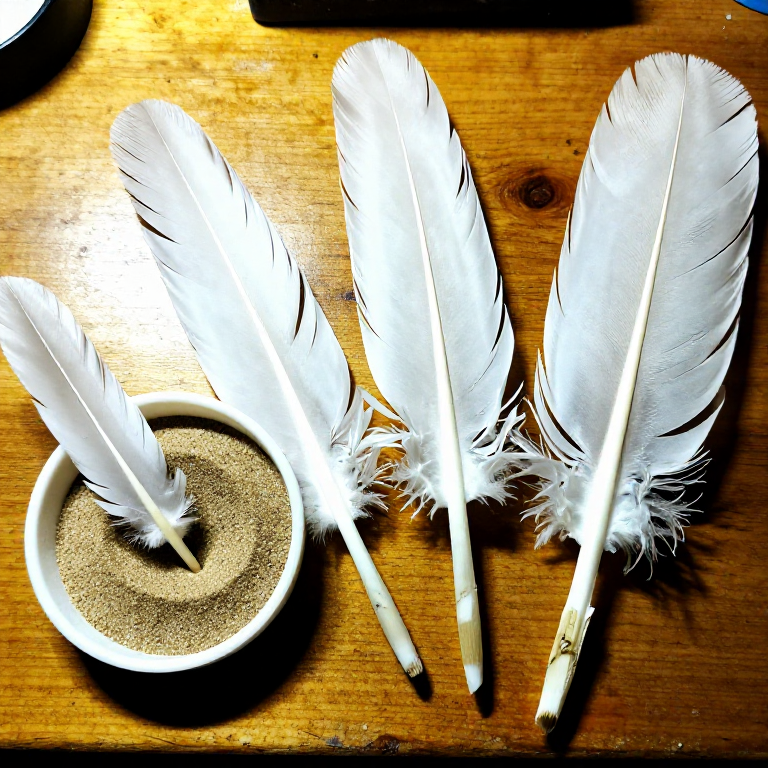
Select and Cure the Feather
Select and Cure the Feather
Select a large primary flight feather from a goose — the five outermost feathers from the left wing are preferred for right-handed writers, as their natural curve sweeps away from the writing hand. The barrel (calamus) should be at least 2 cm in diameter and free of cracks. Strip the barbs (the feathery vane) from the lower third of the shaft, leaving a clean barrel for gripping. To harden the barrel for a longer-lasting nib, cure it by soaking in water for several hours, then plunging the barrel into hot sand (approximately 150 degrees Celsius) for 10 to 20 seconds. The heat drives out residual moisture and tempers the keratin, making it harder, more transparent, and less prone to splitting. Alternatively, the quill can be air-cured by ageing for several months — medieval scriptoria kept stocks of feathers ageing on racks.
Materiały do tego kroku:
 Feathers3-5 sztuka
 Fine Sand1 cup kubek
Tools needed:
 Utility Knife
Make the Initial Cut
Make the Initial Cut
Using a very sharp pen-knife, make a long diagonal cut across the end of the barrel at approximately 45 degrees, removing the tip and creating an angled opening. This cut should be approximately 2 to 3 cm long, exposing the hollow interior of the barrel. Clean out any membrane (the pith) from inside the barrel using the knife tip or a thin wire. The inside must be completely clean for ink to flow smoothly through the barrel by capillary action. Turn the quill over so the cut face is downward and make a short slit (approximately 5 to 8 mm long) in the centre of the cut, starting from the very tip. This slit is essential — it acts as an ink reservoir and allows the two tines of the nib to flex independently, controlling ink flow through capillary action as the pen is pressed against the writing surface.
Tools needed:
Utility KnifeShape the Nib
Shape the Nib
Place the quill barrel on a hard cutting surface (a smooth stone or glass plate) with the slit facing up. Using the pen-knife, make two final cuts to shape the nib tip: first, cut the left shoulder at an angle from the barrel edge to the slit, then cut the right shoulder symmetrically. The resulting nib should have a broad, slightly curved tip approximately 1 to 2 mm wide for standard writing (narrower for fine work, wider for display lettering). Make a final straight cut across the very tip of the nib, perpendicular to the slit, to create a clean, sharp writing edge. This final cut must be made on a hard surface with a single decisive stroke — a ragged nib edge will produce scratchy, inconsistent lines. The nib shape determines the writing style: a broad nib cut at an angle produces the characteristic thick-and-thin strokes of medieval calligraphy.
Tools needed:
Utility KnifeTest and Adjust the Nib
Test and Adjust the Nib
Dip the nib approximately 5 mm into ink and test it on parchment or good-quality paper. The ink should flow smoothly from the nib as you write, producing a consistent line that varies in width as you change the angle and pressure. If the ink does not flow, the slit may be too short — extend it by 1 to 2 mm. If the ink blobs or flows too freely, the slit may be too long or too wide — re-cut the nib tip to narrow it. If the pen scratches, the nib tip is not smooth — polish it on a fine whetstone or fine sandpaper. A properly cut quill should produce approximately 10 to 15 lines of text before needing to be re-dipped. Medieval scribes re-cut their nibs frequently — a quill might be re-trimmed dozens of times before the barrel became too short to hold comfortably, at which point a new feather was used.
Tools needed:
 Caliper
Maintain the Quill
Maintain the Quill
Between writing sessions, rinse the nib in clean water and blot dry to prevent ink from drying in the slit and clogging the capillary channel. Store the quill horizontally or nib-up to prevent ink from settling back into the barrel. A well-cured quill nib will hold its edge for several hours of continuous writing before needing re-cutting — place the nib on the cutting surface and shave a thin slice from the tip to restore the sharp edge. Medieval scribes kept their pen-knives always at hand for this purpose. A single goose feather typically provides enough barrel length for the nib to be re-cut 15 to 20 times before the barrel is exhausted. Goose feathers were available in quantity from domestic flocks, and large scriptoria consumed thousands of feathers annually — the monastery of St. Gallen in Switzerland records purchasing feathers by the cartload.
Materiały do tego kroku:
 Water1 bowl bowl
Tools needed:
Utility KnifeMateriały
3Related blueprints
Other builds that share materials, tools, or techniques with this one.

CC0 Domena publiczna
Ten plan jest udostępniany na licencji CC0. Możesz go swobodnie kopiować, modyfikować, rozpowszechniać i wykorzystywać do dowolnych celów, bez konieczności uzyskiwania zgody.
Wesprzyj Makera kupując produkty przez jego plan, za co zarabia Prowizja Makera ustalony przez sprzedawców, lub stwórz nową iterację tego planu i dołącz go jako połączenie w swoim własnym planie, aby dzielić się przychodami.