Współpraca
SZTUKA
Piękno i dobre samopoczucie
RZEMIOSŁO
KULTURA I HISTORIA
ROZRYWKA
ŚRODOWISKO
JEDZENIE I NAPOJE
INŻYNIERIA ODWROTNA
NAUKI
LEKKOATLETYKA
TECHNOLOGIA
URZĄDZENIA DO NOSZENIA
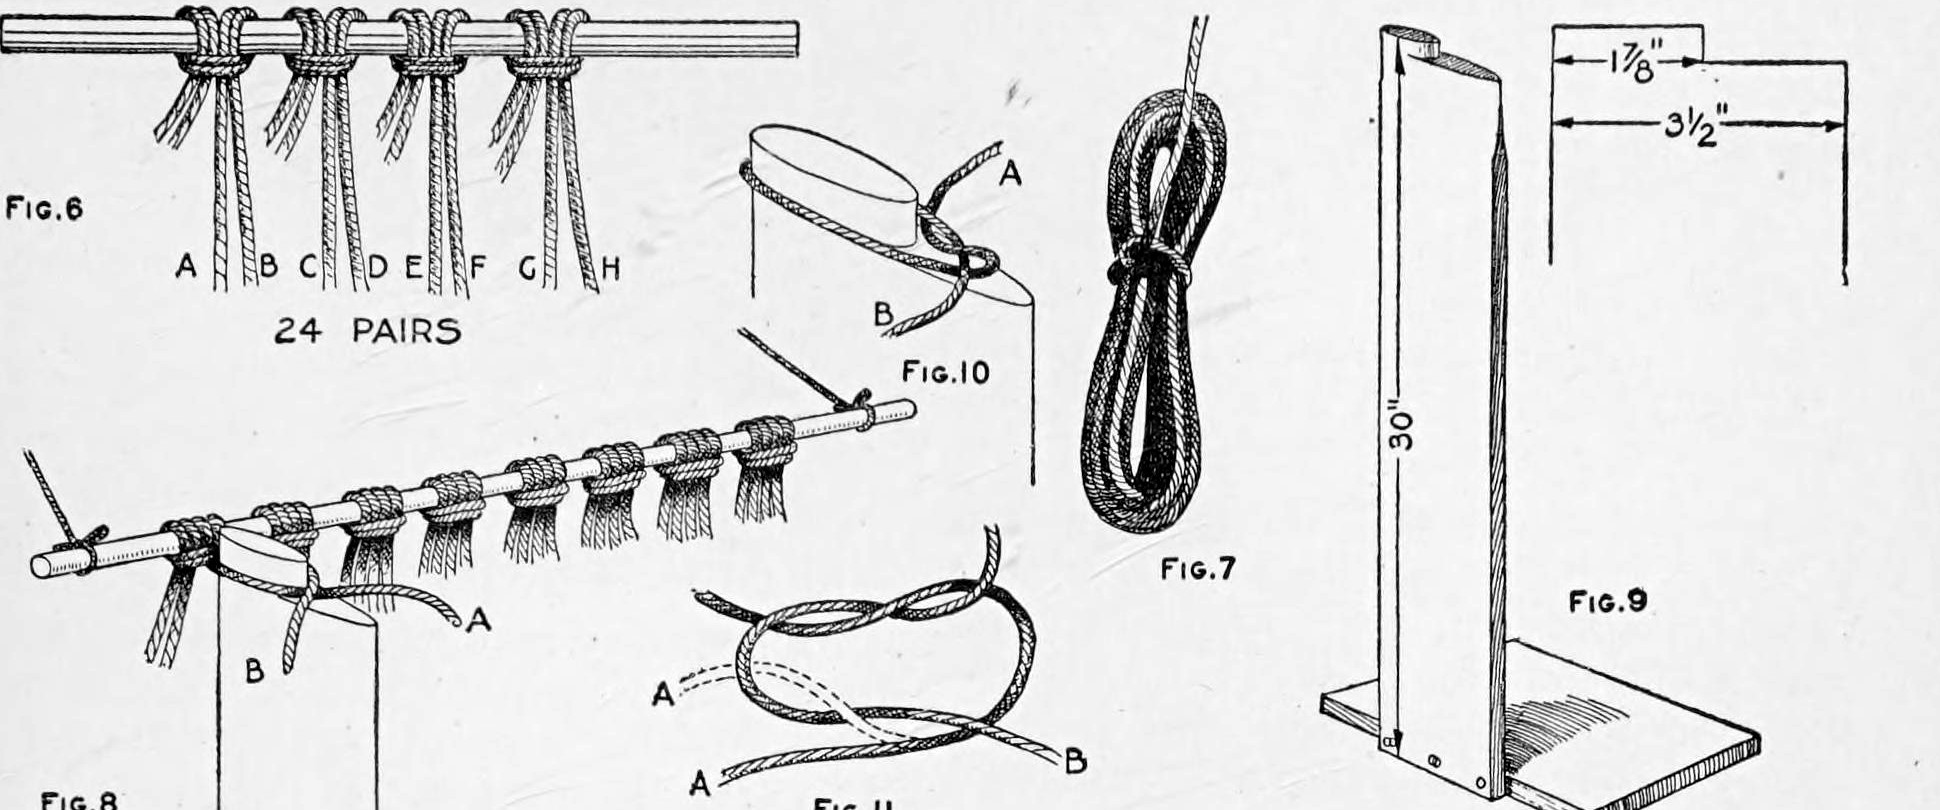


Knotted Twine Hammock: 48 Seine-Twine Cords Tied From a Centre Rod Over a Two-Size Mesh Post (Boy Mechanic, 1919)
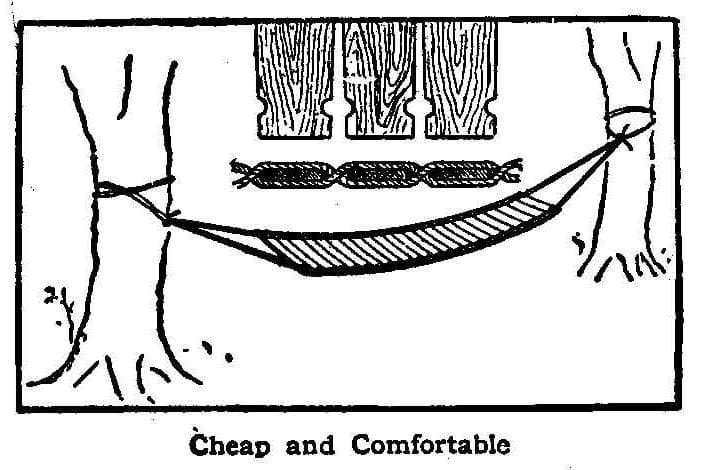
Charles M. Miller's knotted hammock from The Boy Mechanic, Book 3 (1919): 24 pairs of 18 ft seine-twine cords looped over a centre rod and knotted toward each end with flat reef (or overhand, or Solomon's) knots over a 30 in mesh post, then gathered into a 2-1/2 in galvanized ring at each end and bound.
Średniozaawansowany
Several days
Instrukcje
1
1
Cord budget
Cord budget
Wczytywanie notatnika Jupyter…
2
2
Read The Boy Mechanic, Book 3
Read The Boy Mechanic, Book 3
"The flat reef knot is small, is easily tied and will not slip."
3
3
Make the mesh post and ring board
Make the mesh post and ring board
Make a mesh post 30 in high on a base you can rest a foot on, its top cut to two sizes: 1-7/8 in across for the first row of meshes and 3-1/2 in for all others (Fig. 9). Make a ring board 30 in long, 3 in or more wide and 1 in thick, with three nails driven slanting (Fig. 14).
Materiały do tego kroku:
 Deska z drewna liściastego1 sztuka
 Deska sosnowa1 sztuka
 Gwoździe4 sztuk
Potrzebne narzędzia:
 Piła ręczna
 Strug ręczny
 Młotek
 Miara zwijana
4
4
Cut and hang the cords
Cut and hang the cords
Cut 48 cords of medium-hard 24-ply seine twine, each 18 ft long, and loop them in 24 pairs over a centre rod (an old broom handle) anchored to a wall (Figs. 6, 8). Loop the opposite halves up out of the way. Wind each working cord into a small bundle secured with a half hitch, leaving about 3 ft free (Fig. 7).
Materiały do tego kroku:
 Przędza sieciowa48 cord
 Miotła1 sztuka
Potrzebne narzędzia:
Miara zwijana Nożyczki
5
5
Knot the body
Knot the body
Set the post's small top between the first pair, A and B, and tie them with a flat reef knot: B over A, A tucked behind; B over again and A tucked under, drawn very hard (Figs. 8, 10, 11). Move along tying each pair, to the 24th (Y, Z). On the way back use the large top and tie neighbouring pairs together (Y with X, W with V ...). Alternate the rows to within 2-1/2 ft of the end. Then move the rod into the second row and knot the other half the same way. An overhand or Solomon's knot may be used instead (Figs. 1, 3, 12).
Materiały do tego kroku:
Przędza sieciowa1 sztukaPotrzebne narzędzia:
 Miarka do oczek sieci
6
6
Fit the rings and bind
Fit the rings and bind
Put the centre rod in the last row of meshes and set it on the ring board with a 2-1/2 in galvanized ring tied by a string to the end nail, 2 ft from the rod. Tie the cords to the ring in pairs with flat reef knots, one cord under and one over its side. Turn the ends back along the cords and wind them about 1-1/2 in with an extra cord, starting with a loop and a flat reef knot and looping each turn through its own winding; finish with a double loop and draw the end back under the turns with an awl (Fig. 15). Do the other end the same way.
Materiały do tego kroku:
 Pierścień metalowy2 sztukPrzędza sieciowa1 sztuka
Potrzebne narzędzia:
 SzydłoNożyczki
7
7
Finishing and troubleshooting
Finishing and troubleshooting
Hammock troubleshooting.
Flow
Loading...
8
8
History and honest limits
History and honest limits
From "How to Make Hammocks, Part I: A Twine Hammock" by Charles M. Miller, in **The Boy Mechanic, Book 3**, Popular Mechanics, 1919 (Project Gutenberg 71856; checked on the archive.org scan boymechanic0003unse, pp. 277-280). He gives no size for the mesh post's base or the winding cord. The tools and metric figures are ours.
Materiały
6- 1 sztukaZastępnik
- 1 sztukaZastępnik
- 4 sztukZastępnik
- 2 sztukZastępnik
- 1 sztukaZastępnik
- 2 sztukZastępnik
Według tego planu powstaje
Powiązane blueprinty
Te blueprinty dzielą się wiedzą — technikami, materiałami lub zasadami

CC0 Domena publiczna
Ten plan jest udostępniany na licencji CC0. Możesz go swobodnie kopiować, modyfikować, rozpowszechniać i wykorzystywać do dowolnych celów, bez konieczności uzyskiwania zgody.
Wesprzyj Makera kupując produkty przez jego plan, za co zarabia Prowizja Makera ustalony przez sprzedawców, lub stwórz nową iterację tego planu i dołącz go jako połączenie w swoim własnym planie, aby dzielić się przychodami.