SZTUKA
Piękno i dobre samopoczucie
RZEMIOSŁO
KULTURA I HISTORIA
ROZRYWKA
ŚRODOWISKO
JEDZENIE I NAPOJE
INŻYNIERIA ODWROTNA
NAUKI
LEKKOATLETYKA
TECHNOLOGIA
URZĄDZENIA DO NOSZENIA
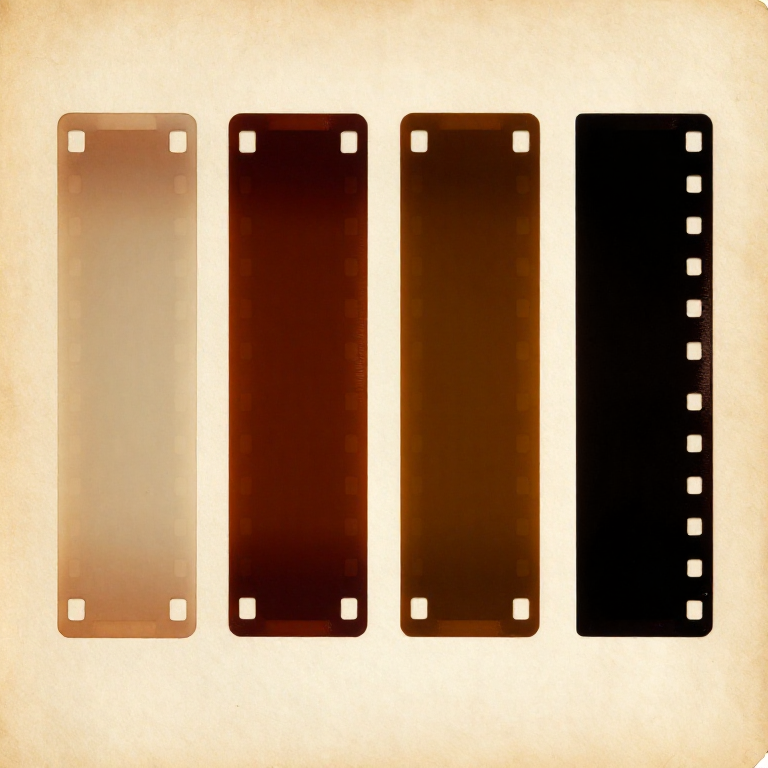


Reading a Negative: Thin or Dense, Flat or Contrasty
A negative carries a complete record of what was done to it, and it separates cleanly into two questions.
**Is it thin or dense?** That is exposure. **Is it flat or contrasty?** That is development. The two are independent, which is what makes the diagnosis possible at all.
Everything else — scratches, fog, marks, blank frames — has its own signature, and most of them are unmistakable once they have been seen and named. This rung is that vocabulary, and it is the fastest way to stop repeating a mistake.
Średniozaawansowany
2 hours
Instrukcje
1
1
The two questions, and how to ask them
The two questions, and how to ask them
**Look at the shadows for exposure.** The darkest parts of the subject are the thinnest parts of the negative, and they are where under-exposure shows first.
*Clear film in the shadows with no detail at all* — under-exposed. Nothing can recover it, because nothing was recorded.
*Shadows carrying faint but real detail* — correct.
*Shadows already quite dense* — over-exposed. Still printable, with more grain and less sharpness.
**Look at the highlights for development.** They are the densest parts, and they are where development shows.
*Highlights so dense you cannot see through them* — over-developed, too much contrast. Print on a softer grade.
*Highlights barely darker than the mid tones* — under-developed, flat. Print on a harder grade.
**The newsprint test.** A well-exposed, well-developed 35 mm negative should let you just about read newsprint through its densest area. It is a crude test and it is remarkably good.
**Look at the clear film outside the frame too.** It should be nearly transparent with a slight base tint; if it is visibly grey, the film was fogged.
Materiały do tego kroku:
 Błona fotograficzna1 sztuka
Potrzebne narzędzia:
 Lupa zegarmistrzowska
2
2
The four combinations
The four combinations
Because exposure and development are independent, there are four cases and each has a different fix.
**Thin and flat** — under-exposed and under-developed. The worst case: there is nothing there to print. More exposure AND more development.
**Thin and contrasty** — under-exposed and over-developed. Empty shadows with blocked highlights. This is what pushing does, and it is why pushing is a compromise rather than a free speed increase. More exposure, less development.
**Dense and flat** — over-exposed and under-developed. Printable, grainy, dull. Less exposure, more development.
**Dense and contrasty** — over-exposed and over-developed. Blocked highlights over usable shadows. Less of both.
**The one to aim for** is a negative that just barely has detail in the important shadows and highlights you can see through. It will look disappointingly thin and low in contrast held up to a window, and it will print beautifully — a negative that looks impressive is usually over-developed.
Write the diagnosis on the sleeve with the roll's log. Two rolls with the same diagnosis is a systematic error; one is an accident.
Materiały do tego kroku:
Błona fotograficzna2 sztukPotrzebne narzędzia:
Lupa zegarmistrzowska3
3
Marks, and what each one means
Marks, and what each one means
**Completely clear film, no frames, no edge markings at all** — the film never went through the camera, or was never developed. Check whether the edge printing is there: if it is, the camera never exposed it; if it is not, the developer did not work.
**Completely black film** — fogged to daylight, usually opened before fixing.
**Clear crescents** — the film was kinked, which cracks the emulsion. Handling damage, usually while loading the reel.
**Streaks running down from dense areas** — bromide drag from too little agitation.
**A clear blotch with a hard edge** — two turns of film touched in the reel, so no developer reached that spot.
**Small round clear spots** — air bubbles that stuck to the emulsion. Tap the tank after each agitation.
**Milky overall haze** — under-fixed. Re-fix it in fresh fixer and wash again; this one is genuinely recoverable.
**Fine crazing over the whole frame** — reticulation, from a large temperature difference between baths.
**A red or purple cast to the base** — the anti-halation layer did not wash out. More washing.
**Dense streaks from the sprocket holes inwards** — too much agitation, surging developer through the holes.
Materiały do tego kroku:
Błona fotograficzna2 sztukPotrzebne narzędzia:
Lupa zegarmistrzowska4
4
The contact sheet, which is the real reading tool
The contact sheet, which is the real reading tool
A **contact sheet** is the whole roll printed at once, in contact with the paper, at one exposure. It is the fastest way to read a roll and the only way to compare frames honestly.
**Make it at a standard exposure** — the one that just barely renders the clear film between the frames as full black. That is a fixed reference: at that setting, a frame that prints too dark is a thin negative and a frame that prints too light is a dense one, and the whole roll can be read at a glance.
Finding that exposure is a test strip on a scrap of clear developed film, done once for a given paper and enlarger height and then written on the wall.
**Keep it with the negatives.** A sleeve of negatives with its contact sheet is a usable archive; a sleeve without one is a box that never gets opened.
**Mark it up.** Ring the frames worth printing, note the crop, note the areas that will need holding back. That marked sheet is the plan for a printing session, and it turns an afternoon of guessing into an afternoon of printing.
This is also where a roll's log finally pays: frame by frame, the settings against the result, in one view.
Materiały do tego kroku:
 Papier fotograficzny (wielogradacyjny)1 sztukaBłona fotograficzna1 sztuka
Potrzebne narzędzia:
 Powiększalnik ciemniowy (średni format)
 Lampa ciemniowa (bursztynowa, LED)
 Zestaw szczypiec ciemniowych
Materiały
2- 2 sztukZastępnik
- Zastępnik
Wymagane narzędzia
4- Zastępnik
- Zastępnik
- Zastępnik
Powiązane blueprinty
Te blueprinty dzielą się wiedzą — technikami, materiałami lub zasadami

CC0 Domena publiczna
Ten plan jest udostępniany na licencji CC0. Możesz go swobodnie kopiować, modyfikować, rozpowszechniać i wykorzystywać do dowolnych celów, bez konieczności uzyskiwania zgody.
Wesprzyj Makera kupując produkty przez jego plan, za co zarabia Prowizja Makera ustalony przez sprzedawców, lub stwórz nową iterację tego planu i dołącz go jako połączenie w swoim własnym planie, aby dzielić się przychodami.