SZTUKA
Piękno i dobre samopoczucie
RZEMIOSŁO
KULTURA I HISTORIA
ROZRYWKA
ŚRODOWISKO
JEDZENIE I NAPOJE
INŻYNIERIA ODWROTNA
NAUKI
LEKKOATLETYKA
TECHNOLOGIA
URZĄDZENIA DO NOSZENIA
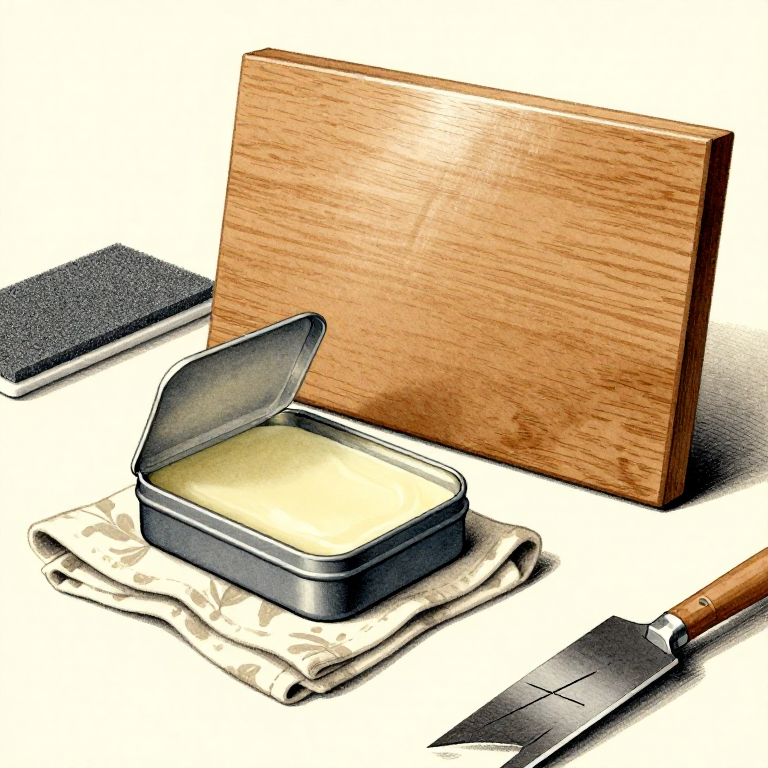


Wax and Rubbing Out: The Last Step That Makes It Feel Right
Wax is not really a finish. It offers almost no protection and it washes off. What it does is change how a surface FEELS and how light comes off it, and that is worth a great deal on a piece people will touch.
Put it over something else — over oil, over shellac, over cured varnish — and it is the last five per cent that makes work feel finished rather than merely coated.
RUBBING OUT is the related idea: deliberately abrading a cured film to the sheen you want instead of hoping the last coat lands perfectly. Together they are how a finish stops being a coating and becomes a surface.
Średniozaawansowany
3 hours
Instrukcje
1
1
Thin, and buff it before it hardens
Thin, and buff it before it hardens
Put paste wax on sparingly with a cloth, let the solvent flash off for a few minutes until it hazes, then buff hard with a clean cloth.
Timing is the whole technique. Buff too soon and you are just smearing it around; leave it too long and it sets hard and is genuinely difficult to remove. The window is usually a few minutes and it shortens in a warm room.
Thin is essential. Thick wax never buffs to a proper shine, it stays soft and collects dirt, and it shows every fingerprint. One light application well buffed beats three heavy ones, and a second coat the next day is how you build a deeper sheen.
Materiały do tego kroku:
 Wosk w paście1 sztuka
 Wosk pszczeli1 sztuka
Potrzebne narzędzia:
 Tkanina bawełniana
 Rękawice nitrylowe
2
2
Wax goes on top of things, and nothing goes on top of wax
Wax goes on top of things, and nothing goes on top of wax
Nothing sticks to wax. That is the single most important fact about it: once a surface is waxed, no finish will bond to it until every trace has been removed with solvent.
So wax is always LAST. If there is any chance of another coat, or of a repair, or of gluing something to that surface later, wax after those and not before. This catches people out constantly in repairs — the old wax is invisible and the new finish simply will not take.
It also means waxing a surface that will be glued is a mistake you cannot see until the joint fails. Keep wax away from anything that is not finished work, and keep the waxing rag away from the glue bench.
Materiały do tego kroku:
Wosk w paście1 sztuka Benzyna lakowa1 sztuka
Potrzebne narzędzia:
Tkanina bawełniana Lupa zegarmistrzowska
3
3
Rubbing out: choose the sheen instead of hoping for it
Rubbing out: choose the sheen instead of hoping for it
Let a film finish cure fully — days, not hours — then abrade it to the sheen you want. Fine abrasive or a grey pad with a little soapy water or mineral spirits as a lubricant gives a soft even satin; progressively finer grades and then a polishing compound give gloss.
This is how a professional-looking finish is actually achieved. The last coat is never perfect — there is always a nib, a slight orange peel, a tiny run — and rubbing out removes all of it and replaces the uneven surface with a uniform one.
Keep the pad flat and stay off the edges and corners, where the film is thinnest. Work along the grain so any remaining scratch pattern reads as texture rather than as damage.
Materiały do tego kroku:
 Zestaw padów Scotch-Brite1 sztuka
 Wełna stalowa1 sztukaBenzyna lakowa1 sztuka
Potrzebne narzędzia:
 Zestaw klocków szlifierskich (pianka)Tkanina bawełnianaLupa zegarmistrzowska
4
4
Maintaining it, and not building up layers of old wax
Maintaining it, and not building up layers of old wax
A waxed surface is renewed by cleaning and re-waxing, not by adding more wax on top. Layer over layer and the surface goes cloudy, sticky and grey — which is what most neglected antique furniture actually has on it.
Clean with a cloth barely damp with mineral spirits first. That lifts the old wax and the dirt held in it, and the surface underneath usually looks dramatically better before any new wax goes on.
Then one thin coat, well buffed. Once or twice a year is plenty for furniture. Steel wool leaves fragments that rust if the surface ever gets damp, so use a synthetic pad instead on anything that might — and never steel wool on oak, where the tannin reacts with iron and stains it blue-black.
Materiały do tego kroku:
Wosk w paście1 sztukaBenzyna lakowa1 sztukaZestaw padów Scotch-Brite1 sztukaPotrzebne narzędzia:
Tkanina bawełnianaRękawice nitryloweMateriały
5- 3 sztukZastępnik
- 1 sztukaZastępnik
- 3 sztukZastępnik
- Zestaw padów Scotch-Brite10% prowizji1 sztukaZastępnik
- 1 sztukaZastępnik
Powiązane blueprinty
Te blueprinty dzielą się wiedzą — technikami, materiałami lub zasadami

CC0 Domena publiczna
Ten plan jest udostępniany na licencji CC0. Możesz go swobodnie kopiować, modyfikować, rozpowszechniać i wykorzystywać do dowolnych celów, bez konieczności uzyskiwania zgody.
Wesprzyj Makera kupując produkty przez jego plan, za co zarabia Prowizja Makera ustalony przez sprzedawców, lub stwórz nową iterację tego planu i dołącz go jako połączenie w swoim własnym planie, aby dzielić się przychodami.