Building a Roman Sewer (Cloaca) — Underground Drainage That Made Cities Liveable
The Romans did not invent sewers, but they built them at a scale and sophistication unmatched until the 19th century. The Cloaca Maxima — the Great Drain of Rome — was originally built around 600 BCE under the Etruscan kings to drain the marshy valleys between Rome's hills. Enlarged and roofed over by Roman engineers around 33 BCE, it discharged into the Tiber through a magnificent stone arch 4.5 metres wide. That same Cloaca Maxima still functions today, still draining rainwater from the Roman Forum area — over 2,600 years of continuous operation.
Roman sewer engineering solved two problems simultaneously: stormwater drainage and foul-water removal. City-scale sanitation was made possible by the combination of the aqueduct system (which brought clean water in) and the cloaca system (which carried waste water out). Every public bath, fountain, and latrina (public toilet) was fed by aqueduct water that, after use, flushed through channels leading to the main sewer. The constant flow of water through the system acted as a self-flushing mechanism — Roman sewers worked without pumping because aqueduct pressure and gravity drove a continuous stream through the channels.
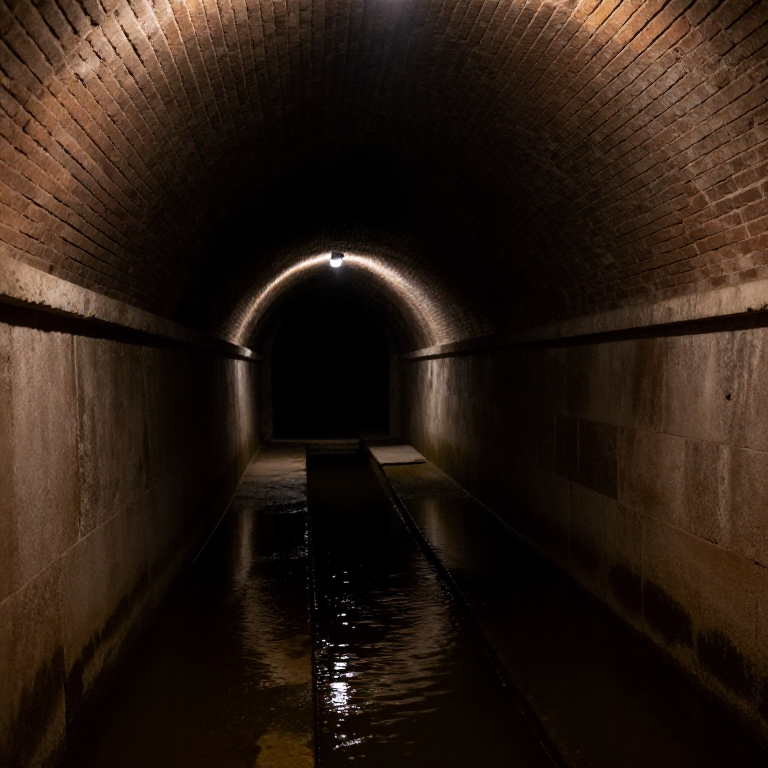
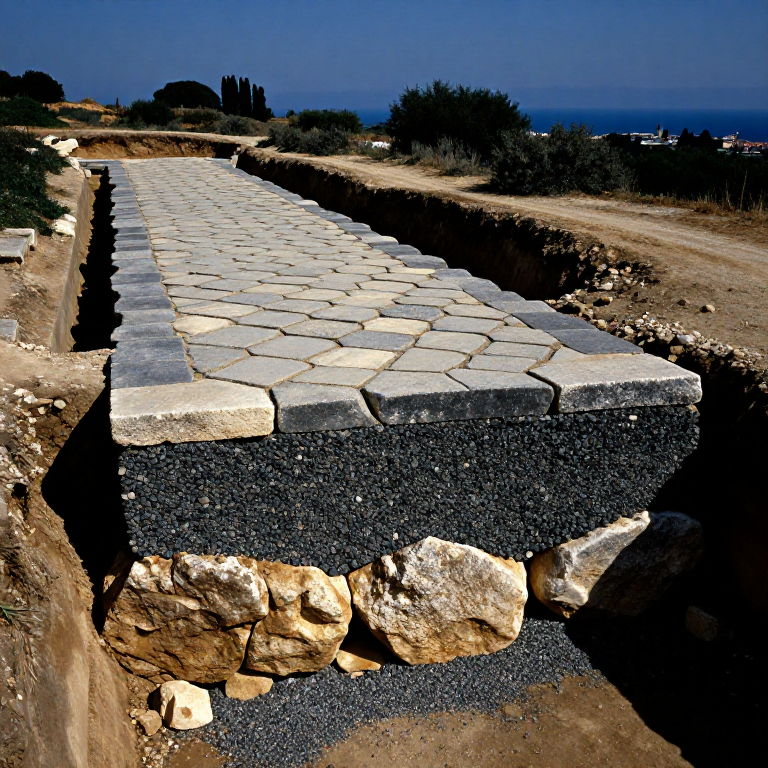
The fundamental engineering of a Roman sewer is an arched tunnel built of cut stone and Roman concrete, with a channel in the floor, all laid to a constant downhill gradient. The arch distributes earth pressure from the soil above around the tunnel walls, preventing collapse. The gradient — typically 1:150 to 1:500 — is shallow enough to be achievable in flat urban terrain but steep enough to maintain a flow velocity of at least 0.5 m/s, preventing sediment from settling and blocking the channel.
Инструкции
Survey the route and establish the gradient
Survey the route and establish the gradient
Use a chorobates — a Roman levelling instrument consisting of a 6-metre horizontal plank with a water-filled groove on top — to establish the elevation difference between the sewer's start and its outfall. The sewer must fall continuously toward the outfall (typically a river or watercourse) at a gradient of between 1:150 (steep) and 1:500 (minimum). Calculate the total drop needed: for a 100-metre sewer run at 1:200 gradient, the outfall is 0.5 metres lower than the inlet. Mark the alignment with stakes at 5-metre intervals, each with the ground-level cut height marked so that all the excavation achieves the correct grade.
Материалы для этого шага:
 Hemp Cord30 метров
Excavate the sewer trench to the correct depth and grade
Excavate the sewer trench to the correct depth and grade
Dig the trench to a width of at least 2 metres (to allow workers to construct the arch inside) and to a depth that places the floor of the finished sewer approximately 1.5–2 metres below street level — deep enough to receive gravity connections from buildings above, and deep enough that the earth cover protects the structure from surface loads. Check the gradient continuously as you dig using boning rods — three identical vertical posts that appear aligned when the ground surface is at the correct gradient. All excavated soil must be removed from the trench sides; any collapse of the trench walls during construction can be lethal.
Необходимые инструменты:
 Shovel
Lay the concrete foundation slab
Lay the concrete foundation slab
Pour a 15–20 cm thick concrete foundation slab along the bottom of the trench at the correct gradient. Use opus caementicium — pozzolanic lime mortar mixed with aggregate — tamped and levelled with a straight board. This slab distributes the weight of the arch above onto the trench floor and provides a working surface. Allow the foundation to cure for at least 7 days before beginning the arch walls. Embed a shallow V-shaped channel (the cloaca channel, approximately 30 cm wide and 15 cm deep) along the centreline of the foundation slab, using a shaped wooden former that is removed after the concrete stiffens.
Материалы для этого шага:
 Calcium Carbonate (Crushed Limestone)40 кг
 Coarse Sand30 кг
Build the side walls (haunches) in stone and concrete
Build the side walls (haunches) in stone and concrete
Build vertical masonry walls on each side of the foundation slab to the height of the arch spring line. Use cut stone blocks laid in opus incertum (irregular) or opus reticulatum (diamond-pattern) facing, with concrete fill behind. The wall thickness should be at least 0.5 metres — the arch will push outward (thrust) at the spring line, and this mass of walling must resist that thrust without sliding. Ensure both walls are at exactly the same height by checking with the chorobates level at every course. Any difference in spring-line height produces an asymmetric arch that will crack on one side under load.
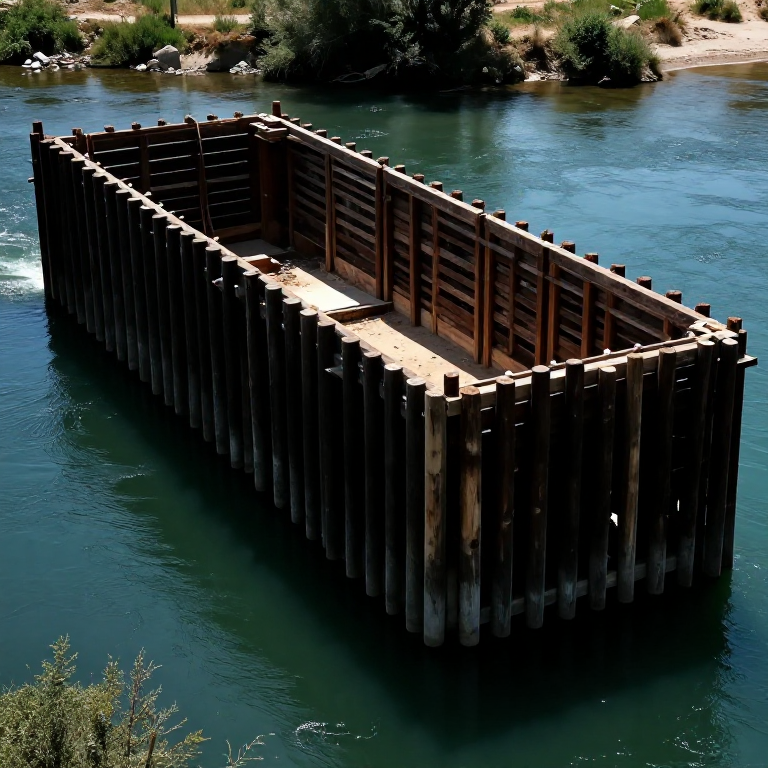
Build the timber centring for the tunnel arch
Build the timber centring for the tunnel arch
Cut curved timber ribs from hardwood plank, each shaped to the exact interior curve of the arch — typically a semicircle with a radius of 0.5–1 metre for a sewer tunnel. Erect the ribs at 60 cm intervals along the trench, braced against the side walls with horizontal struts. Cover the ribs with close-jointed planks (lagging) to form a smooth shuttering surface for the concrete arch. Coat all surfaces with tallow or wet clay to prevent adhesion. The centring must carry the full wet weight of the arch concrete without deflecting — test by loading the central rib with sandbags before placing any concrete.
Материалы для этого шага:
 Hardwood Block15 штук
 Iron Nails80 штук
Необходимые инструменты:
 Hand Saw
Lay the arch voussoirs from both sides simultaneously
Lay the arch voussoirs from both sides simultaneously
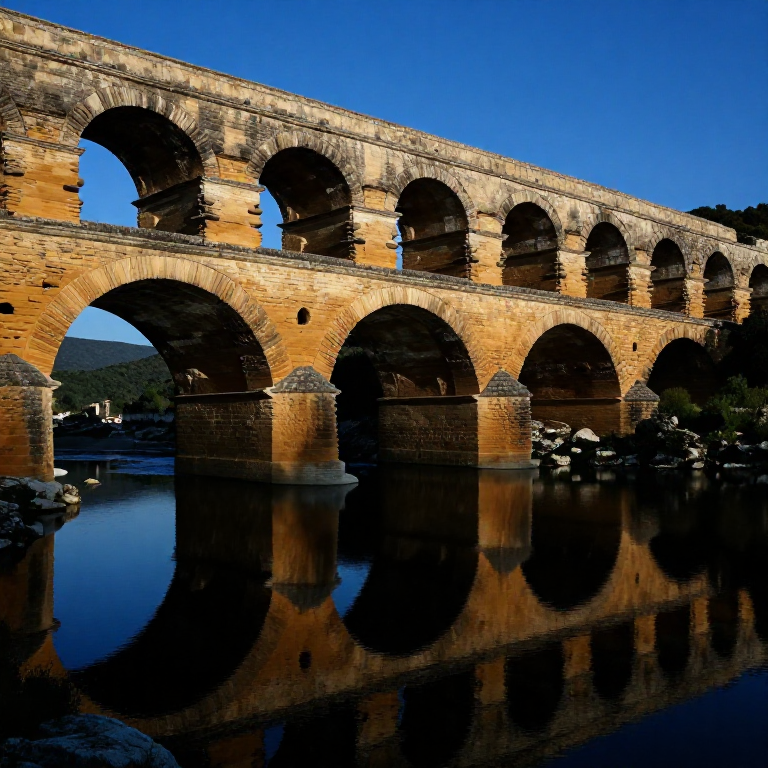
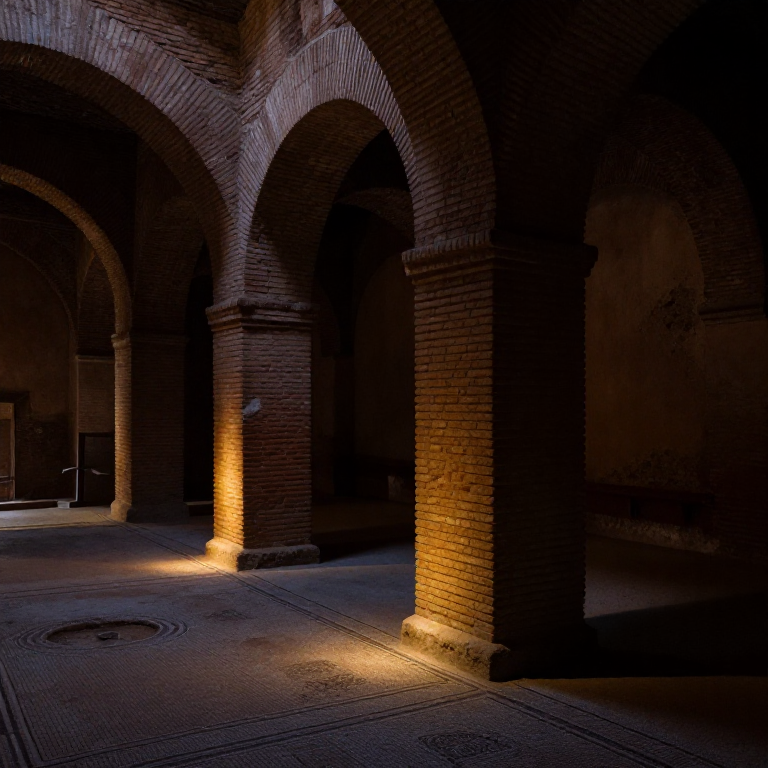
Build the barrel vault arch by placing cut stone voussoirs (wedge-shaped blocks) on the centring from both sides toward the crown, keeping the two sides at equal heights at all times. Each voussoir is bedded in mortar and lightly tapped into position. A semicircular arch of 1-metre radius would use voussoirs approximately 20 cm wide × 30 cm tall × 40 cm deep. The keystone — the central voussoir at the crown — locks the arch in compression when placed last. Once the keystone is set, the arch is self-supporting and all the arch forces flow through compression in the stone. Fill the haunches (the triangular spaces between the arch sides and the walls below) with concrete to prevent the arch from spreading laterally.
Apply hydraulic waterproofing render (opus signinum) to all interior surfaces
Apply hydraulic waterproofing render (opus signinum) to all interior surfaces
Coat all interior surfaces of the sewer — floor, walls, and arch soffit — with opus signinum: a hydraulic render made from slaked lime mixed with crushed terra cotta pottery and brick dust at approximately 1 part lime to 2 parts brick dust. This mortar is water-resistant because the reactive silica in the fired clay particles undergoes the same pozzolanic reaction as volcanic ash. Apply in two coats: a 15 mm base coat pressed firmly into any voids, then after curing for 5 days, a smooth 5 mm finish coat. Round off all internal corners with a thick cove fillet (a curved mortar fillet in the corner) — sharp corners concentrate water turbulence and erosion. The Cloaca Maxima's interior opus signinum lining is still intact after 2,000+ years.
Strike the arch centring after 14 days of curing
Strike the arch centring after 14 days of curing
After the arch mortar has cured for at least 14 days, carefully lower and remove the wooden centring. Lower it gradually (using sand-box supports that drain slowly) rather than knocking it out suddenly. Watch the arch during lowering for any cracking sounds or visible movement — if a crack appears, stop and investigate before proceeding. Once the centring is clear, the arch should be visibly rigid and carrying its own weight. The mortar will continue to harden over years as the pozzolanic reaction progresses — Roman concrete is unusual in that it strengthens with age rather than degrading.
Install connection junctions for building drainage
Install connection junctions for building drainage
At planned connection points (matching the locations of building latrinae, kitchen drains, and public fountains above), cut or cast junction openings in the sewer wall at an angle of 45 degrees to the main flow direction — angling downstream prevents backflow into connecting drains. The junction pipe diameter should be one-third to one-half the main tunnel diameter. Roman connection pipes were typically ceramic (terra cotta) or lead — press-fit into the masonry with mortar. Each junction must be sealed watertight around the connection entry point to prevent soil water from infiltrating the sewer.
Backfill the trench in compacted layers
Backfill the trench in compacted layers
Backfill the trench over the completed arch in layers of 20 cm, compacting each layer by ramming with a heavy wooden post before adding the next. Do not tip material directly onto the arch crown — fill both sides simultaneously and evenly to prevent unequal lateral earth pressure. Use the original excavated material for backfill, excluding large stones that could punch through the arch concrete. Bring the backfill to the level of the surrounding ground surface and leave it slightly mounded to allow for settlement. The soil cover provides thermal insulation and additional compressive load that actually improves the arch's stability (earth arching over the tunnel).
Build the outfall structure at the river or watercourse
Build the outfall structure at the river or watercourse
At the downstream end, build a stone-faced outfall portal where the sewer discharges. The outfall arch should be slightly larger than the tunnel bore, framed in carefully cut stone voussoirs and keyed into the bank. Set the outfall invert (floor level) at least 0.5 metres above the normal river high-water level to prevent backflow flooding the sewer during river floods. Many Roman sewer outfalls incorporated a flap valve — a hinged stone or bronze disc that gravity-closes when river water rises against it. The Cloaca Maxima's outfall arch into the Tiber is still visible in Rome today at the Ponte Palatino.
Test the completed sewer with a flushing flow
Test the completed sewer with a flushing flow
Before connecting any building drains, test the sewer with a controlled flush of clean water — divert a temporary aqueduct supply or use buckets to send water through the entire length. Walk or crawl the tunnel length (using a torch for illumination) to inspect for leaks, low spots where water pools, and inadequate gradient. Any pool of standing water indicates a gradient error or a sag in the invert — excavate and re-lay that section. The target is a clear, fast-flowing stream of water from inlet to outfall with no pooling. A well-graded sewer will be largely self-cleaning for centuries with only occasional manual removal of accumulated sediment.
Материалы
5- Заполнитель
- Заполнитель
- 15 штукЗаполнитель
- 80 штукЗаполнитель
Материалы из связанных чертежей
Связанные чертежи
Эти чертежи делятся знаниями — техники, материалы или принципы
Related blueprints
Other builds that share materials, tools, or techniques with this one.

CC0 Общественное достояние
Этот чертёж выпущен под лицензией CC0. Вы можете свободно копировать, изменять, распространять и использовать эту работу в любых целях без запроса разрешения.
Поддержите мейкера, покупая товары через его чертёж, где он получает Комиссию мейкера установленную продавцами, или создайте новую итерацию этого чертежа и включите его как связь в свой чертёж для распределения дохода.