ИСКУССТВО
КРАСОТА И ЗДОРОВЬЕ
РЕМЕСЛО
КУЛЬТУРА И ИСТОРИЯ
РАЗВЛЕЧЕНИЯ
ЭКОЛОГИЯ
ЕДА И НАПИТКИ
ОБРАТНАЯ ИНЖЕНЕРИЯ
НАУКИ
СПОРТ
ТЕХНОЛОГИИ
НОСИМЫЕ УСТРОЙСТВА
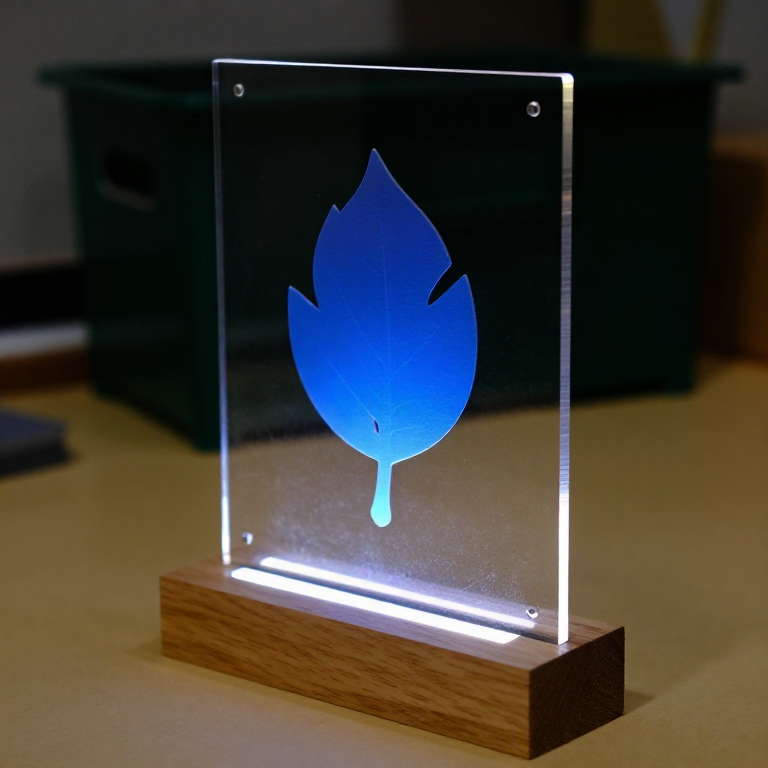


Cast Acrylic Sheet
Otto Röhm had worked on acrylic chemistry since his 1901 doctorate. His firm first used polymethacrylate as the sticky middle layer of laminated safety glass - and noticed that the polymer came away from the glass plates cleanly, leaving a clear sheet as smooth as the glass. Sold from 1933 as Plexiglas, the sheet went into aircraft canopies within the decade.
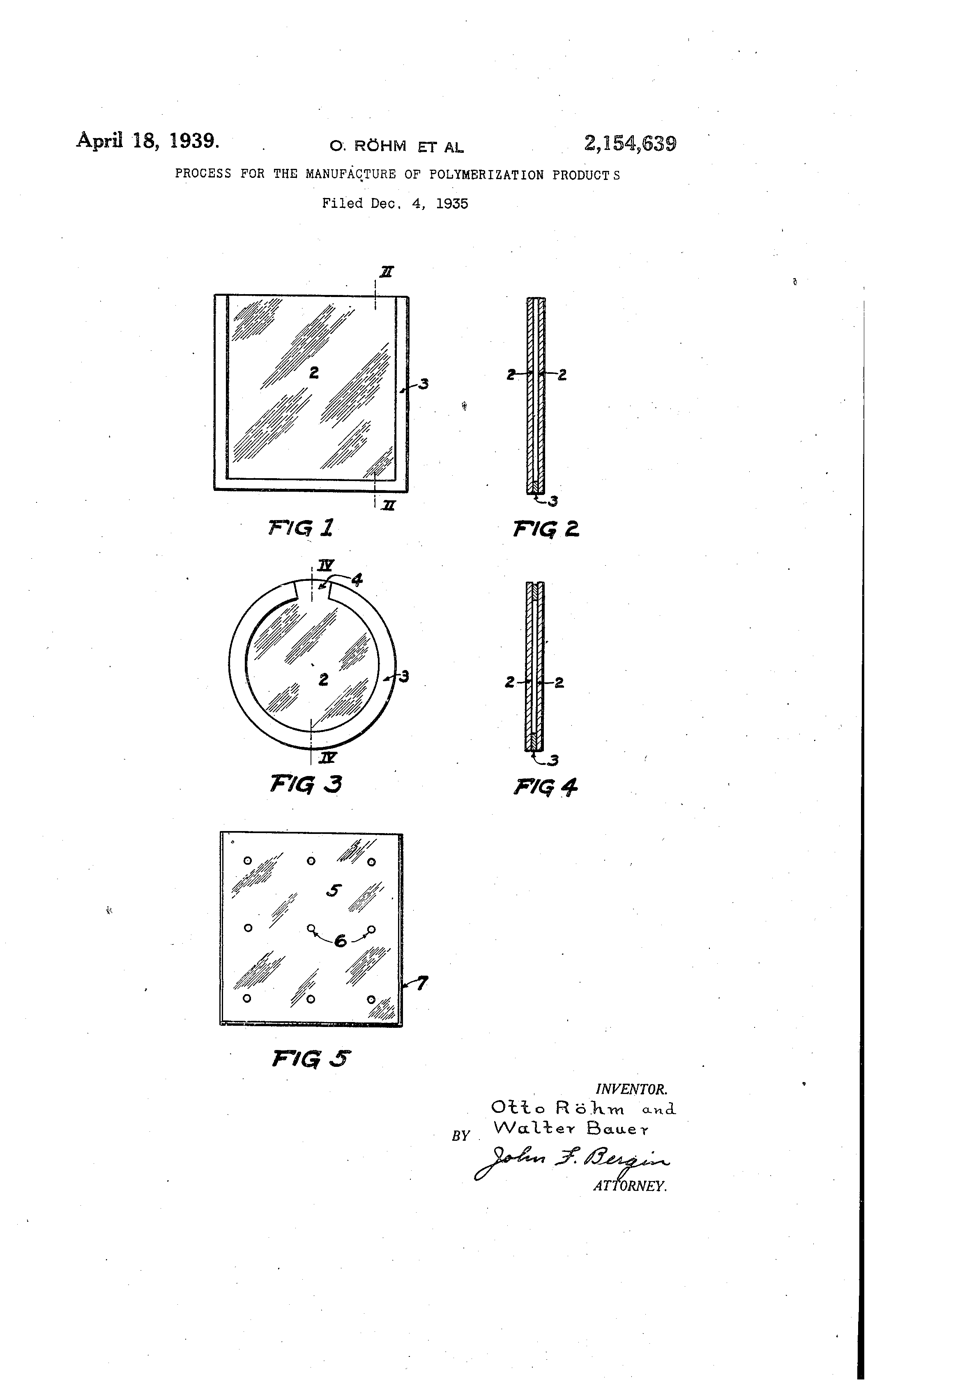
**US 2,154,639**, "Process for the manufacture of polymerization products", Röhm and Bauer, assigned to Röhm & Haas, filed 4. December 1935, granted 18. April 1939: methacrylic esters polymerised between sheets of glass and then separated from them, for "glass substitutes" whose faces are "as highly polished as the surfaces of the glass itself".
**You use that polish**: an edge-lit sign whose engraving glows while the smooth faces stay dark, and two heat-bent offcuts that show how tight a bend the light survives.
Начинающий
3 hours
Инструкции
1
1
Cut the panel
Cut the panel
Keep the protective film on. Score 3 mm cast acrylic 200 x 120 mm with the utility knife against a ruler, 8 to 10 passes, then snap it over the bench edge. Cut two 100 x 30 mm offcuts the same way.
Необходимые инструменты:
 Строительный нож
 Линейка
 Прозрачные защитные очки
 Акриловый лист
2
2
Polish the light edge
Polish the light edge
Sand the 120 mm bottom edge flat, then run the Micro-Mesh grits in order until it is clear. Light enters here; a frosted edge scatters it at the door.
Необходимые инструменты:
 Набор для шлифовки микросеткой (9 зернистостей)
3
3
Engrave the back
Engrave the back
Peel the back film. Draw your design on paper, tape it under the sheet, and trace it with the engraving point at medium speed, light pressure.
Необходимые инструменты:
 Ротационный инструмент (типа Dremel)
 ШтихельПрозрачные защитные очки
4
4
Slot the base
Slot the base
Cut a pine block 160 x 60 x 40 mm. Saw two parallel kerfs 3.5 mm apart, 15 mm deep, along its length and chisel out between them. Chisel a channel underneath for the LED strip to shine up into the slot.
Материалы для этого шага:
 Сосновая доска1 штука
Необходимые инструменты:
 Ножовка по дереву
 Набор стамесок по дереву
5
5
Light it
Light it
Strip 5V, GND and DIN to the Uno's 5V, GND and D6. Install the Adafruit NeoPixel library and upload. Stand the panel in the slot.
edge_lit_panel.inocpp
Материалы для этого шага:
 Светодиодная лента Neopixel1 штука
 Набор проводов Dupont (папа-мама)1 набор
Необходимые инструменты:
 Arduino Uno R3
 Кабель USB-B
6
6
Bend two offcuts
Bend two offcuts
Heat an offcut along a line on the strip heater, turning it over every 30 seconds, until it flexes. Bend it 90° round a 6 mm dowel and hold until cool. Bend the second round a 20 mm dowel.
Материалы для этого шага:
 Деревянный шкант1 штука
Необходимые инструменты:
 Полосовой нагреватель для акрила
 Сварочные перчатки
7
7
Trace the beam
Trace the beam
In a dim room shine the laser pointer into the end of each bent strip, never towards anyone's eyes. See where light escapes at the bend, and compare with the notebook.
Необходимые инструменты:
 Лазерная указка
8
8
Critical angle and bends
Critical angle and bends
Загрузка блокнота Jupyter…
9
9
History & Context
History & Context
**What the patent specifies:** methacrylic esters polymerised between glass sheets and separated, giving a glass substitute with glass-polished faces. **Modern build (derived):** commercial cast acrylic sheet, cut and heat-bent.
Cast sheet is still made between glass plates; cheaper extruded sheet came later and is softer and more prone to crazing. The limits: acrylic scratches, cracks if drilled carelessly, crazes when solvents or stress meet, and burns.
Материалы
4- 1 штукаЗаполнитель
- 1 штукаЗаполнитель
- Заполнитель
- 1 штукаЗаполнитель
Требуемые инструменты
14- Заполнитель
- Заполнитель
- Заполнитель
- Заполнитель
- Заполнитель
- Заполнитель
- Заполнитель
- Заполнитель
- 1 vendor sell this, none ship to you yetЗаполнитель
- 1 vendor sell this, none ship to you yetЗаполнитель
- Заполнитель
- Заполнитель
- Заполнитель
По этому чертежу делают

Связанные чертежи
Эти чертежи делятся знаниями — техники, материалы или принципы

CC0 Общественное достояние
Этот чертёж выпущен под лицензией CC0. Вы можете свободно копировать, изменять, распространять и использовать эту работу в любых целях без запроса разрешения.
Поддержите мейкера, покупая товары через его чертёж, где он получает Комиссию мейкера установленную продавцами, или создайте новую итерацию этого чертежа и включите его как связь в свой чертёж для распределения дохода.