Сотрудничество
ИСКУССТВО
КРАСОТА И ЗДОРОВЬЕ
РЕМЕСЛО
КУЛЬТУРА И ИСТОРИЯ
РАЗВЛЕЧЕНИЯ
ЭКОЛОГИЯ
ЕДА И НАПИТКИ
ОБРАТНАЯ ИНЖЕНЕРИЯ
НАУКИ
СПОРТ
ТЕХНОЛОГИИ
НОСИМЫЕ УСТРОЙСТВА
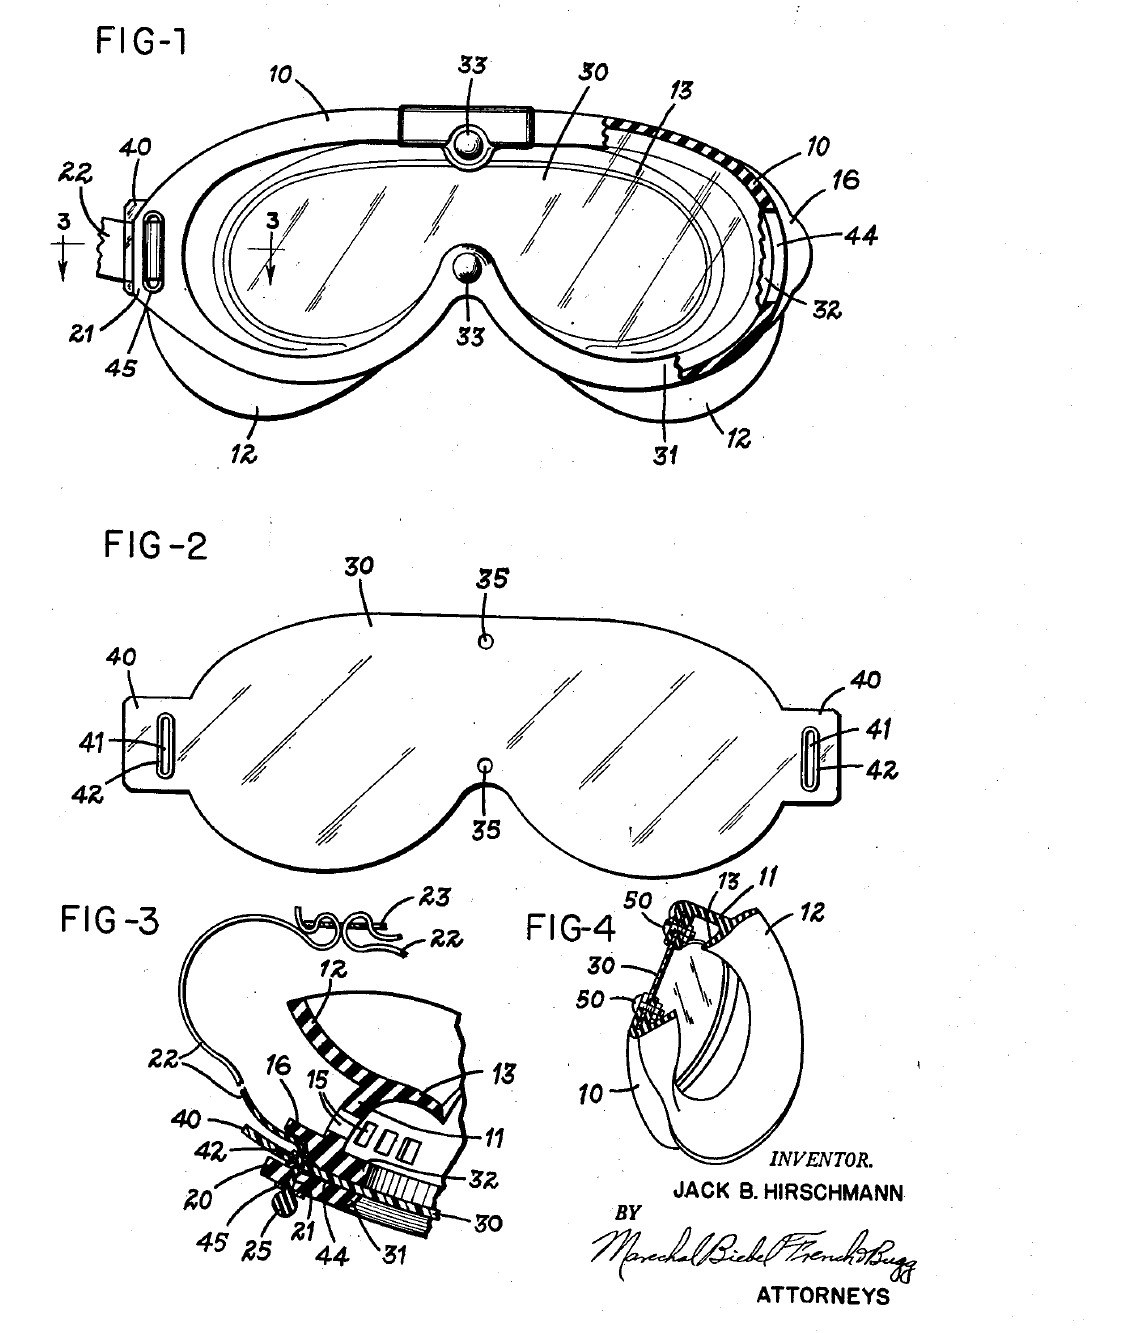


Chemical Splash Goggles: One Sealed Lens in a Moulded Rubber Frame (Hirschmann, 1954)
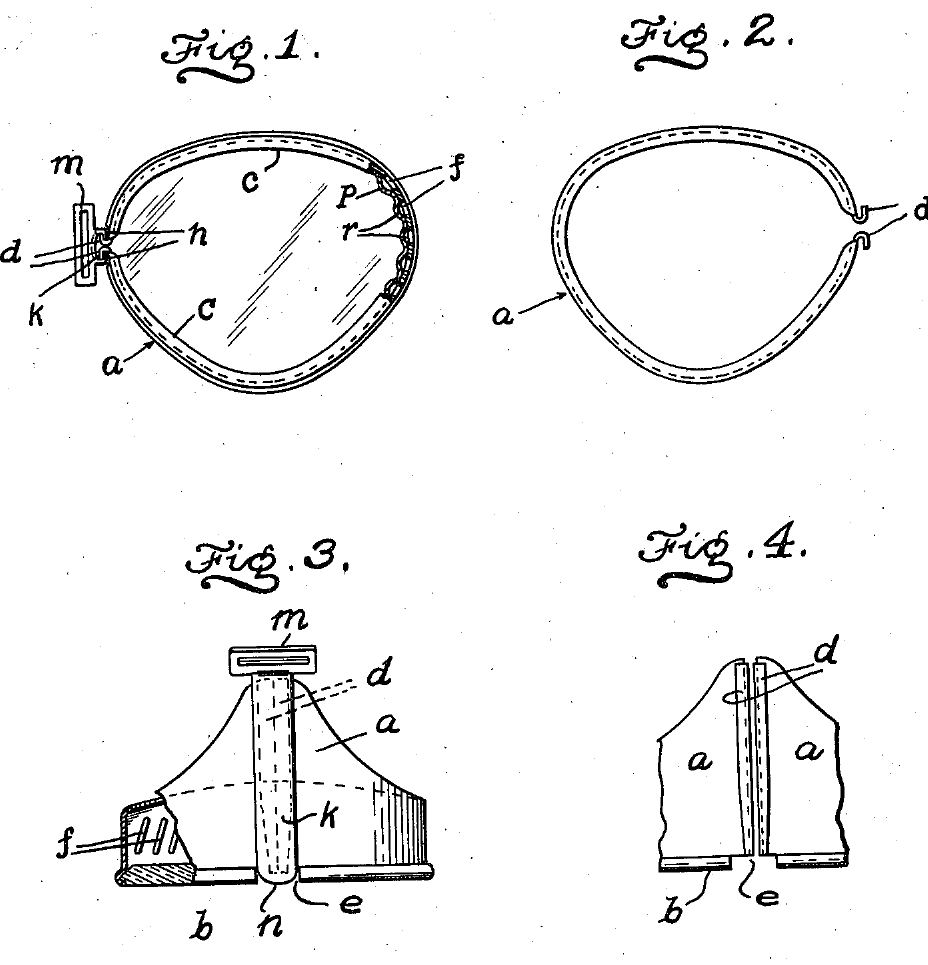
Goggles for work with corrosive liquids. One clear plastic lens covers both eyes and sits sealed all round in a soft moulded rubber frame that seals against the face. The version for gas and corrosive liquids has no vent holes at all, and the strap passes through tabs outside the lens, so nothing can leak through or around the part you look through.
Result: chemical splash goggles with a lens you can pull out and replace, and a strap pull shared evenly between lens and frame, so neither warps.
Source: J. B. Hirschmann, US Patent 2,680,846 (1954), Fig. 4 version. Unknown: sizes, the rubber compound, the strap material and how the frame is moulded. Ours: the mould; the patent tested a cellulose acetate lens. Picture: patent drawing.
Средний
2 days
Инструкции
1
1
Mould the rubber frame
Mould the rubber frame
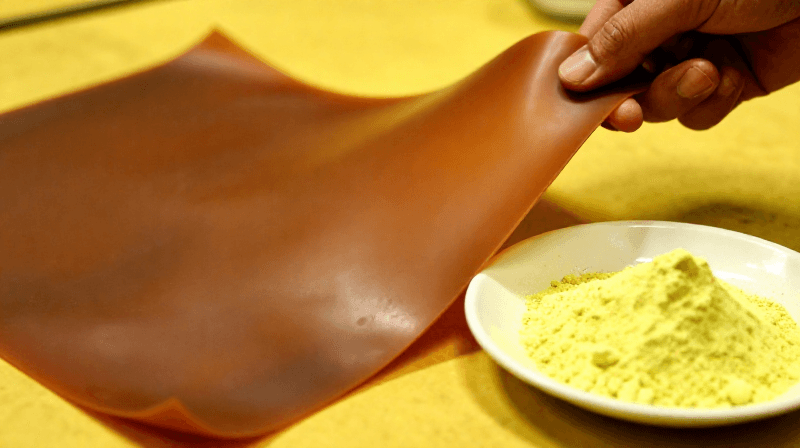
Mould the frame in one piece from rubber. The front rim has one opening shaped for both eyes, narrower above the nose. Behind it, a wall forms the eye chamber and ends in a double flange that seals against the face. Inside the rim, form a channel between an outer and an inner flange to hold the lens edge. At each end, mould a lug with a strap slot and a slit through the channel for the lens tab. For corrosive liquids, leave out all vent holes. Ours: a compression mould.
Материалы для этого шага:
 Резиновая смесь1 frame
Необходимые инструменты:
 Компрессионная пресс-форма
 Неизвестные размеры
2
2
Cut the lens
Cut the lens
Cut one lens from flexible clear plastic, shaped to match the rim. The patent tested cellulose acetate. Leave a tab at each end, outside the area you look through. Cut a closed slot in each tab and line it with a grommet. Make two holes at the centre for the bolts. Leave no other holes in the viewing area.
Материалы для этого шага:
 Прозрачный лист пластика1 lens
 Пистон2 tab grommets
Необходимые инструменты:
 Ножницы по металлу
 Кернер
3
3
Seal the lens in the frame
Seal the lens in the frame
Spring the lens edge into the channel all the way round, pushing each tab out through its slit so it lies under the lug, slot over slot. Fasten the centre with two stainless-steel bolts and nuts. (The vented version uses snap fasteners here.)
Материалы для этого шага:
 Машинные винты2 stainless steel
 Шестигранная гайка2 stainless steel
Необходимые инструменты:
 Набор отвёрток
4
4
Fit the head strap
Fit the head strap
Use a strap in two halves, joined at the back by a buckle, each half with a thickened end. Slide a slotted plate of metal or plastic onto each half, then thread it from the front through the lug slot and the lens-tab slot. The thick end stops against the plate and lug. The pull of the strap now goes into both lens and frame, holds the lens in, and stays outside the field of view.
Материалы для этого шага:
 Ремешок защитных очков1 two halves
 Латунная пряжка со шпеньком1 штука
 Неизвестный материал1 two slotted plates
Необходимые инструменты:
Неизвестные размерыМатериалы
8- 1 frameЗаполнитель
- 1 lensЗаполнитель
- 2 tab grommetsЗаполнитель
- 2 stainless steelЗаполнитель
- 2 stainless steelЗаполнитель
- 1 two halvesЗаполнитель
- 1 штукаЗаполнитель
- 1 two slotted platesЗаполнитель
Требуемые инструменты
5- Заполнитель
- Заполнитель
- Заполнитель
- Заполнитель
- Заполнитель
Материалы из связанных чертежей
По этому чертежу делают

Связанные чертежи
Эти чертежи делятся знаниями — техники, материалы или принципы

CC0 Общественное достояние
Этот чертёж выпущен под лицензией CC0. Вы можете свободно копировать, изменять, распространять и использовать эту работу в любых целях без запроса разрешения.
Поддержите мейкера, покупая товары через его чертёж, где он получает Комиссию мейкера установленную продавцами, или создайте новую итерацию этого чертежа и включите его как связь в свой чертёж для распределения дохода.