Mixing and Applying Shino Feldspar Glaze — Milky White Japanese Glaze
Инструкции
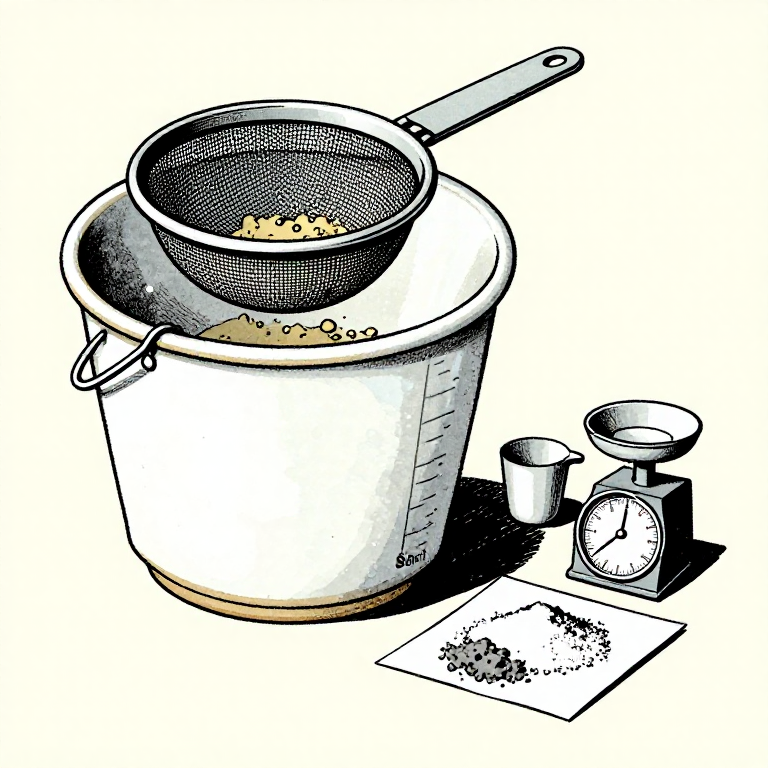
Weigh and Prepare Raw Materials
Weigh and Prepare Raw Materials
A basic Shino glaze recipe by dry weight is approximately 80% nepheline syenite (or soda feldspar), 10% unwashed hardwood ash, 5% kaolin, and 5% ball clay. Weigh each ingredient accurately on a scale. The feldspar provides the primary glass-forming flux; the wood ash contributes calcium and potassium that promote the milky opacity; the kaolin and ball clay add alumina for viscosity (preventing the glaze from running off the pot) and improve the glaze suspension in the bucket. Do not substitute potash feldspar for soda feldspar — the sodium in soda feldspar is critical for developing the characteristic Shino white opacity through phase separation during cooling.
Материалы для этого шага:
 Kaolin Clay50-100g г
 Ball Clay50g г
 Water400-500ml мл
Необходимые инструменты:
 Livestock Scale
 Hydrometer
Mix and Sieve the Glaze
Mix and Sieve the Glaze
Combine all dry ingredients in a bucket and add water gradually, stirring continuously. The target consistency is heavy cream — approximately 1.45-1.50 specific gravity. Pass the mixture through an 80-mesh sieve at least twice to remove lumps, unmixed powder, and coarse ash particles. Wood ash often contains charcoal fragments and calcium carbite chunks that must be screened out. Allow the glaze to slake (rest) for 24 hours if possible, then re-stir and sieve again before use. The clay content helps keep the heavier feldspar particles in suspension, but stir the bucket thoroughly before each dipping session.
Apply Glaze to Bisqueware
Apply Glaze to Bisqueware
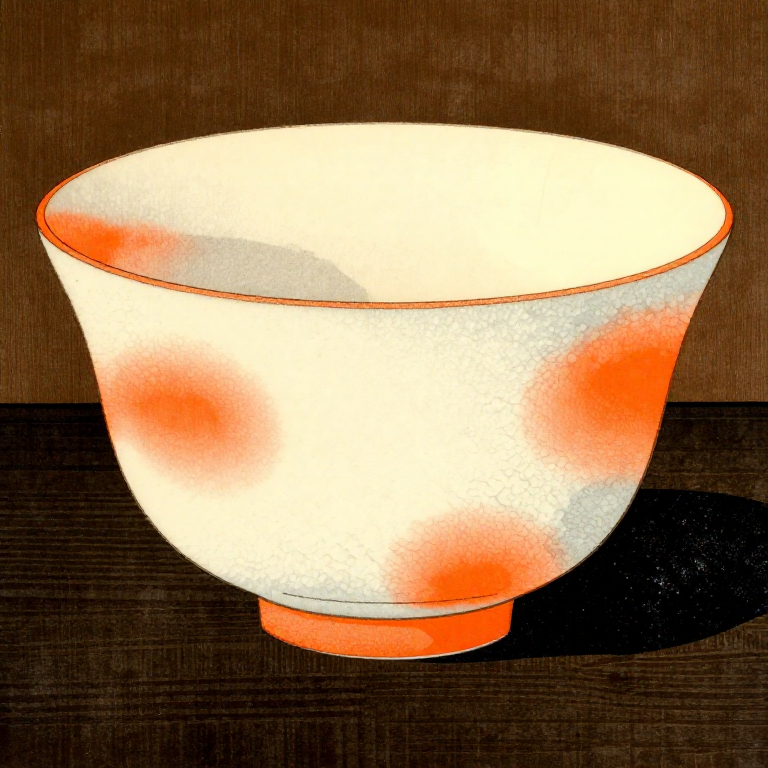
Shino glaze must be applied thickly — 2-3mm is typical, much thicker than most glazes. Dip bisque-fired ware into the glaze bucket and hold it submerged for 5-10 seconds, longer than usual, to build up a thick coat. For extra thickness, double-dip after the first coat dries. The thick application is essential: thin areas fire to a warm orange-red (hi-iro) because the iron in the clay body shows through, while thick areas fire white and opaque. This contrast between white and orange is the defining aesthetic of Shino ware. Leave the foot ring clean by waxing it before dipping, or wipe glaze from the bottom 5mm with a damp sponge to prevent the piece from sticking to the kiln shelf.
Fire to Cone 10 in Reduction
Fire to Cone 10 in Reduction
Load the glazed ware into a kiln capable of reaching cone 10 (approximately 1280-1300 degrees C). Shino glazes develop their best qualities in a reduction atmosphere — restrict the primary air to the burners at approximately 1000 degrees C and maintain moderate reduction (slight back-pressure, lazy yellow flame at the peepholes) through peak temperature. Heavy reduction causes Shino to turn grey; light reduction or oxidation produces a less interesting flat white. The firing cycle is typically 10-14 hours up, with a one-hour soak at peak temperature. Slow cooling is beneficial for Shino — it allows micro-crystallization that enhances the milky quality.
Evaluate the Fired Glaze Surface
Evaluate the Fired Glaze Surface
After the kiln cools (typically 24-48 hours), unload and inspect the pieces. A successful Shino glaze shows thick, creamy white areas (where the glaze was thickest) transitioning to warm orange blush (hi-iro) at edges, rims, and any thin spots. The surface often has tiny pinholes or crawled areas — these are considered desirable in the Japanese aesthetic as they add visual texture. If the glaze ran, it was applied too thick or the feldspar percentage was too high. If the surface is dry and rough, the kiln did not reach full temperature. Record your results and adjust the recipe: add more feldspar for more melt, more kaolin for more stiffness, or more ash for more orange blush.
Материалы
5- 500g штукаЗаполнитель
- 200g штукаЗаполнитель
- 50-100g штукаЗаполнитель
Требуемые инструменты
5- Заполнитель
- Заполнитель
- Заполнитель
- Заполнитель
Related blueprints
Other builds that share materials, tools, or techniques with this one.
CC0 Общественное достояние
Этот чертёж выпущен под лицензией CC0. Вы можете свободно копировать, изменять, распространять и использовать эту работу в любых целях без запроса разрешения.
Поддержите мейкера, покупая товары через его чертёж, где он получает Комиссию мейкера установленную продавцами, или создайте новую итерацию этого чертежа и включите его как связь в свой чертёж для распределения дохода.