Thatching a Roof with Wheat Straw — Medieval Roofing
Инструкции
Prepare Straw Bundles and Roof Battens
Prepare Straw Bundles and Roof Battens
Select long, straight wheat straw that has been threshed to remove the grain but not broken by mechanical processing — the stems must be intact and at least 60 to 90 cm long. Bundle the straw into yealms (loose bundles approximately 15 cm in diameter, laid with butt ends aligned). The roof structure must have horizontal battens (thin wooden laths) nailed across the rafters at intervals of approximately 25 to 30 cm from eaves to ridge. These battens provide the attachment points for securing the thatch. The roof pitch must be steep — at least 45 degrees, ideally 50 to 55 degrees — because thatch relies entirely on steep angle and tight layering to shed water rather than any waterproof membrane.
Материалы для этого шага:
Необходимые инструменты:
Lay the First Course at the Eaves
Lay the First Course at the Eaves
Begin at the eaves (bottom edge) of the roof. Lay the first yealm of straw with the butt (cut) ends projecting approximately 5 to 8 cm below the eaves batten, and the ear ends pointing up the roof slope. The butts form the visible outer surface of the finished thatch. Fix the yealm to the batten by driving a sharpened hazel spar through the straw and hooking it over the batten, or by tying with tarred twine. Lay subsequent yealms along the eaves, overlapping their edges by approximately 5 cm to create a continuous band. Press the straw down firmly with a leggatt (a flat wooden paddle with a ridged face) to compact it into a dense, even layer. The eaves course is the thickest part of the thatch — it may be 30 to 40 cm deep — because it receives the most runoff.

Layer Successive Courses Up the Roof
Layer Successive Courses Up the Roof
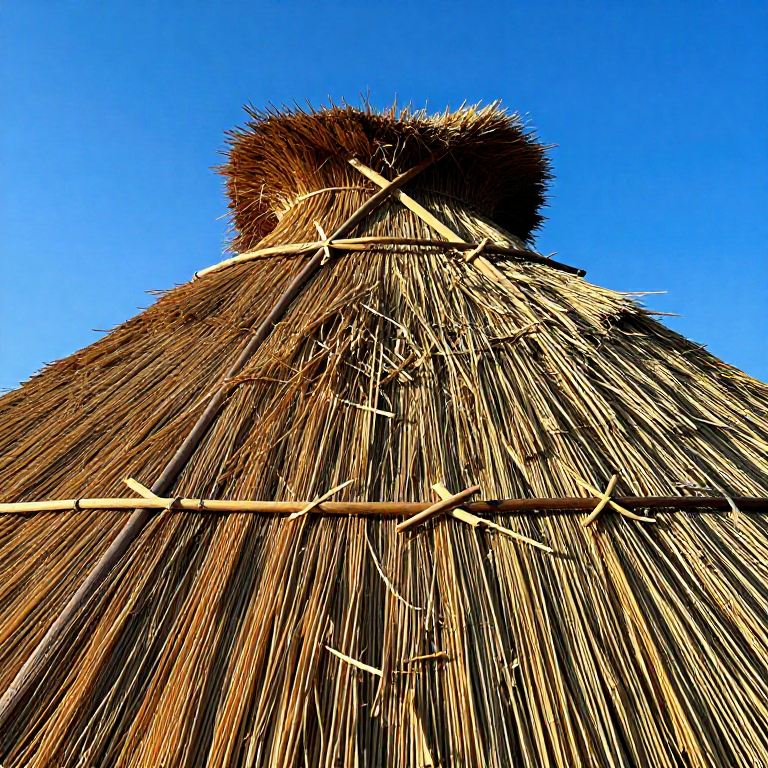
Working upward from the eaves, lay each successive course of yealms so that the butts of the upper course overlap the ear ends of the course below by at least two-thirds of the straw length. This deep overlap ensures that water running down the outer surface of the thatch encounters multiple layers before it could possibly reach the batten level. Secure each course with hazel spars and liggers (horizontal hazel rods laid across the thatch surface and pegged down with spars). Compact each course firmly with the leggatt before adding the next. The visible thickness of thatch at the surface should be approximately 25 to 30 cm, with each butt end exposed for only 15 to 20 cm before being covered by the next course. Continue layering up to within one course of the ridge.
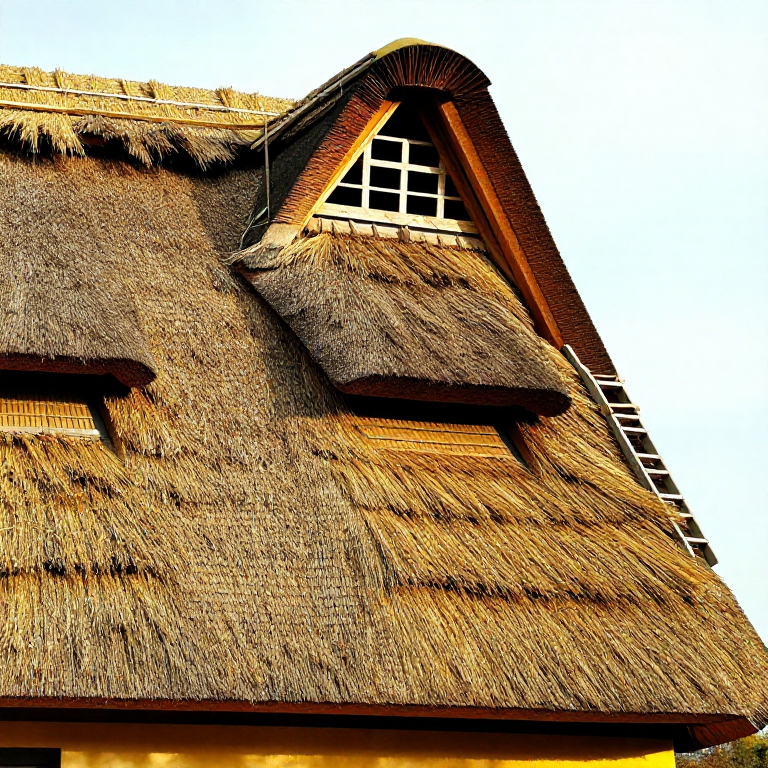
Form the Ridge
Form the Ridge
The ridge is the most vulnerable point of a thatched roof, as it must seal the junction between the two roof slopes. Lay the final courses from each side so they overlap at the ridge peak. The traditional ridge is formed by bending long yealms of straw over the ridge beam so they drape down both sides, securing them with a ridge-cap of tightly packed straw held in place with a decorated pattern of cross-spars and liggers. The ridge must be thick and tightly packed — it takes the most weather exposure and is typically the first part of a thatch that needs replacement, usually every 10 to 15 years even when the main thatch has decades of life remaining. In some regions, the ridge was finished with a decorative pattern woven from split hazel, adding both functionality and beauty.
Trim and Dress the Finished Thatch
Trim and Dress the Finished Thatch
Once all courses are laid and the ridge is complete, dress the entire roof surface with the leggatt, working from eaves to ridge, to compact and align the straw into a smooth, uniform surface. Trim the eaves and gable edges with a shearing hook or sharp knife to a clean, even line. The finished thatch should present a smooth, dense surface with all straw butts lying at the same angle. A well-thatched roof sheds water entirely on its outer surface — rain runs from straw to straw down the steep pitch without penetrating more than 2 to 3 cm into the thatch depth. The air trapped within the straw provides excellent thermal insulation — significantly better than slate or tile. A new wheat straw thatch will last 25 to 40 years depending on climate, pitch, and exposure, with the ridge requiring more frequent renewal.
Материалы
4- Long wheat straw (threshed but not broken, 60-90 cm stems)large quantity — approx. 1 tonne per 10 sq m of roof штука
- Hazel or willow spars (split rods, sharpened, 60-70 cm long)hundreds штука
- Liggers (horizontal rods, hazel, 1.5-2 m long)dozens штука
- Tarred twine or hemp cordlarge ball штука
Требуемые инструменты
4- Leggatt (flat wooden paddle for dressing straw)
- Shearing hook or knife for trimming
- Eaves hook (for tucking straw)
- Ladder and scaffold
Related blueprints
Other builds that share materials, tools, or techniques with this one.

CC0 Общественное достояние
Этот чертёж выпущен под лицензией CC0. Вы можете свободно копировать, изменять, распространять и использовать эту работу в любых целях без запроса разрешения.
Поддержите мейкера, покупая товары через его чертёж, где он получает Комиссию мейкера установленную продавцами, или создайте новую итерацию этого чертежа и включите его как связь в свой чертёж для распределения дохода.