
Raccolta dell'Argilla Toscana — Dalla Terra alla Massa Ceramica
Инструкции
Capire cos'e l'argilla toscana
Capire cos'e l'argilla toscana
L'argilla e un silicato di alluminio idrato formatosi dalla decomposizione dei feldspati per azione degli agenti atmosferici nel corso di milioni di anni. In Toscana, l'argilla e particolarmente ricca di ossidi di ferro (Fe2O3), che le conferiscono il caratteristico colore rosso-arancione dopo la cottura. Le particelle argillose hanno un diametro inferiore a 0,002 mm. L'argilla toscana e stata utilizzata fin dal periodo etrusco (VIII-I secolo a.C.) per la produzione di bucchero, tegole e laterizi.
Identificare i depositi argillosi
Identificare i depositi argillosi
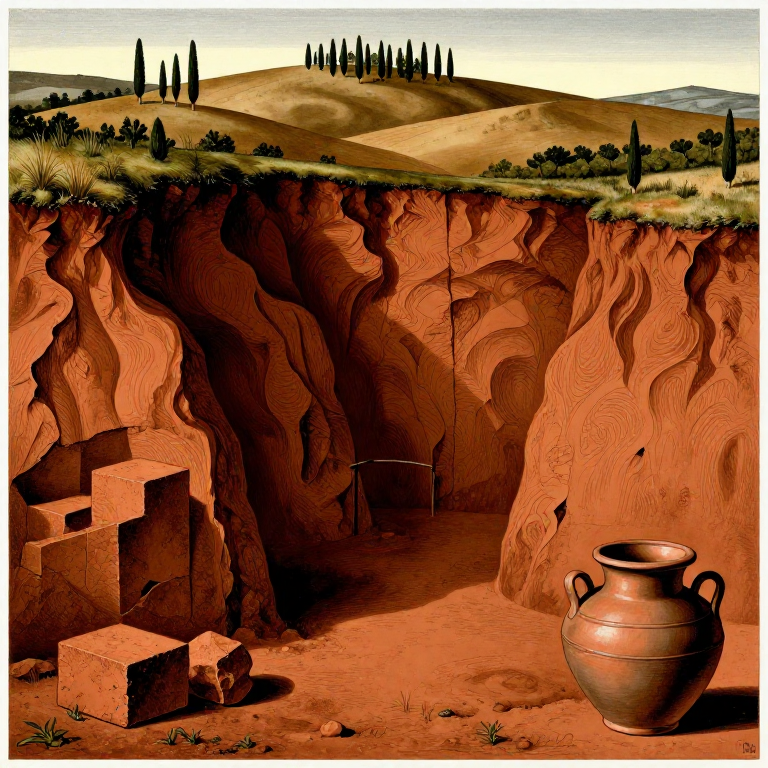
I migliori depositi si trovano lungo le rive dei fiumi (Arno, Elsa, Era), ai piedi delle colline, nei tagli stradali e nelle zone erose. L'argilla appare come uno strato compatto, liscio, di colore uniforme (rosso, ocra, grigio) sotto lo strato di humus. Cercate zone dove la pioggia ha esposto strati di terra lucida e scivolosa che non drena l'acqua rapidamente.
Необходимые инструменты:
 Набор для чтения топографических карт
Verificare i permessi di raccolta
Verificare i permessi di raccolta
In Italia, il sottosuolo appartiene al demanio secondo il Codice Civile (art. 840). Per piccole quantita ad uso personale e artigianale, la raccolta da terreni pubblici e generalmente tollerata. Per quantita superiori o da terreni privati, chiedete sempre il permesso al proprietario. Evitate aree protette, parchi naturali e siti archeologici.
Eseguire il test della palla
Eseguire il test della palla
Prelevate una manciata di terra, inumiditela leggermente e cercate di formare una palla delle dimensioni di un'arancia. Se la palla mantiene la forma senza sgretolarsi e la superficie puo essere lisciata col pollice, avete trovato argilla con buona plasticita. Se si sbriciola, il materiale contiene troppa sabbia.
Eseguire il test del cilindro
Eseguire il test del cilindro
Arrotolate l'argilla umida in un cilindro di 1 cm di diametro e 15 cm di lunghezza. Sollevatelo da un'estremita: se regge almeno 5 cm senza spezzarsi, la plasticita e sufficiente per la ceramica. Piegate il cilindro ad arco: se non si fessura nella curva, l'argilla e di buona qualita. Questi test si chiamano test di Atterberg semplificati.
Scavare l'argilla
Scavare l'argilla
Con una vanga, rimuovete i primi 15-20 cm di suolo organico. L'argilla pulita si trova al di sotto. Scavate blocchi di argilla e metteteli in secchi. Raccogliete almeno 15-20 kg di materiale grezzo, poiche la lavorazione comporta una perdita del 20-30% in impurita. Non mescolate strati di colori diversi: argille diverse hanno composizioni differenti.
Материалы для этого шага:
 Сырая глина из залежи20 kilogram
Необходимые инструменты:
 Штыковая лопата
 Ведро на 20 литров
 Кожаные рабочие перчатки
Essiccare i blocchi al sole
Essiccare i blocchi al sole
Stendete i blocchi di argilla su un telo all'aperto per 2-3 giorni finche sono completamente asciutti. L'argilla secca si spezza facilmente in frammenti piu piccoli. Frantumate i blocchi in pezzi delle dimensioni di una noce usando un martello di legno. Piu piccoli sono i frammenti, piu rapidamente si scioglieranno nell'acqua nella fase successiva.
Необходимые инструменты:
 Брезент
 Деревянная киянка
Preparare la barbottina
Preparare la barbottina
Mettete i frammenti secchi in un secchio capiente e copriteli con acqua nella proporzione di 1 parte di argilla secca per 2 parti di acqua. Lasciate in ammollo per 24-48 ore. L'argilla si dissolve lentamente formando una sospensione liquida chiamata barbottina. Mescolate energicamente con un bastone. I grumi residui si romperanno a mano.
Материалы для этого шага:
 Дистиллированная вода40 литров
Необходимые инструменты:
 Большое ведро для замеса
 Деревянная мешалка-палочка
Setacciare la barbottina
Setacciare la barbottina
Filtrate la barbottina liquida attraverso un setaccio a maglia 60 (apertura 0,25 mm) per rimuovere sassi, radici, sabbia grossolana e detriti organici. L'argilla fine passa con l'acqua. Il materiale trattenuto nel setaccio viene scartato. Per un risultato piu raffinato, passate una seconda volta con maglia 80 (apertura 0,18 mm).
Необходимые инструменты:
 Сито с мелкой сеткой
 Ведро для сбора проб
Decantare l'argilla
Decantare l'argilla
Lasciate riposare la barbottina setacciata per 24 ore. L'argilla sedimenta sul fondo per gravita, mentre l'acqua limpida rimane in superficie. Sifonare o inclinare il secchio per eliminare l'acqua chiara senza disturbare il sedimento. Ripetete il processo fino a quando l'acqua in superficie e relativamente trasparente. Questo processo si chiama levigazione.
Необходимые инструменты:
 Сифонная трубка
Asciugare la massa fino alla consistenza di lavoro
Asciugare la massa fino alla consistenza di lavoro
Versate il sedimento argilloso su una lastra di gesso o su un telo di cotone assorbente. Il gesso assorbe l'acqua in eccesso rapidamente grazie alla sua porosita. Se non disponete di gesso, stendete su un telo di cotone al sole. Rivoltate la massa ogni poche ore. L'argilla e pronta quando ha la consistenza della plastilina e non appiccica alle dita.
Необходимые инструменты:
 Гипсовая планшайба для гончарного дела
Impastare l'argilla (wedging)
Impastare l'argilla (wedging)
Impastate l'argilla come si fa col pane: premete con la base dei palmi, ripiegate su se stessa e ruotate di un quarto di giro. Ripetete per 5-10 minuti. Questa operazione, chiamata impastamento a testa di montone, elimina le bolle d'aria intrappolate (che causerebbero esplosioni durante la cottura) e uniforma l'umidita. L'argilla pronta ha una superficie liscia e omogenea.
Необходимые инструменты:
 Стол для промина глины
Testare la plasticita finale
Testare la plasticita finale
Ripetete il test del cilindro: un rotolo di 1 cm di diametro deve reggere almeno 8 cm senza spezzarsi. Piegate il cilindro ad U: se non si fessura, la plasticita e eccellente. Se si crepa, l'argilla necessita di un periodo di stagionatura piu lungo o dell'aggiunta di una piccola quantita di argilla ball clay (2-5%) per migliorare la plasticita.
Confezionare e conservare
Confezionare e conservare
Formate l'argilla pronta in blocchi di 2-3 kg. Avvolgete ogni blocco saldamente in pellicola di plastica, eliminando tutta l'aria. Conservate in un luogo fresco e ombreggiato. L'argilla ben confezionata mantiene l'umidita per mesi. Un periodo di stagionatura di 2-4 settimane migliora ulteriormente la plasticita grazie alla decomposizione batterica delle particelle organiche residue.
Необходимые инструменты:
 Пищевая плёнка
Documentare la fonte di raccolta
Documentare la fonte di raccolta
Annotate il luogo esatto di raccolta, il colore dell'argilla cruda, i risultati dei test di campo e la data. Argille di localita diverse hanno composizioni diverse che influenzano il colore dopo cottura (dal rosso mattone al rosa), la temperatura di maturazione (900-1100 gradi C per le terrecotte toscane) e la plasticita. Un buon giacimento puo fornire materiale per anni.
Необходимые инструменты:
 Полевой блокнот
Материалы
2- 20 kilogramЗаполнитель
- 40 литровЗаполнитель
Требуемые инструменты
15- Заполнитель
- Заполнитель
- Заполнитель
- Заполнитель
- Заполнитель
- Заполнитель
- Заполнитель
- Заполнитель
- Заполнитель
- Заполнитель
- Заполнитель
- Заполнитель
- Заполнитель
- Заполнитель
- Заполнитель
По этому чертежу делают

CC0 Общественное достояние
Этот чертёж выпущен под лицензией CC0. Вы можете свободно копировать, изменять, распространять и использовать эту работу в любых целях без запроса разрешения.
Поддержите мейкера, покупая товары через его чертёж, где он получает Комиссию мейкера установленную продавцами, или создайте новую итерацию этого чертежа и включите его как связь в свой чертёж для распределения дохода.