Сотрудничество
ИСКУССТВО
КРАСОТА И ЗДОРОВЬЕ
РЕМЕСЛО
КУЛЬТУРА И ИСТОРИЯ
РАЗВЛЕЧЕНИЯ
ЭКОЛОГИЯ
ЕДА И НАПИТКИ
ОБРАТНАЯ ИНЖЕНЕРИЯ
НАУКИ
СПОРТ
ТЕХНОЛОГИИ
НОСИМЫЕ УСТРОЙСТВА
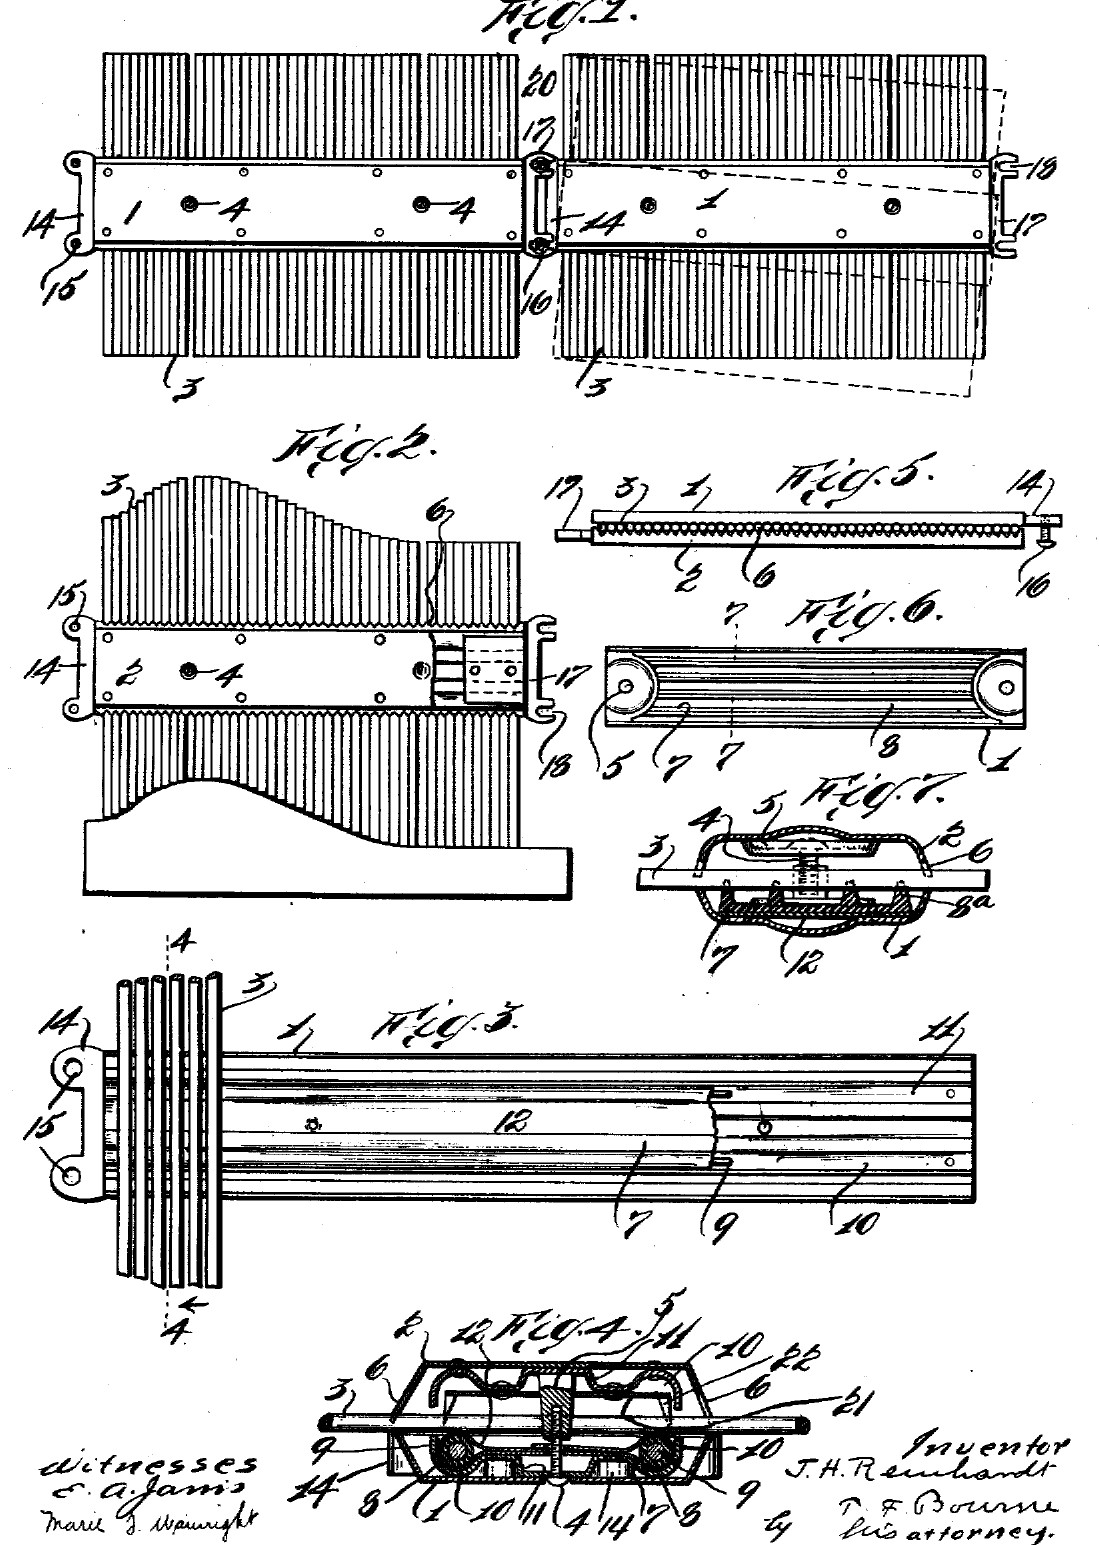


Profile Gauge: Sliding Pins Held by Cloth-Wrapped Rubber Tubes (Reinhardt, 1918)
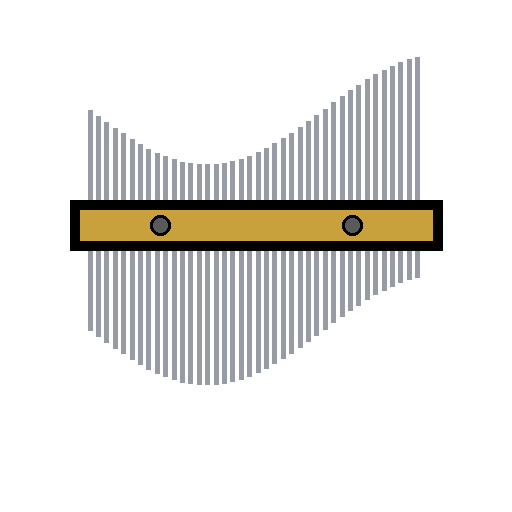
James H. Reinhardt of East Orange, New Jersey, received US 1,261,438, dated 2 April 1918, for a profile gauge: a row of pins clamped between two thin metal members. Rubber tubes wrapped in cloth press on the pins, so each one slides when pushed and stays where it is left. Pressed against an object, the pin ends take its outline, and a pencil drawn along them copies it, so the shape can be made again.
We build his single gauge from brass sheet and steel wire. All sizes are ours.
Средний
About 5 hours
Инструкции
1
1
How many pins
How many pins
Загрузка блокнота Jupyter…
2
2
Read US 1,261,438
Read US 1,261,438
"The rods or pins 3 of the respective gages may be pushed against the surface of the object, as required, to obtain its outline along the ends of the rods or pins, whereby a pencil may be drawn along the ends of the pins to trace such outline or contour of the object. From such outlines objects corresponding to the master object may be reproduced either in relief or concave according to which way the outline drawn from the ends of the rods is used."
3
3
Make the two members
Make the two members
Cut two strips of 0.8 mm brass sheet 200 x 32 mm (ours) with tin snips and file the edges. Bend 4 mm down along each long side in the vice, so each strip becomes a shallow channel 24 mm wide: his "gutter-like form". Clamp them together, open sides facing, and drill a 3.5 mm hole through both, 50 mm from each end, on the middle line.
Материалы для этого шага:
 Латунный лист2 штук
Необходимые инструменты:
 Ножницы по металлу
 Набор напильников
 Слесарные тиски
 Чертилка
 Ручная дрель
4
4
Make the gutters
Make the gutters
Cut two strips of the same brass 180 x 14 mm and bend each round a 6 mm rod into a U that will hold the rubber tube, his gutters 10. Rivet them inside one member, one near each long side, with copper rivets, keeping clear of the screw holes.
Материалы для этого шага:
Латунный лист1 штука Медные заклёпки6 штук
Необходимые инструменты:
Ножницы по металлу Круг из низкоуглеродистой сталиСлесарные тискиРучная дрель
 Слесарный молоток с шаровым бойком
5
5
Make the retainers
Make the retainers
Cut two pieces of 6 mm rubber tubing 170 mm long and push a 2 mm wire through each, his cores 9, "to somewhat stiffen them". Wrap each in a strip of cotton cloth, lap its edges and glue them with contact cement, his protecting cloth 12, so the rubber does not touch the metal. Lay one in each gutter.
Материалы для этого шага:
 Резиновая трубка1 штука
 Стальная проволока1 штука
 Хлопчатобумажная ткань1 штука
 Контактный клей1 штука
Необходимые инструменты:
 Бокорезы
 Ножницы
6
6
Cut the pins
Cut the pins
Cut 1 mm steel wire into pins 120 mm long, as many as the notebook gives. Straighten any that are bent and file both ends flat and smooth, so they slide easily and do not mark the work.
Материалы для этого шага:
Стальная проволока1 штукаНеобходимые инструменты:
Бокорезы Набор надфилейСлесарные тиски
7
7
Assemble
Assemble
Lay the member with the retainers open side up. Lay the pins across it side by side, touching, centred so equal lengths stick out on both sides; leave a gap at each screw hole (ours). Put the other member on top and pass a machine screw through each hole with a nut. Tighten them evenly until each pin slides when pushed but does not fall.
Материалы для этого шага:
 Машинные винты2 штук
 Шестигранная гайка2 штук
Необходимые инструменты:
 Набор отвёрток
 Разводной ключ
8
8
Take a profile
Take a profile
Push all the pins level with a flat board. Press the gauge square against the object until the pins have taken its shape. Lift it off, lay it on paper or on the stock to be cut, and draw a pencil along the pin ends.
Необходимые инструменты:
 Карандаш
9
9
Troubleshooting
Troubleshooting
Pin profile gauge troubleshooting.
Flow
Loading...
10
10
History and honest limits
History and honest limits
**James H. Reinhardt** of East Orange, New Jersey, US 1,261,438, dated 2 April 1918, filed 20 June 1914. He claimed "a profile gage comprising a pair of opposed members, rods or pins located between and transversely with respect to said members, means for clamping said members together" and "a resilient retainer comprising spaced rubber tubes". His members can have teeth along their edges, and his patent also covers end castings that join several gauges in a line or at an angle, a smaller gauge clamped between them, a toothed spacer strip and a rubber-mat retainer: none of those are built here. He gives no sizes: the brass, the 200 mm length, the 1 mm pins, the tube and core sizes, the cement, the rivets and the screws are ours.
Материалы
8- 2 штукЗаполнитель
- 6 штукЗаполнитель
- 1 штукаЗаполнитель
- 2 штукЗаполнитель
- 1 штукаЗаполнитель
- 1 штукаЗаполнитель
- 2 штукЗаполнитель
- 2 штукЗаполнитель
Требуемые инструменты
13- Заполнитель
- Заполнитель
- Заполнитель
- Заполнитель
- Заполнитель
- Заполнитель
- Заполнитель
- Заполнитель
- Заполнитель
- Заполнитель
- Заполнитель
- Заполнитель
- 1 vendor sell this, none ship to you yetЗаполнитель
По этому чертежу делают
Связанные чертежи
Эти чертежи делятся знаниями — техники, материалы или принципы

CC0 Общественное достояние
Этот чертёж выпущен под лицензией CC0. Вы можете свободно копировать, изменять, распространять и использовать эту работу в любых целях без запроса разрешения.
Поддержите мейкера, покупая товары через его чертёж, где он получает Комиссию мейкера установленную продавцами, или создайте новую итерацию этого чертежа и включите его как связь в свой чертёж для распределения дохода.