Сотрудничество
ИСКУССТВО
КРАСОТА И ЗДОРОВЬЕ
РЕМЕСЛО
КУЛЬТУРА И ИСТОРИЯ
РАЗВЛЕЧЕНИЯ
ЭКОЛОГИЯ
ЕДА И НАПИТКИ
ОБРАТНАЯ ИНЖЕНЕРИЯ
НАУКИ
СПОРТ
ТЕХНОЛОГИИ
НОСИМЫЕ УСТРОЙСТВА
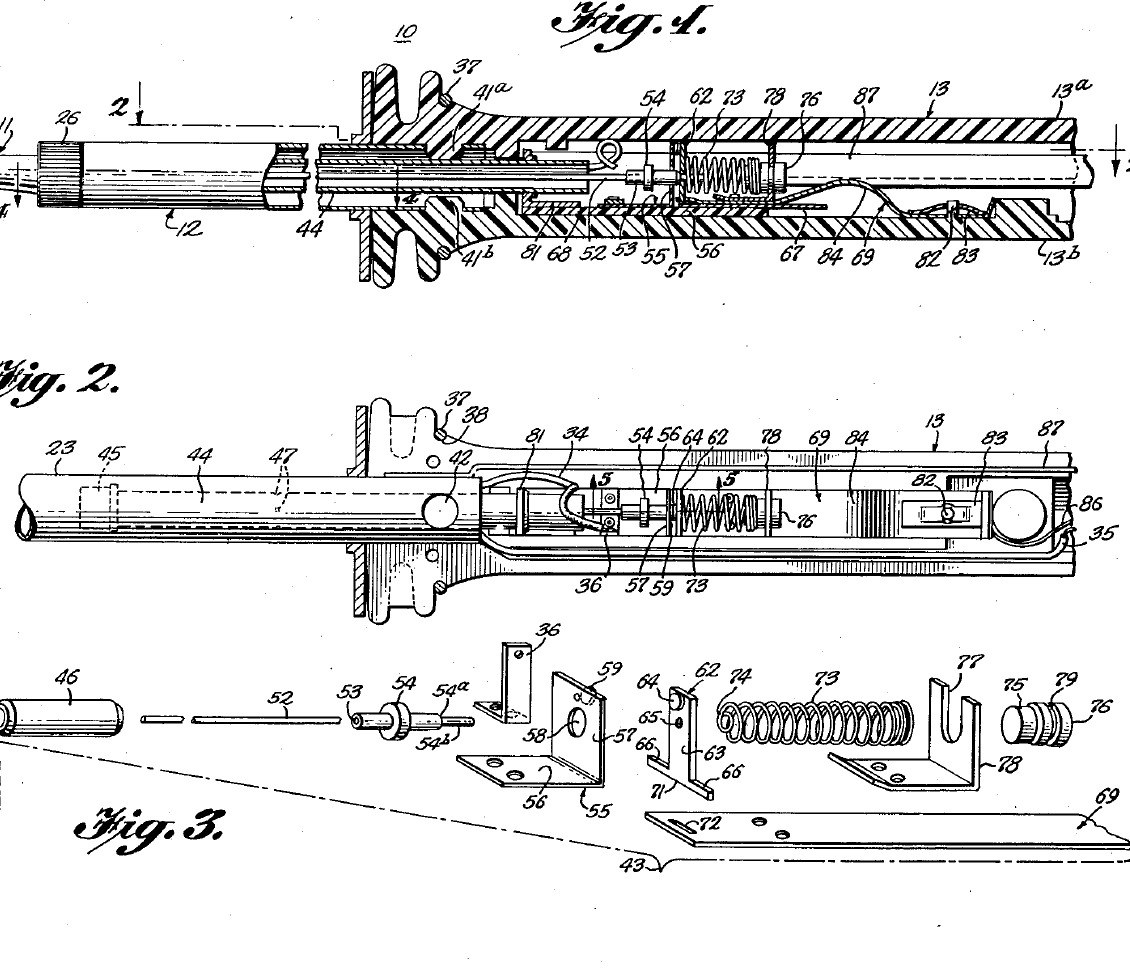


Soldering Iron: Temperature Controlled by a Curie-Point Tip and a Magnet Switch (Weller, US 3,188,448, 1965)
A soldering iron that holds its own tip temperature. At the back of the copper tip sits a slug of nickel-iron alloy that stops being magnetic above a set temperature (its Curie point). A small Alnico magnet behind it is pulled forward while the slug is cool, closing a switch that feeds the heater; once the tip is hot the slug lets go, a steel bushing pulls the magnet back and the switch opens. Swap tips to choose 600, 700 or 800 °F.
Result: a 55-watt temperature-controlled iron idling near 700 °F instead of running ever hotter.
Source: C. E. Weller, US 3,188,448 (1965). Unknown: the plating baths, the heater wire and insulation, most sizes. Picture: the patent drawing.
Продвинутый
Unknown
Инструкции
1
1
Make the tip and control slug
Make the tip and control slug
Turn the tip from tellurium copper: a cylindrical body, a taper and a chisel end (any shape suits the work). Plate it first with iron, which keeps the copper out of the molten solder, then with nickel, which shuts out the air. Bore its rear end and fit tightly into it the shank of a slug of thermomagnetic nickel-iron alloy, such as 48 % nickel, 3 % molybdenum and the rest iron, or about 43 % nickel and the rest iron. The alloy sets the control point: make tips for 600, 700 and 800 °F. Not given: the plating baths, sizes.
Материалы для этого шага:
 Пруток теллуристой меди1 tip
 Термомагнитный железоникелевый сплав1 control slug
Необходимые инструменты:
 Токарный станок по металлу
 Набор для гальваники
 Неизвестные размеры
2
2
Wind the heater barrel
Wind the heater barrel
Make the barrel of two stainless steel tubes: an inner spool the tip slides into snugly, and an outer cover tube joined to it at the front, with a thread and screw cap to hold the tip. In the space between them wind the heater from one length of resistance wire: an inner layer, then an outer layer wound the opposite way so their fields cancel, with insulating sheet inside, between and outside the layers. Silver-solder heat-resistant leads to its ends. Ours: nichrome wire. Not given: the insulating sheet, the turns.
Материалы для этого шага:
 Труба из нержавеющей стали2 spool and cover tube
 Нихромовая проволока1 heater
 Неизвестный изоляционный материал1 three sheet layers
 Неизвестный металл1 leads
 Серебряный припой1 as needed
Необходимые инструменты:
 Пропановая горелкаТокарный станок по металлу
3
3
Build the magnet switch
Build the magnet switch
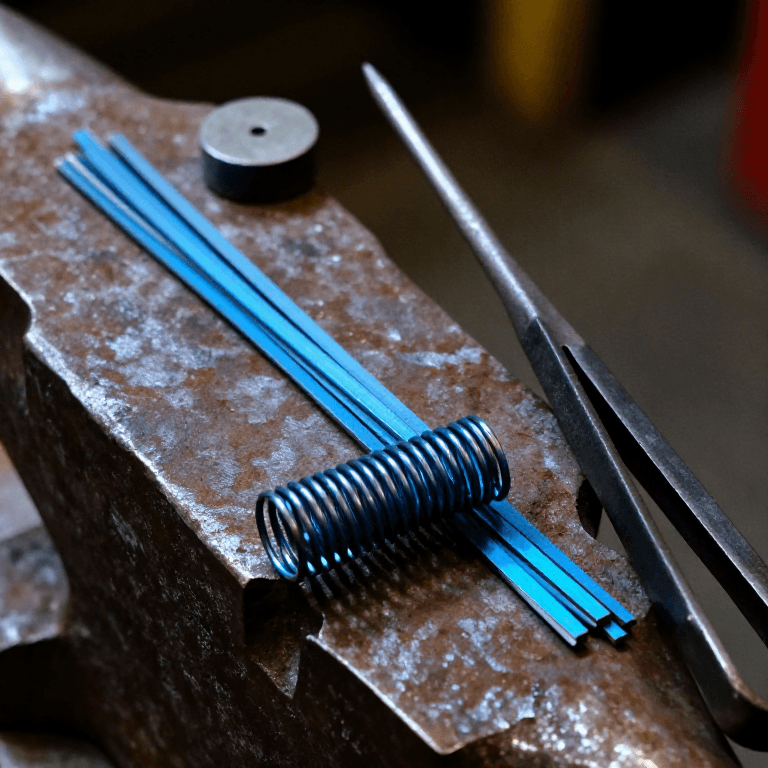
In a stainless steel sleeve about 2.4 in long, close the front with a non-magnetic thermal bushing. Behind it slides a cylindrical Alnico V magnet, then a non-magnetic spacer about 0.032 in thick, then a cold-drawn steel bushing about 0.50 in long held by dents in the sleeve; the magnet's stroke is about 0.015 in. A push rod runs from the magnet through the bushing to an insulator. On a melamine plate, hinge a moving contact between a thin conducting strip and a holding strip, facing a flexible contact; a spring of fourteen coils of 0.010 in music wire, 0.210 in across, presses the moving contact toward the flexible one. Rivet the spring bracket to the holding strip. Not given: the contact metals.
Материалы для этого шага:
Труба из нержавеющей стали1 sleeve Магнит альнико1 штука
 Круг из низкоуглеродистой стали1 magnetic bushing, push rodНеизвестный металл1 thermal bushing, spacer, contacts, strips, brackets
 Неизвестный материал1 insulator
 Меламиновая пластина1 base plate
 Пружинная стальная проволока1 0.010 in music wire spring
Необходимые инструменты:
Токарный станок по металлу Клепальный набор
 Круглогубцы
4
4
Assemble the handle and use
Assemble the handle and use
Mould the handle in two plastic halves with a socket at the front whose bosses lock the cover tube. Lay in the switch unit, held only by the bowed tail of its holding strip on an anchor pin with a speed nut, so it floats and its thermal bushing presses on the tip's slug. Wire the heater, the switch and a ground lead from the cover tube to the cord. Rivet the halves near the butt and fit a split ring near the front. In use, below the control point the slug pulls the magnet forward and the spring closes the contacts; above it the steel bushing pulls the magnet back and the push rod opens them. At idle the heater runs only about 30 to 40 % of the time. Not given: the plastic.
Материалы для этого шага:
Неизвестный материал1 handle halvesНеизвестный металл1 rivet, split ring, speed nut Гибкий шнур с вилкой1 штука
Необходимые инструменты:
 Литьевая машинаКлепальный набор
Материалы
13- Заполнитель
- 1 control slugЗаполнитель
- 1 sleeveЗаполнитель
- 1 heaterЗаполнитель
- 1 three sheet layersЗаполнитель
- 1 rivet, split ring, speed nutЗаполнитель
- 1 as neededЗаполнитель
- 1 штукаЗаполнитель
- 1 magnetic bushing, push rodЗаполнитель
- 1 handle halvesЗаполнитель
- 1 base plateЗаполнитель
- 1 0.010 in music wire springЗаполнитель
- 1 штукаЗаполнитель
Требуемые инструменты
7- Заполнитель
- Заполнитель
- Заполнитель
- Заполнитель
- Заполнитель
- Заполнитель
- Заполнитель
Материалы из связанных чертежей

По этому чертежу делают

CC0 Общественное достояние
Этот чертёж выпущен под лицензией CC0. Вы можете свободно копировать, изменять, распространять и использовать эту работу в любых целях без запроса разрешения.
Поддержите мейкера, покупая товары через его чертёж, где он получает Комиссию мейкера установленную продавцами, или создайте новую итерацию этого чертежа и включите его как связь в свой чертёж для распределения дохода.