Сотрудничество
ИСКУССТВО
КРАСОТА И ЗДОРОВЬЕ
РЕМЕСЛО
КУЛЬТУРА И ИСТОРИЯ
РАЗВЛЕЧЕНИЯ
ЭКОЛОГИЯ
ЕДА И НАПИТКИ
ОБРАТНАЯ ИНЖЕНЕРИЯ
НАУКИ
СПОРТ
ТЕХНОЛОГИИ
НОСИМЫЕ УСТРОЙСТВА
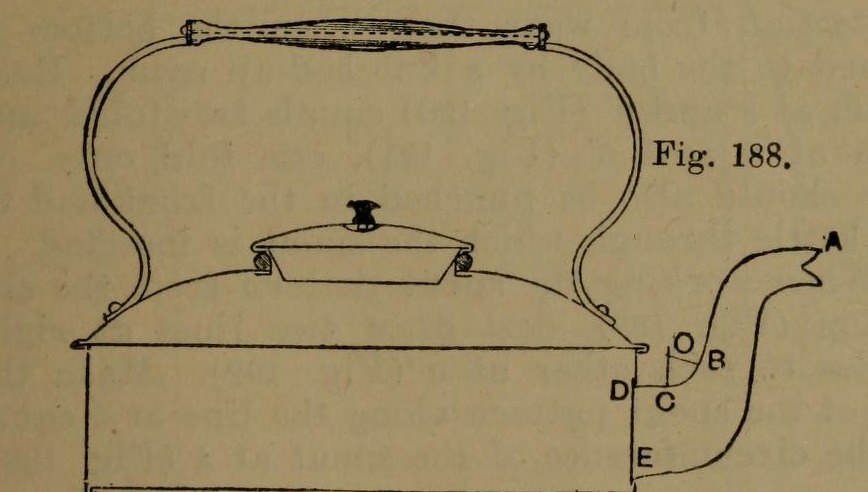


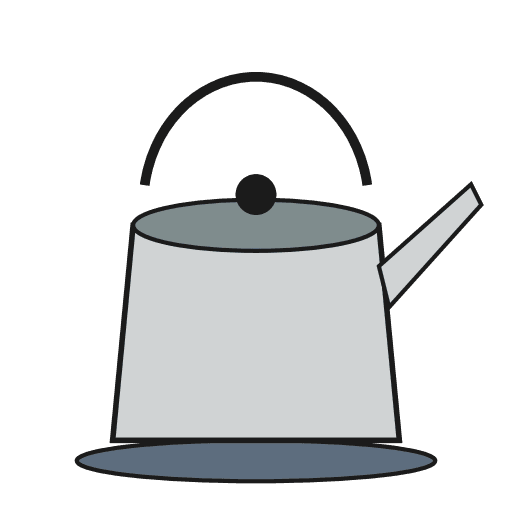
Stovetop Kettle: a Square Copper Kettle (Hasluck, 1907)
A tinsmith's square kettle in sheet copper, 9 x 9 in and 3 5/8 in deep: a box body with folded corner seams, a hollowed top pened on, a brazed and bent spout, a small cover, and a wooden handle on brass uprights.
Hasluck prefers copper; tinplate also works and is a separate route.
Source: Paul N. Hasluck, Tinplate Work (1907), pp. 91-98. Unknown: copper gauge, solder. Picture: Figs. 188-189 of the book.
Продвинутый
Unknown
Инструкции
1
1
Cut the patterns
Cut the patterns
For a body 9 x 9 x 3 5/8 in, cut two ends 9 1/2 x 4 in and two sides 9 1/4 x 4 in, notched for box seams at the corners (Figs. 190-191), with allowances to fold at top and bottom. Punch the spout hole in the front. Cut the bottom 9 1/2 in square, notched for a 1/4 in edge. Set out the top as a 10 1/2 in square with curved allowances for hollowing and a 4 in circle for the cover hole (Fig. 193); set out the spout from the elevation (Fig. 192), the cover and its cone-shaped rim (Figs. 194-195).
Материалы для этого шага:
 Медный лист1 body, bottom, top, spout, cover
Необходимые инструменты:
 Разметочный циркуль
 Чертилка
 Ножницы по металлу
2
2
Braze and shape the spout
Braze and shape the spout
Thin the long edges by hammering. Set in the throat with a stretching hammer on a beak iron, bend the spout round until the edges overlap, bind it with wire, lay spelter and borax along the inside of the seam and braze it; then close and braze the under seam. Fill it with lead and bend the neck with a round-faced hammer on the hollowing block; file off spare spelter and smooth it. Run out the lead, throw off a seating round the large end, trim the top with snips and tin the inside.
Материалы для этого шага:
 Неизвестный металл1 spelter
 Олово1 tinning
Необходимые инструменты:
 Рихтовочный молоток
 Кол
 Железная проволока
 Порошок буры
 Горелка для пайки твёрдым припоем
 Свинец
 Дырчатая шумовка
 Брусок твёрдой древесины
 Напильник по металлуНожницы по металлу
3
3
Fold and seam the body
Fold and seam the body
Fold the top edges square, the front and back outwards and the sides likewise; fold the bottom edges right over inwards to take the bottom (Fig. 188). Hook each side's end over the front's and work the corner seam on a straight-edged tool (Figs. 198-199). Turn up the bottom's 1/4 in edge, push it edge-down into the bottom folds, and solder the bottom and seams.
Материалы для этого шага:
 Оловянно-свинцовый припой1 штука
Необходимые инструменты:
 Деревянная киянкаКол
 Электрический паяльник
 Флюс
4
4
Hollow the top and make the cover
Hollow the top and make the cover
Hollow the top on the block: sink the four sides a little, hollow the corners with a bullet-faced hammer, flatten each side along the block edge, even the shoulder and smooth it all over. Pare the edges, mark the flange with an edging machine, set it down square with a hatchet stake and mallet, and take up an edge to fit over the body. Cut the cover hole with circular snips and fit a narrow wired rim, worked over inside. Make the cover: solder its cone rim to fit the wired rim, throw off a flange, hollow the cover disc and seam it on, and fix the knob.
Материалы для этого шага:
Железная проволока1 rimОловянно-свинцовый припой1 штукаНеизвестный металл1 cover knobНеобходимые инструменты:
Рихтовочный молотокБрусок твёрдой древесиныКолДеревянная киянкаНожницы по металлуЭлектрический паяльникФлюс5
5
Handle, top and spout
Handle, top and spout
Cut two handle uprights from stout brass or copper band (Fig. 196), drill them for rivets and for the spindle that carries the wooden handle, and bend them to shape. Rivet them to the top and solder over the rivet heads inside. Pene the top down onto the body and solder along each edge. Push the spout through its hole from inside until its large end butts against the front, and solder it strongly from inside.
Материалы для этого шага:
 Латунный лист1 handle uprights
 Латунный пруток1 spindle
 Рукоятка1 wood
 Медные заклёпки1 number not givenОловянно-свинцовый припой1 штука
Необходимые инструменты:
 Ручная дрель
 Клепальный молотокДеревянная киянкаЭлектрический паяльникФлюс
Материалы
9- 1 body, bottom, top, spout, coverЗаполнитель
- 1 cover knobЗаполнитель
- 1 tinningЗаполнитель
- Заполнитель
- 1 rimЗаполнитель
- 1 handle uprightsЗаполнитель
- 1 spindleЗаполнитель
- 1 woodЗаполнитель
- 1 number not givenЗаполнитель
Требуемые инструменты
17- Заполнитель
- Заполнитель
- Заполнитель
- Заполнитель
- Заполнитель
- Заполнитель
- Заполнитель
- Заполнитель
- Заполнитель
- Заполнитель
- Заполнитель
- Заполнитель
- Заполнитель
- Заполнитель
- Заполнитель
- Заполнитель
- Заполнитель
Материалы из связанных чертежей


По этому чертежу делают
CC0 Общественное достояние
Этот чертёж выпущен под лицензией CC0. Вы можете свободно копировать, изменять, распространять и использовать эту работу в любых целях без запроса разрешения.
Поддержите мейкера, покупая товары через его чертёж, где он получает Комиссию мейкера установленную продавцами, или создайте новую итерацию этого чертежа и включите его как связь в свой чертёж для распределения дохода.