
How to build a Forge Trip Hammer
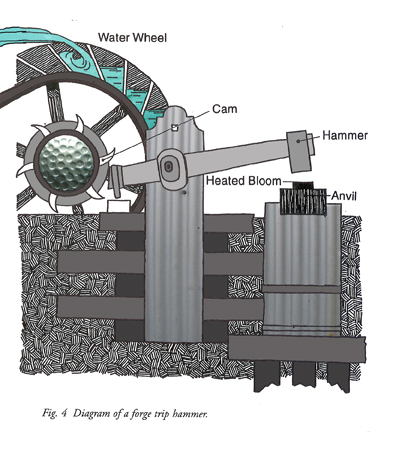
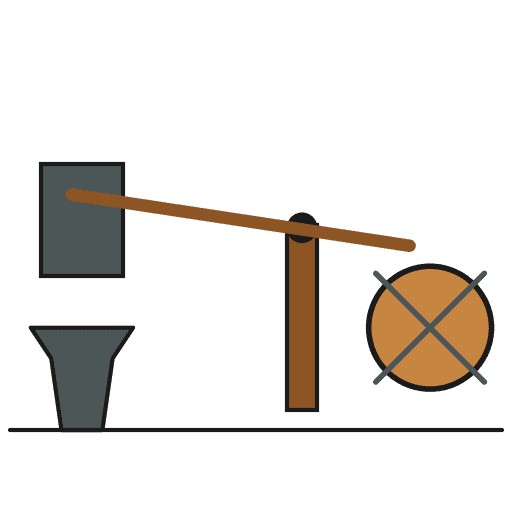
A trip hammer (helve or tilt hammer) is a water-powered forging hammer used by blacksmiths to pound metal far faster than a hand hammer — a technology in use for over 2,000 years and the backbone of the medieval hammer mill. Flowing water turns a wheel; the wheel's axle carries protruding cams that repeatedly catch the tail of a heavy pivoted beam (the helve), lifting the iron hammer head and then releasing it to fall under gravity onto the anvil below.
This blueprint documents the mechanism and assembly sequence of the classic water-powered forge trip hammer. It converts the steady rotation of a water wheel into the vertical, repetitive striking force needed to consolidate a bloom and shape wrought iron and steel. Many historical forges paired it with a trompe — a falling-water air compressor that blasts the forge with no mechanical bellows. Source: Wikipedia — Trip hammer; mechanism diagram after Fig. 4 (forge trip hammer).
Amabwiriza
Divert flowing water to the wheel
Divert flowing water to the wheel
Cut a channel (a leat or sluice) that diverts part of a stream or river to the site and delivers a steady flow to where the wheel will sit. A gate at the head of the channel lets you start, stop and throttle the flow. The whole machine runs on this moving water — gravity and flow are the only power source.
Ibikoresho by'iyi ntambwe:
 Urugi rw'umuyoboro w'amazi1 igice
Ibikoresho bikenewe:
 Ipiki
IpikiBuild the water wheel on an iron axle
Build the water wheel on an iron axle
Build a water wheel and mount it on a strong iron axle turning in fixed bearings. Position it so the diverted water strikes the wheel — over the top (overshot) or against the lower blades (undershot). The pushing water gives constant rotational torque at the axle.
Ibikoresho by'iyi ntambwe:
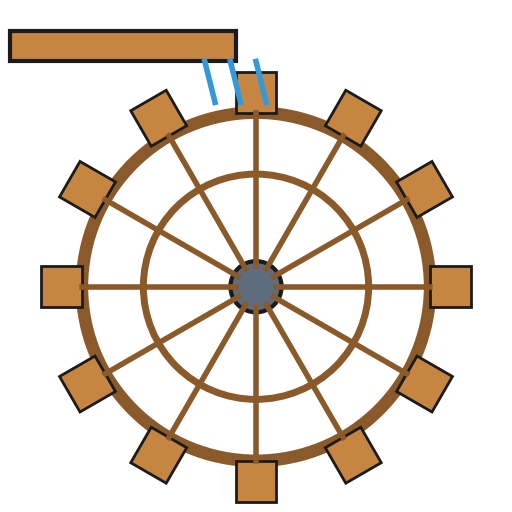 Uruziga rukoreshwa n'amazi1 igice
 Umutambiko w'icyuma1 igice
Ibikoresho bikenewe:
 Umusumeno w'ababaji
Fit the camshaft
Fit the camshaft
Couple a heavy timber or iron camshaft to the water wheel's axle so it turns with the wheel. This rotating shaft is what will drive the hammer.
Ibikoresho by'iyi ntambwe:
 Umuyoboro w'ibiti ufite udukoni1 igice
Ibikoresho bikenewe:
 Ishoka ry'ubugi butambitse
Space iron cams around the camshaft
Space iron cams around the camshaft
Fit protruding curved iron cams (lugs) around the camshaft. Each cam is the finger that will catch and lift the hammer beam once per pass. More cams around the shaft means more blows per rotation.
Ibikoresho by'iyi ntambwe:
 Kamu y'icyuma1 ikirundo
Ibikoresho bikenewe:
 Uruganda rw'umucuzi
Make the helve (hammer beam) and pivot
Make the helve (hammer beam) and pivot
Shape a heavy timber beam — the helve — and mount it on a fixed pivot (fulcrum) so it rocks like a see-saw: the tail on the camshaft side, the head on the anvil side.
Ibikoresho by'iyi ntambwe:
 Igiti kinini cy'inyundo izamurwa ikagwa1 igice
 Imitambiko y'ibiti1 igice
Ibikoresho bikenewe:
Umusumeno w'ababajiForge and fit the iron hammer head
Forge and fit the iron hammer head
Forge a heavy iron hammer head and fix it to the working end of the helve. This is the mass that does the pounding; its weight, dropping from height, delivers the blow.
Ibikoresho by'iyi ntambwe:
 Umutwe w'inyundo w'icyuma1 igice
Ibikoresho bikenewe:
Uruganda rw'umucuzi Inyundo y'umucuzi
Set the anvil under the head
Set the anvil under the head
Bed a heavy iron anvil into a solid base directly beneath the hammer head, aligned so the head lands square on the anvil face. The workpiece sits here to be struck.
Ibikoresho bikenewe:
Ipiki Ingoyi
Align the cams to the helve tail
Align the cams to the helve tail
Position the helve so its tail sits in the path of the cams. As the camshaft rotates, each cam must catch the underside of the tail, lift it, then release it cleanly as the cam rotates past.
Ibikoresho bikenewe:
Ishoka ry'ubugi butambitseRun it: lift and drop
Run it: lift and drop
Open the sluice. The wheel turns, the camshaft turns, and each cam lifts the helve tail — raising the head. The instant the cam passes, the tail drops and the head falls under gravity onto the anvil. One cam pass = one blow. This is the whole cycle, repeating as long as the water flows.
Regulate the blow with the sluice gate
Regulate the blow with the sluice gate
Control the hammer with the gate at the head of the channel: more water means a faster wheel and faster, harder blows; less water slows or stops it. The gate is the throttle.
Ibikoresho by'iyi ntambwe:
Urugi rw'umuyoboro w'amazi1 igiceOptional — add a trompe for the forge blast
Optional — add a trompe for the forge blast
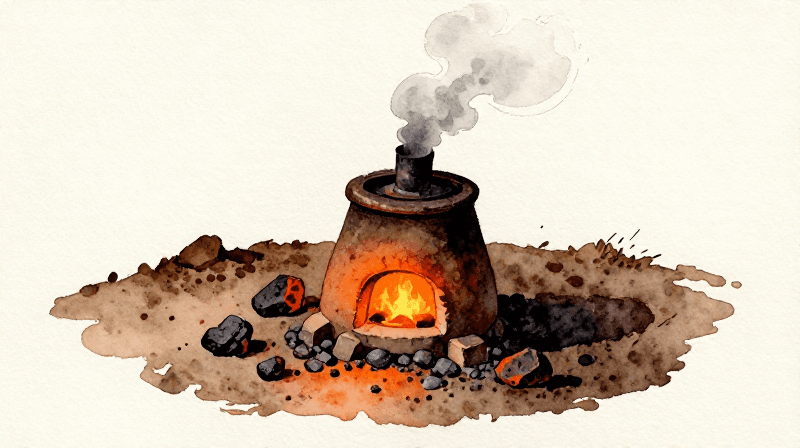
Many historical forges added a trompe: water falling down a pipe draws air in with it, compresses it in a chamber below, and pipes that steady blast to the forge fire — no bellows, no fan. It powers the forge from the same falling water that drives the hammer.
Ibikoresho by'iyi ntambwe:
 Umuyoboro w'ibiti wa trompe1 igice
Forge under the hammer
Forge under the hammer
Heat the workpiece in the forge — for consolidating a spongy iron bloom, or drawing out a bar. Hold it on the anvil under the falling head and let the hammer do the work: consolidating the bloom, drawing, and shaping far faster than a hand hammer ever could.
Ibikoresho by'iyi ntambwe:
 Ibumba ry'icyuma ryavuye mu ruganda1 igice
Ibikoresho bikenewe:
 Amafashi y'umucuzi
How it works, and why it mattered
How it works, and why it mattered
The core idea: a trip hammer converts the rotational energy of a water wheel into a vertical, repeating blow. The cam is a lifter, not a driver — it only raises the head; gravity delivers the force. Blows-per-minute is set by the number of cams times the wheel speed; blow force is set by the head's mass and how high it is lifted.
Why it mattered: before steam, this is how the world's wrought iron and steel was shaped where water was available — over 2,000 years of blooms consolidated and bars drawn under water power. The same principle scaled up into the steam hammer of the 1840s and the industrial revolution that followed. A handful of water-powered forge hammers are still worked by hand today.
Ibikoresho
10- 1 igiceUmwanya
- 1 igiceUmwanya
- 1 igiceUmwanya
- Umwanya
- 1 ikirundoUmwanya
- Umwanya
- 1 igiceUmwanya
- 1 igiceUmwanya
- 1 igiceUmwanya
- Umwanya
Ibikoresho by'Ibishushanyo Bifitanye Isano
Iki gishushanyo gikora
Blueprint zijyanye
Izi blueprint zisangira ubumenyi — uburyo, ibikoresho cyangwa amahame
CC0 Umurenge rusange
Iyi blueprint yasohowe munsi ya CC0. Ushobora gukoporora, guhindura, gukwirakwiza no gukoresha nta kwemererwa.
Shyigikira Umuremyi ugura ibicuruzwa binyuze muri Blueprint ye Komisiyo y'Umuremyi byashyizweho n'Abacuruzi, cyangwa kora verisiyo nshya y'iyi Blueprint ukayinjiza nk'isano muri Blueprint yawe kugira ngo musangire inyungu.