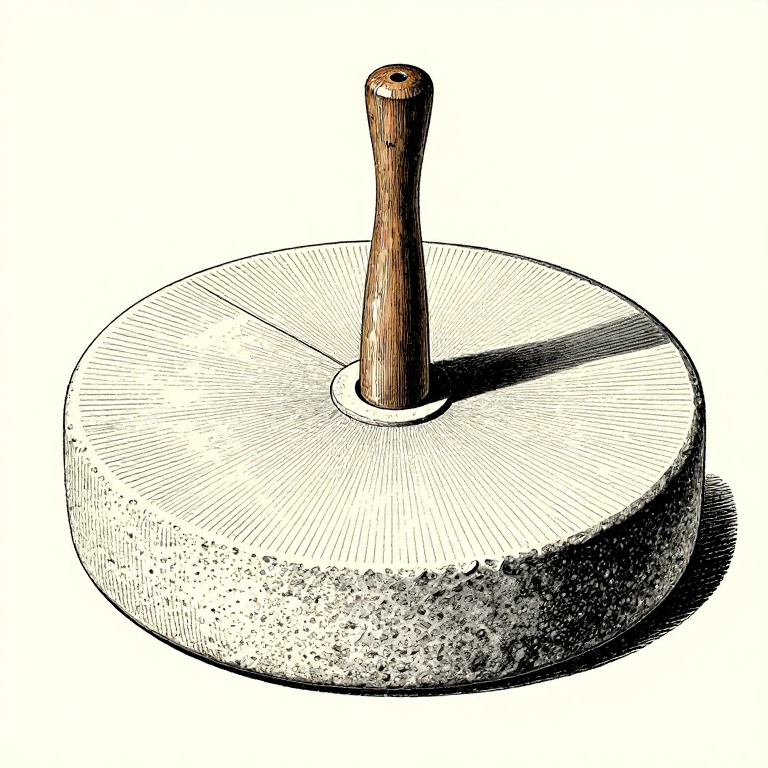
Pecking a Stone Mortar and Pestle — Grinding Implements from Granite
Consignes
Select Suitable Stone
Select Suitable Stone
Choose a large, stable cobble or boulder of coarse-grained ignite rock — granite, gneiss, or coarse sandstone work well because their crystalline structure fractures in small, controllable chips when pecked. Avoid fine-grained stones like basalt for the mortar, as they are much harder to peck. The mortar stone should have a naturally flat or slightly concave top surface that you can deepen. For the pestle, select an elongated, naturally rounded river cobble that fits comfortably in one or both hands — granite or basalt are ideal because their hardness resists wear.
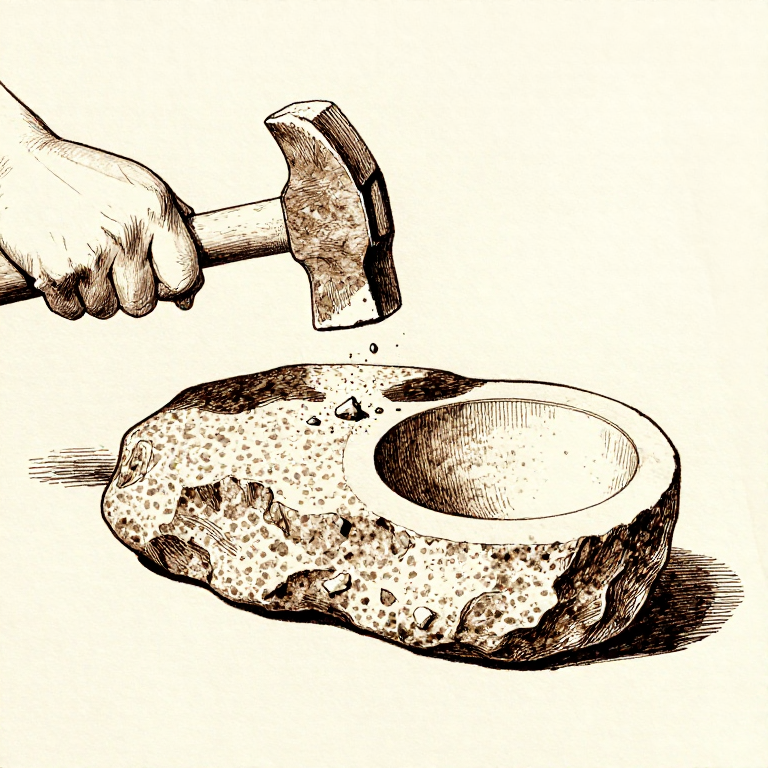
Mark and Begin Pecking the Mortar Bowl
Mark and Begin Pecking the Mortar Bowl
Mark a circular area on the mortar stone's flat surface — about 10-15 cm in diameter. Using a hard hammerstone, strike the stone surface within this circle with repeated, controlled blows. Each strike shatters a small amount of stone at the point of impact, gradually deepening the depression. Work in a spiral pattern from the centre outward, keeping the depth approximately even across the bowl. The pecking action creates a rough, cratered surface — this is desirable, as the texture helps grip the material being ground. Expect to remove stone very slowly — 1-2 mm of depth per hour of pecking is typical for granite.
Deepen and Shape the Bowl
Deepen and Shape the Bowl
Continue pecking to deepen the mortar bowl to 5-8 cm. Shape the interior into a smooth, even curve — the sides should slope gradually from the rim to the deepest point. A bowl that is too shallow will not contain material during grinding; too deep and the pestle cannot reach the bottom effectively. Periodically check the shape by running your fingers around the interior to feel for high spots or uneven areas. Remove any ridges or bumps by concentrated pecking. The pecked surface should be uniformly rough, like coarse sandpaper, which provides the abrasive texture needed for grinding grain.
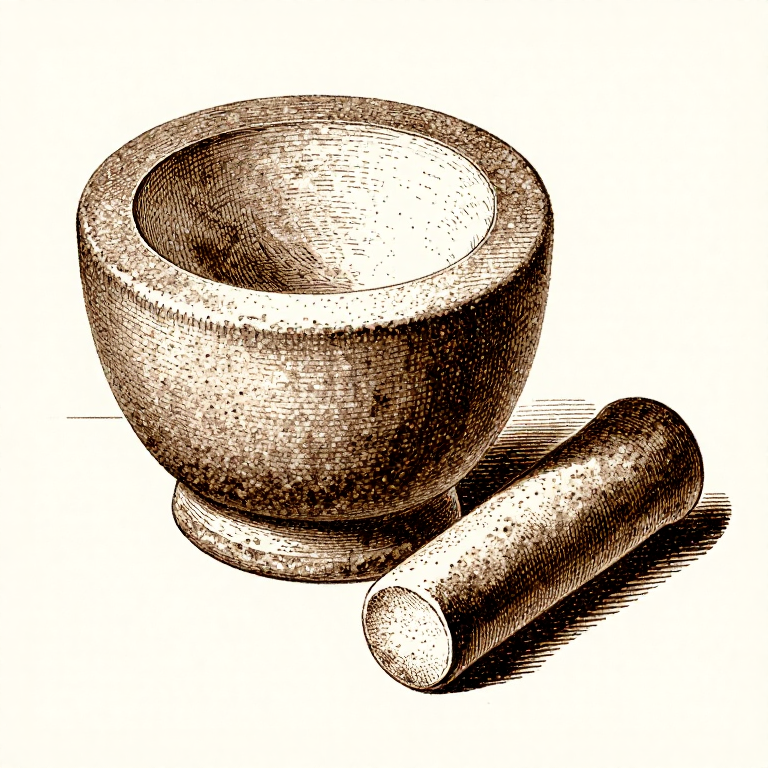
Shape the Pestle
Shape the Pestle
The pestle needs a rounded working end that matches the curvature of the mortar bowl. If your chosen cobble is not naturally rounded, peck and grind the working end against a flat stone until it forms a smooth dome. The opposite end should be comfortable to grip — a slight taper or natural narrowing helps. Some pestles are shaped by pecking alone; others benefit from grinding on a sandstone slab to achieve a smoother working surface. The pestle diameter should be about half the diameter of the mortar bowl, allowing a rolling and crushing motion with room for material to circulate.
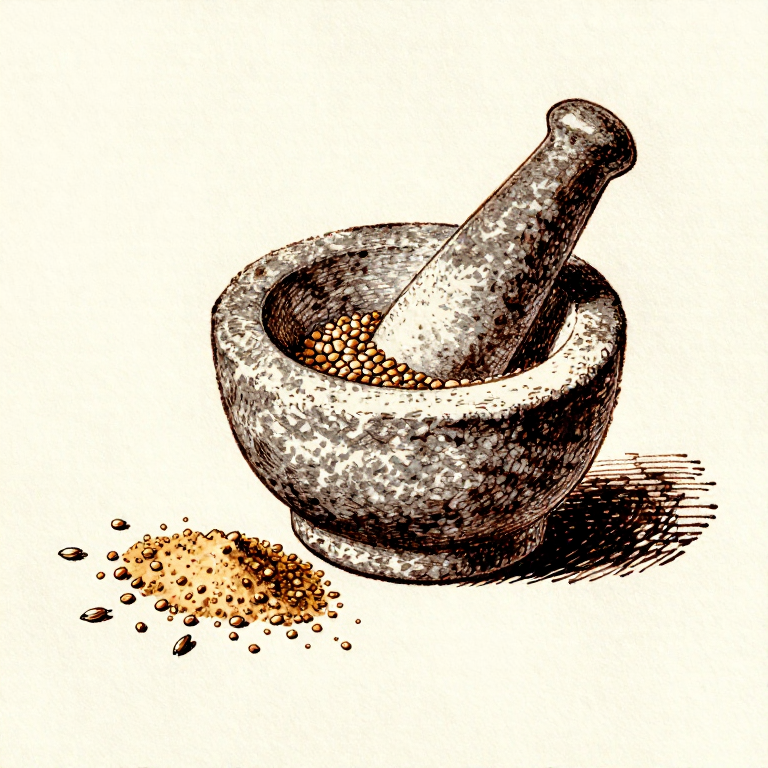
Test with Material
Test with Material
Test the mortar and pestle by grinding a handful of dried seeds or grain. Place the material in the mortar bowl and press the pestle down with a combination of crushing and circular grinding motions. The rough pecked surface of the mortar catches and holds the material while the pestle crushes it against the interior. Effective grinding produces a coarse flour or meal. If material slides around without being crushed, the mortar surface is too smooth — peck it again to restore texture. Over time, the mortar and pestle surfaces will smooth from use, creating a polished, efficient grinding pair. Archaeological examples show deep, mirror-smooth bowls from generations of daily use.
Matériaux pour cette étape :
 Stone Block1 piece, 15-20 cm long cm
Outils nécessaires :
 Hammerstone
 Sandstone (Abrasive)
Matériaux
2- 1 piece, 20-30 cm diameter pièceEspace réservé
- 1 piece, 15-20 cm long pièceEspace réservé
Outils requis
2- Espace réservé
- Espace réservé
Related blueprints
Other builds that share materials, tools, or techniques with this one.

CC0 Domaine public
Ce blueprint est publié sous CC0. Vous êtes libre de copier, modifier, distribuer et utiliser ce travail pour tout usage, sans demander la permission.
Soutenez le Maker en achetant des produits via son Blueprint où il perçoit une Commission Maker définie par les Vendeurs, ou créez une nouvelle itération de ce Blueprint et incluez-le comme connexion dans votre propre Blueprint pour partager les revenus.