التعاون
فنون
الجمال والعناية
حِرَف
الثقافة والتاريخ
ترفيه
البيئة
الطعام والمشروبات
الهندسة العكسية
العلوم
رياضة
التقنية
الأجهزة القابلة للارتداء
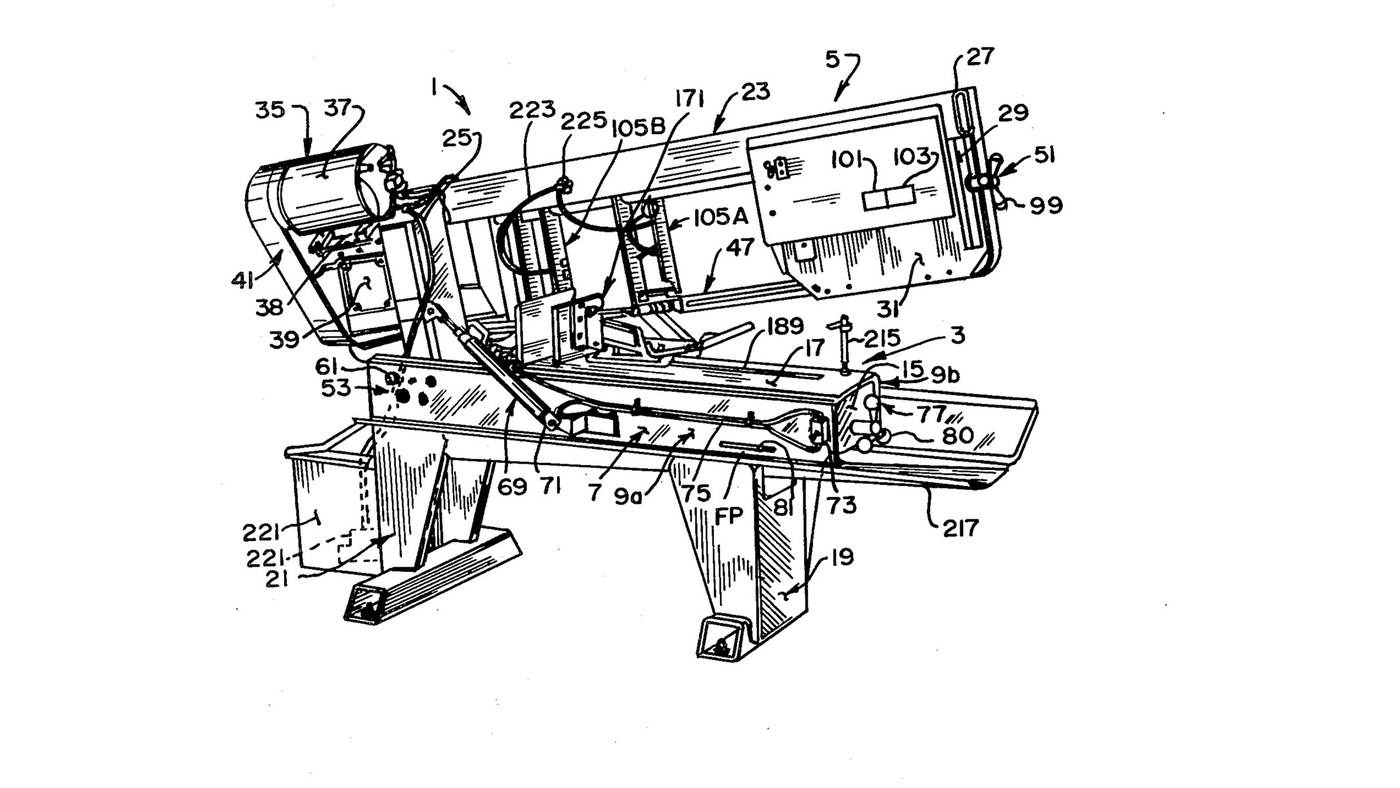


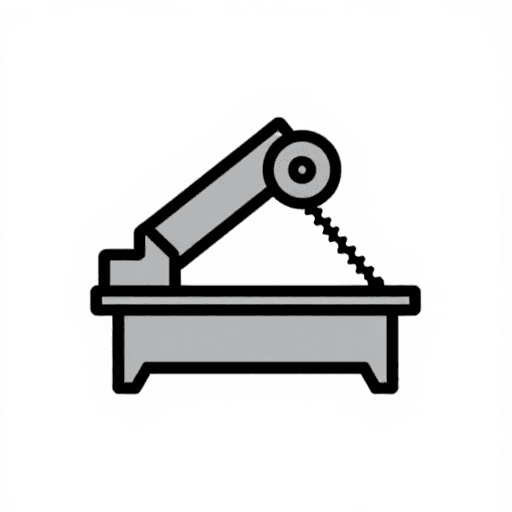
Metal Band Saw: Horizontal Saw on a Welded Steel Frame
Curtis Eccardt's horizontal power band saw (Emerson Electric, US 4,364,294, 1982), built from welded steel channel and tube instead of iron castings to cut its cost. The saw head swings down on trunnions over the bed; a hydraulic cylinder with a valve sets how fast it feeds, a spring counterbalances it, and a spring tensioner shows the blade tension on a scale. Two guides with rollers twist the blade's lower run 90° so its teeth face down into the work, and carbide inserts hold it there.
The patent gives no sizes, speeds or ratings; the welder and wrenches are ours. The picture: the patent's Fig. 1.
متقدم
4 days
التعليمات
1
1
Weld the bed
Weld the bed
Stand two steel channels (9a, 9b) parallel, webs upright and flanges facing in, and weld gussets (15) between their webs. Bolt a bed plate (17) across the top flanges as the work surface. Ours: MIG welder, drill press for the bolt holes.
المواد لهذه الخطوة:
 قطاع فولاذي على شكل U2 قطع
 لوح صلب طري1 قطعة
 برغي سدّاسي الرأس - رتبة 8.81 قطعة
الأدوات المطلوبة:
 لحّام MIG
 مثقاب عمودي
 مفتاح إنجليزي
2
2
Weld and bolt on the legs
Weld and bolt on the legs
Weld formed sheet-steel legs onto horizontal floor members to make front and rear leg weldments (19, 21), and bolt them under the bed.
المواد لهذه الخطوة:
 لوح فولاذ1 قطعة
 أنابيب فولاذية إنشائية1 قطعةبرغي سدّاسي الرأس - رتبة 8.81 قطعة
الأدوات المطلوبة:
لحّام MIGمفتاح إنجليزي3
3
Weld the head
Weld the head
Weld a head post (25) of square or rectangular steel tube square to a head beam (27) of rectangular tube. Weld a bracket leg (29) down from the beam's outer end, and fix support plates at both ends (31, 33).
المواد لهذه الخطوة:
أنابيب فولاذية إنشائية1 قطعةلوح صلب طري1 قطعةالأدوات المطلوبة:
لحّام MIG4
4
Fit the trunnions and align the pivot
Fit the trunnions and align the pivot
Fix a shaft through the head post with its ends out as trunnions (55a, 55b), in bushings in two bearing blocks (59a, 59b) bolted inside the channel webs. Each block has one close-fit bolt hole and three oversize ones: shift the blocks until the pivot is parallel to the bed plate, then torque the bolts. A set screw (67) takes out end play.
المواد لهذه الخطوة:
 عمود فولاذي1 قطعة
 جلبة معدنية2 قطع
 كتلة محمل2 قطعبرغي سدّاسي الرأس - رتبة 8.88 قطع
 مسمار ضبط بطرف مقعّر1 قطعة
الأدوات المطلوبة:
مثقاب عمودي مفتاح عزم
5
5
Mount motor, belt drive and gearbox
Mount motor, belt drive and gearbox
Mount the electric motor (37) on a plate (38) pivoted on the head beam, and couple it by a multi-speed belt and pulleys (41) to a gearbox (39). Fit the drive wheel (43) on the gearbox output shaft.
المواد لهذه الخطوة:
 محرك كهربائي1 قطعةلوح صلب طري1 قطعة
 سير الإدارة1 قطعة
 بكَرة1 قطعة
 علبة تروس1 قطعة
 عجلة منشار الشريط1 قطعة
الأدوات المطلوبة:
مفتاح إنجليزي6
6
Build the idler tensioner
Build the idler tensioner
Weld an idler yoke (87) of rolled steel plate, pivot it on the head beam with a pin (89), and cantilever the idler axle from it with the idler wheel (45) on bearings (85). A threaded rod (91) pulls the yoke through a coil spring (93) held between compression plates and a U-bolt (97); a knob (99) turns the rod. An indicator (101) on the spring reads the tension on a scale (103).
المواد لهذه الخطوة:
لوح صلب طري1 قطعة مسمار فولاذي مستقيم1 قطعةعمود فولاذي1 قطعةعجلة منشار الشريط1 قطعة
 محمل كُريّ1 قطعة
 قضيب مسنّن1 قطعة
 Coil Spring1 قطعة
 مسمار على شكل U1 قطعة
 مقبض تحكّم1 قطعة
الأدوات المطلوبة:
لحّام MIGمفتاح إنجليزي7
7
Build the two blade guides
Build the two blade guides
In each guide channel (111) mount two guide rollers (115a, 115b) on ball bearings on eccentric bushings, one fixed and one adjusted to the blade thickness. Add a carbide thrust insert (133) on the blade's back edge and two carbide side inserts (137a fixed, 137b on a sprung swing bracket set by a bolt and knob). Clamp the guides on two bar tracks (107).
المواد لهذه الخطوة:
 بكرة توجيه4 قطعمحمل كُريّ4 قطع
 جلبة لامركزية4 قطع
 لقمة كربيد6 قطعCoil Spring2 قطعمقبض تحكّم2 قطعأنابيب فولاذية إنشائية1 قطعة
الأدوات المطلوبة:
مفتاح إنجليزي8
8
Fit the blade and set the tension
Fit the blade and set the tension
By hand, run the endless blade (47) round the drive and idler wheels and through both guides; the rollers twist its lower run about 90° so the teeth face down. Turn the tension knob until the scale shows the tension you want.
المواد لهذه الخطوة:
 شفرة منشار شريطي1 قطعة
9
9
Fit the feed cylinder and counterbalance
Fit the feed cylinder and counterbalance
Connect a hydraulic cylinder (71) between bed channel and head post above the trunnions, filled with oil and piped through tubing (75) to a control valve (73): the valve sets the feed rate and, closed, holds the head. Fit a coil spring (78) on a threaded linkage (79) between an end gusset and the head post below the trunnions, adjusted by a knob (80), to counterbalance the head.
المواد لهذه الخطوة:
 أسطوانة هيدروليكية1 قطعة
 زيت هيدروليكي1 batch
 أنبوب هيدروليكي1 قطعة
 صمام التحكم في التدفق1 قطعةCoil Spring1 قطعةقضيب مسنّن1 قطعةمقبض تحكّم1 قطعة
الأدوات المطلوبة:
مفتاح إنجليزي10
10
Bolt on the vice
Bolt on the vice
Bolt the quick-acting vice to the bed plate to clamp the work square under the blade.
المواد لهذه الخطوة:
 ملزمة آلية1 قطعةبرغي سدّاسي الرأس - رتبة 8.81 قطعة
الأدوات المطلوبة:
مفتاح إنجليزيالمواد
29- عنصر نائب
- 1 قطعةعنصر نائب
- عنصر نائب
- 1 قطعةعنصر نائب
- 1 قطعةعنصر نائب
- 1 قطعةعنصر نائب
- 2 قطععنصر نائب
- 2 قطععنصر نائب
- 1 قطعةعنصر نائب
- 1 قطعةعنصر نائب
- 1 قطعةعنصر نائب
- 1 قطعةعنصر نائب
- 1 قطعةعنصر نائب
- 1 قطعةعنصر نائب
- 1 قطعةعنصر نائب
- عنصر نائب
- 1 قطعةعنصر نائب
- 4 قطععنصر نائب
- 1 قطعةعنصر نائب
- عنصر نائب
- 4 قطععنصر نائب
- 4 قطععنصر نائب
- 6 قطععنصر نائب
- 1 قطعةعنصر نائب
- 1 قطعةعنصر نائب
- 1 batchعنصر نائب
- 1 قطعةعنصر نائب
- 1 قطعةعنصر نائب
- 1 قطعةعنصر نائب
هذا المخطط يصنع
CC0 ملكية عامة
هذا المخطط مُصدر بموجب CC0. يحق لك نسخه وتعديله وتوزيعه واستخدامه لأي غرض، دون طلب إذن.
ادعم الصانع بشراء منتجات عبر مخططه حيث يكسب عمولة الصانع يحددها البائعون، أو أنشئ نسخة جديدة من هذا المخطط وضمّنه كرابط في مخططك لمشاركة الإيرادات.