التعاون
فنون
الجمال والعناية
حِرَف
الثقافة والتاريخ
ترفيه
البيئة
الطعام والمشروبات
الهندسة العكسية
العلوم
رياضة
التقنية
الأجهزة القابلة للارتداء
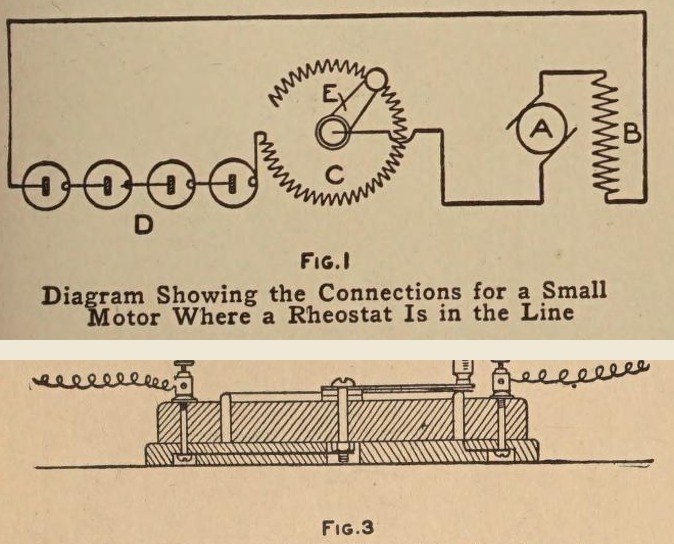


Rheostat: a Small Ring Rheostat for Toy Motors (Boy Mechanic, 1915)
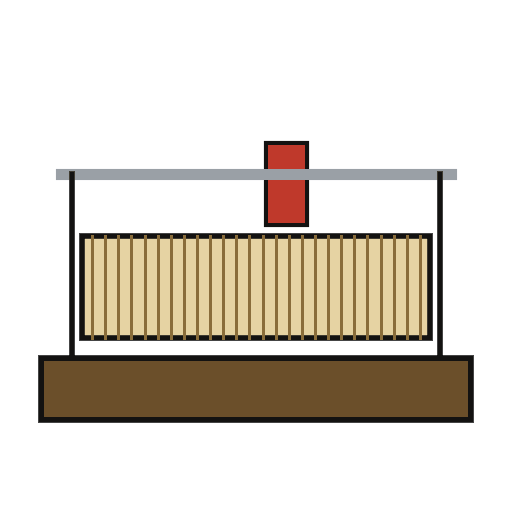
A small variable resistor to set the speed of a toy motor: resistance wire wound on a fibre strip bent into a ring, set in a groove in a hardwood base, with a brass arm that slides round the bared top of the winding.
Wired in series with the motor, it works like a valve in a water pipe.
Source: The Boy Mechanic, Book 2 (1915), pp. 393-394. Unknown: wire alloy. Picture: Figs. 1 and 3 of the book.
متوسط
Unknown
التعليمات
1
1
Wind the resistance strip
Wind the resistance strip
Smooth a strip of thin fibre about 1/16 in thick, 1/2 in wide and 10 in long. Wind it with No. 22 cotton-covered resistance wire, close turns from 1/4 in from one end to 1/4 in from the other, securing the ends through small drilled holes and leaving 3 to 4 in free. Bend the strip into a ring round a round object, winding outward, and note its inside and outside diameters.
المواد لهذه الخطوة:
 مادة غير معروفة1 fibre strip
 سلك مقاومة من الفضة الألمانية1 No. 22
الأدوات المطلوبة:
 مثقب يدوي
2
2
Make the base
Make the base
Round the corners and top edges of a seasoned hardwood block 1/2 x 4 1/2 x 4 1/2 in, mark the ring's two diameters from the centre, and saw out the circles so the ring fits between them. Screw this onto a second board 1/4 x 4 3/4 x 4 3/4 in from below with countersunk screws. Drill a hole for one wire end, fit two back-connected binding posts in the corners, and cut grooves underneath for the leads; one post goes to the winding, the other to the centre bolt.
المواد لهذه الخطوة:
 لوح خشب صلب2 1/2 and 1/4 in
 براغي خشب1 قطعة
 عمود ربط2 قطع
الأدوات المطلوبة:
 فرجار سنّي
 منشار ذو ظهرمثقب يدوي
 مفكّ مسطّح
3
3
Make and mount the arm
Make and mount the arm
Cut the arm from 1/16 in sheet brass, 2 in long, 1/2 in wide at one end and 1/4 in at the other. Under the narrow end solder thin spring brass to bear on the ring; fit a small handle on top. Mount it on a 1/8 in brass bolt about 1 in long through the centre, with washers under it, the base hole countersunk underneath 1/2 in wide and 1/4 in deep. Solder a short brass strip to the nut, set in a recess, and lock with a second nut or a spring washer.
المواد لهذه الخطوة:
 صفيحة نحاس أصفر1 arm, spring
 معدن غير معروف1 1/8 in brass bolt
 حلقة تثبيت مسطحة3 قطع
 Spring Washer1 قطعة
 لحام قصدير-رصاص1 قطعة
الأدوات المطلوبة:
 مقصّ صفائحمثقب يدوي
 كاوية لحام كهربائية
4
4
Bare the track and finish
Bare the track and finish
Set the ring in its groove. Sand the insulation off the top edge of the winding so the spring contact touches the wire. Give the wood a coat of shellac.
المواد لهذه الخطوة:
 ورنيش شلّاكي1 قطعة
الأدوات المطلوبة:
 ورق صنفرة
 فُرَش دقيقة
المواد
11- 1 fibre stripعنصر نائب
- 1 No. 22عنصر نائب
- 2 1/2 and 1/4 inعنصر نائب
- 1 قطعةعنصر نائب
- عنصر نائب
- 1 arm, springعنصر نائب
- 1 1/8 in brass boltعنصر نائب
- 3 قطععنصر نائب
- 1 قطعةعنصر نائب
- 1 قطعةعنصر نائب
- 1 قطعةعنصر نائب
الأدوات المطلوبة
8- عنصر نائب
- عنصر نائب
- عنصر نائب
- عنصر نائب
- عنصر نائب
- عنصر نائب
- عنصر نائب
- عنصر نائب
هذا المخطط يصنع
CC0 ملكية عامة
هذا المخطط مُصدر بموجب CC0. يحق لك نسخه وتعديله وتوزيعه واستخدامه لأي غرض، دون طلب إذن.
ادعم الصانع بشراء منتجات عبر مخططه حيث يكسب عمولة الصانع يحددها البائعون، أو أنشئ نسخة جديدة من هذا المخطط وضمّنه كرابط في مخططك لمشاركة الإيرادات.