ART
BEAUTY & WELLNESS
CRAFT
CULTURE & HISTORY
ENTERTAINMENT
ENVIRONMENT
FOOD & DRINKS
REVERSE ENGINEERING
SCIENCES
SPORTS
TECHNOLOGY
WEARABLES


Acid Spill Kit: Assembled for the Lab
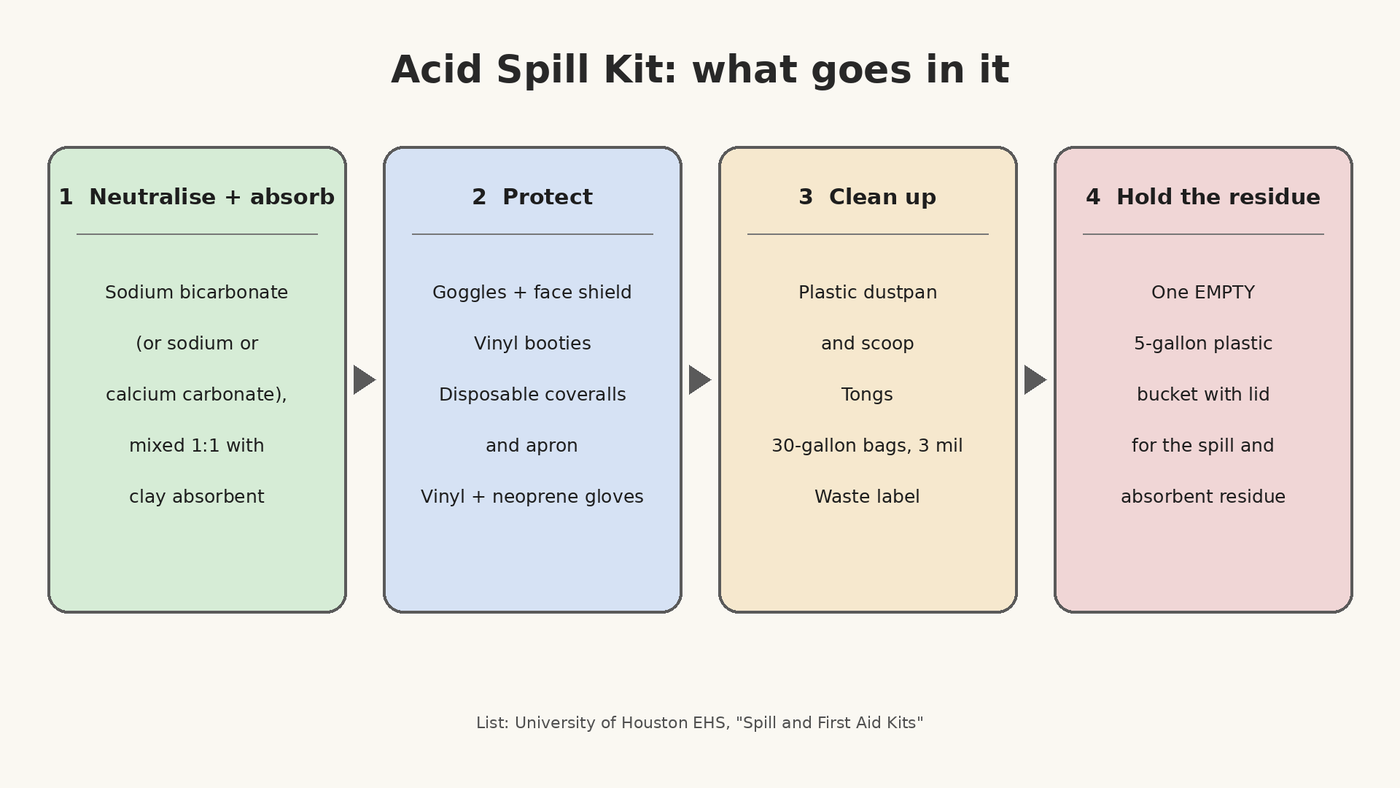
A spill kit you assemble yourself, to the University of Houston's laboratory list: a neutralising absorbent, protective gear, clean-up tools, waste bags and an empty lidded bucket for the residue. For acids the neutraliser is sodium bicarbonate (or sodium or calcium carbonate); mixed 1:1 with clay absorbent it also soaks up solvents and bases. UH says to tailor the kit to each lab.
The list gives no amounts. The picture: our diagram of the list.
Beginner
30 minutes
Instructions
1
1
Mix the universal absorbent
Mix the universal absorbent
Mix sodium bicarbonate 1:1 with clay absorbent (floor-dry or unscented cat litter); or 1:1:1 clay absorbent, sodium bicarbonate and sand. The bicarbonate neutralises acid; the clay soaks up the liquid.
Materials for this step:
 Sodium Bicarbonate1 batch
 Clay Absorbent1 batch
 Sand1 batch
Tools needed:
 Scoop
2
2
Pack the protective gear
Pack the protective gear
By hand, pack goggles and a face shield, vinyl booties, disposable coveralls and an apron, disposable vinyl gloves and heavy neoprene gloves.
Materials for this step:
 Safety Goggles1 piece
 Face Shield1 piece
 Shoe Covers1 pair
 Disposable Coveralls1 piece
 Chemical Apron1 piece
 Vinyl Gloves1 pair
 Chemical-Resistant Gloves1 pair
3
3
Pack the clean-up tools
Pack the clean-up tools
By hand, pack a plastic dustpan and scoop, tongs, plastic bags (30-gallon, 3 mil thick) and a waste label.
Materials for this step:
 Dustpan1 pieceScoop1 piece
 Tongs1 piece
 Plastic Bags1 pack
 Adhesive Labels1 sheet
4
4
Keep the residue bucket empty
Keep the residue bucket empty
Keep one empty 5-gallon plastic bucket with a lid in the kit for the spill and absorbent residue. Ours: mark the kit and the bucket with a permanent marker.
Materials for this step:
 Bucket1 piece
Tools needed:
 Permanent Marker
Materials
16- 1 batchPlaceholder
- 1 batchPlaceholder
- 1 batchPlaceholder
- 1 piecePlaceholder
- 1 piecePlaceholder
- 1 pairPlaceholder
- 1 piecePlaceholder
- 1 piecePlaceholder
- 1 pairPlaceholder
- Placeholder
- 1 piecePlaceholder
- 1 piecePlaceholder
- 1 piecePlaceholder
- 1 packPlaceholder
- 1 sheetPlaceholder
- 1 piecePlaceholder
CC0 Public Domain
This blueprint is released under CC0. You are free to copy, modify, distribute, and use this work for any purpose, without asking permission.
Support the Maker by purchasing products through their Blueprint where they earn a Maker Commission set by Vendors, or create a new iteration of this Blueprint and include it as a connection in your own Blueprint to share revenue.