ศิลปะ
ความงามและสุขภาพ
งานฝีมือ
วัฒนธรรมและประวัติศาสตร์
ความบันเทิง
สิ่งแวดล้อม
อาหารและเครื่องดื่ม
วิศวกรรมย้อนรอย
วิทยาศาสตร์
กีฬา
เทคโนโลยี
อุปกรณ์สวมใส่
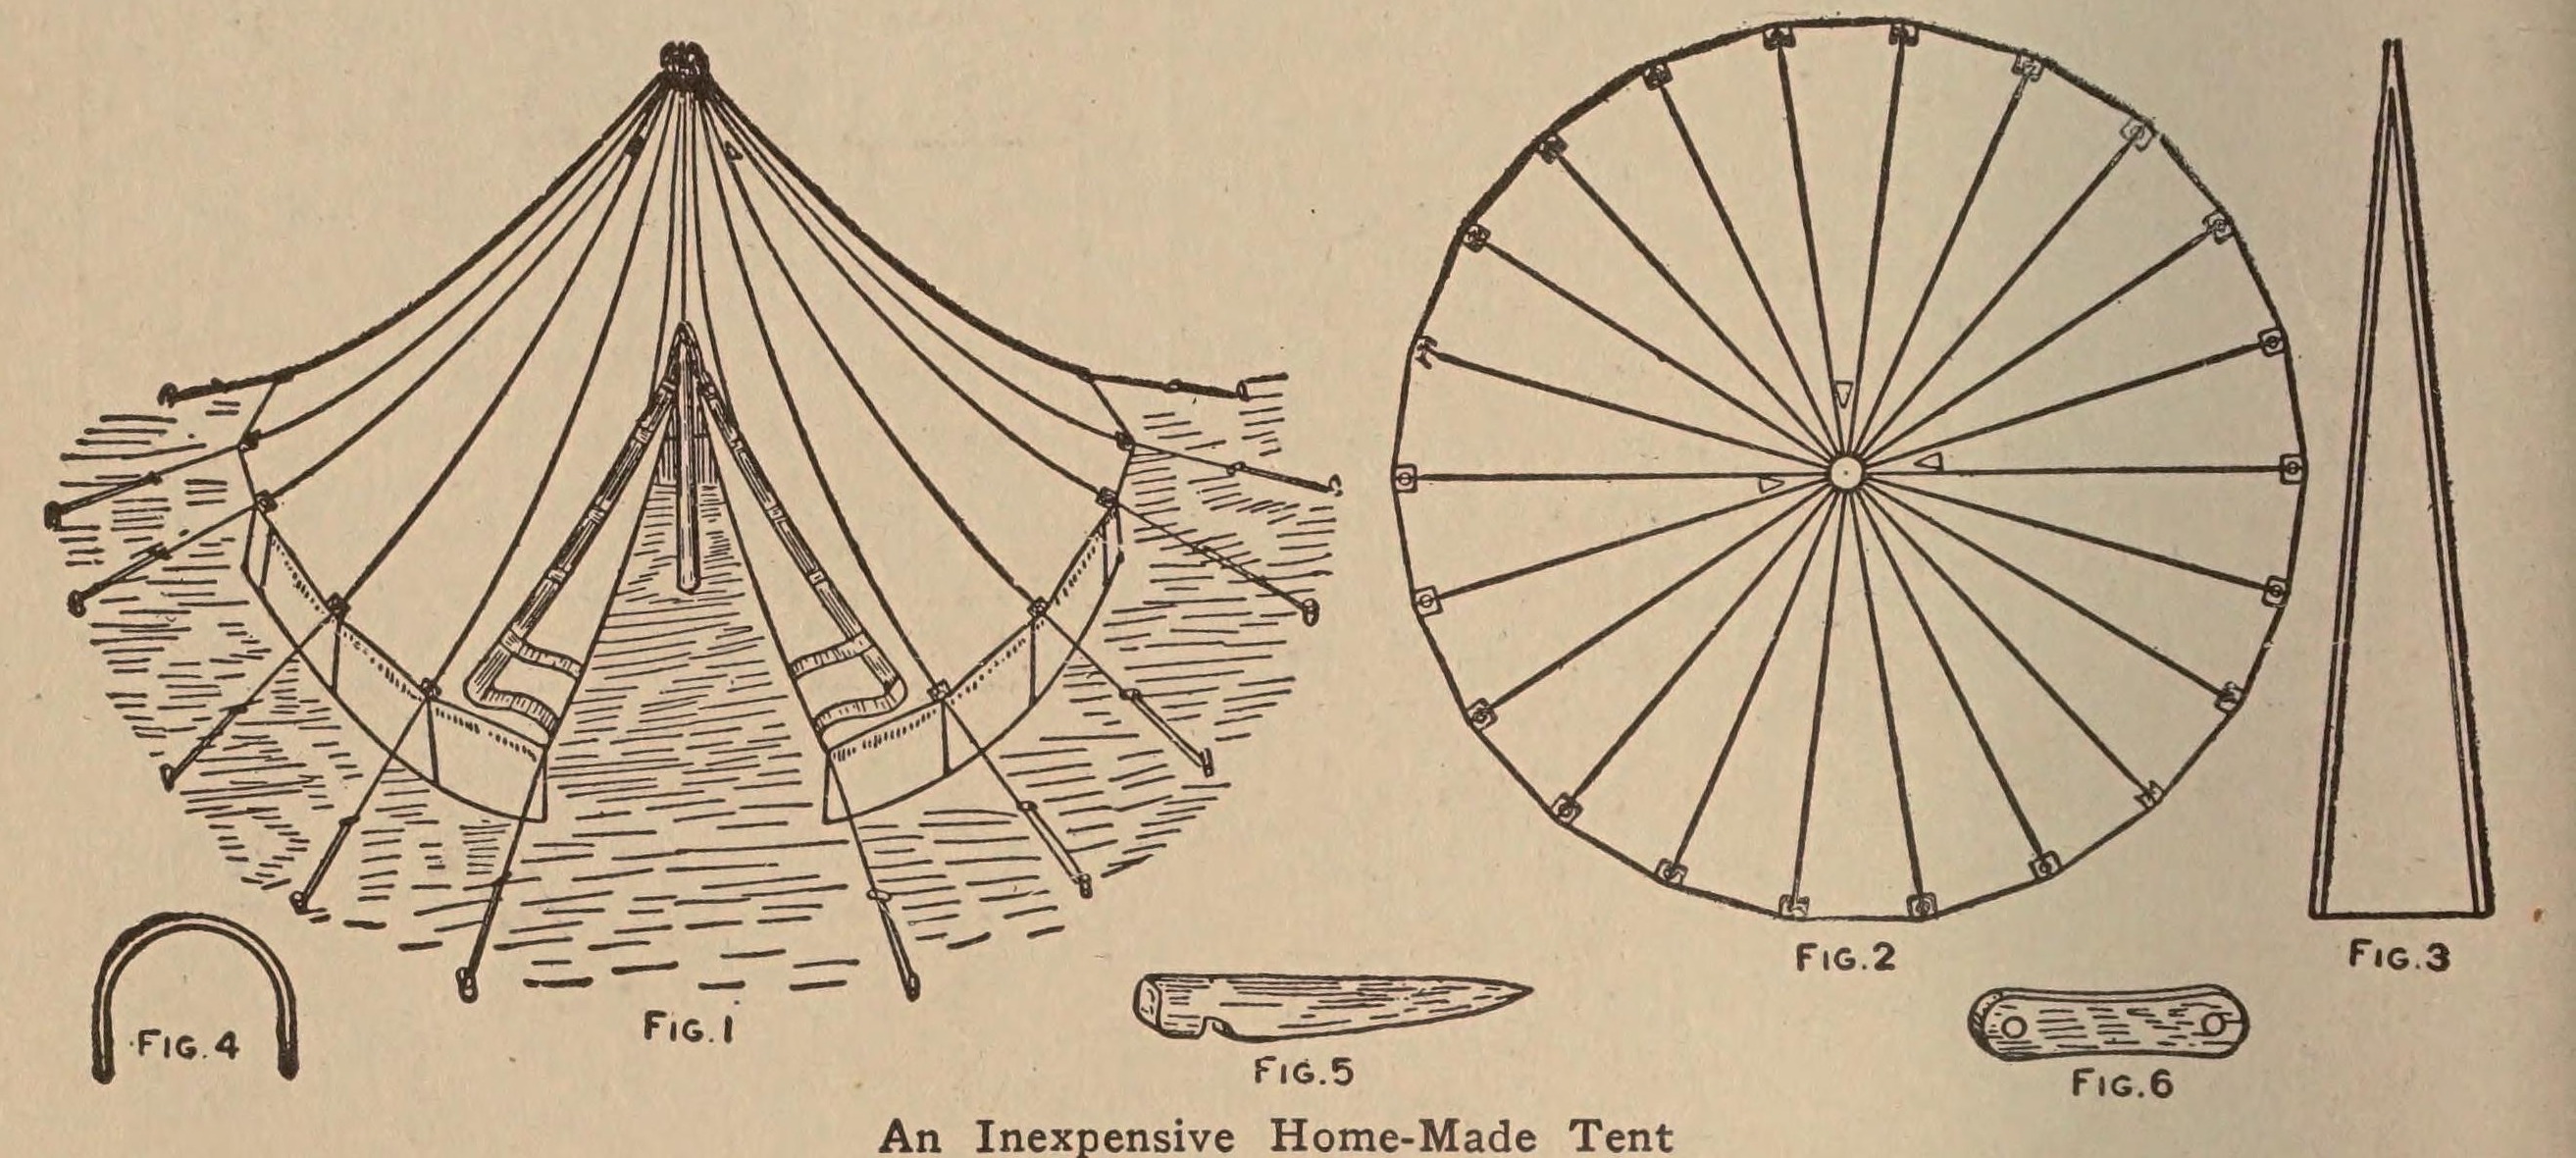


Bell Tent, 14 ft: Twenty-Two Duck Sections, a Galvanized Hoop at the Apex and a Two-Piece Pole (Boy Mechanic, 1913)
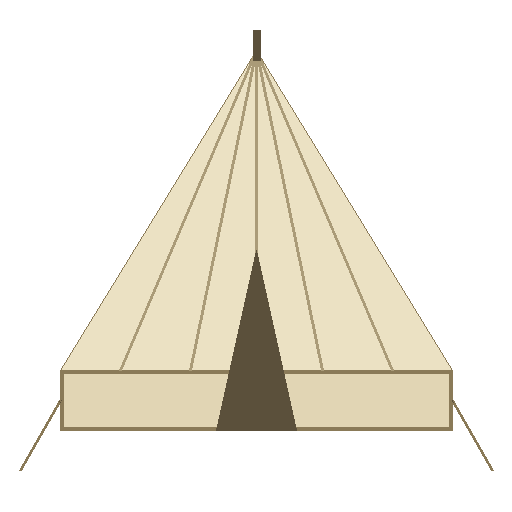
A round bell tent 14 ft across "for lawns, as well as for a boy's camping outfit", from The Boy Mechanic (1913): twenty-two tapered sections of unbleached tent duck sewn into a cone on a small iron hoop, a 2 ft 2 in wall, three ventilators, webbing-bound edges with eyelets for the stay ropes, and one centre pole.
Sizes are his; the pole length is worked out from them.
ระดับกลาง
About 3 days
คำแนะนำ
1
1
The cover, checked
The cover, checked
กำลังโหลดสมุด Jupyter…
2
2
Read The Boy Mechanic
Read The Boy Mechanic
"To make such a tent, procure unbleached tent duck, which is the very best material for the purpose."
3
3
Cut and sew the cover
Cut and sew the cover
Cut 22 sections of unbleached tent duck, each 10 ft 6 in long and 2 ft 2 in wide at the bottom, tapering in a straight line to a point; these sizes allow for lapped seams. Double-stitch the seams on a machine. Sew the last seam only 4 ft down from the top, leaving the rest as the door, and stitch an extra gusset at the end of it so it will not rip.
วัสดุสำหรับขั้นตอนนี้:
 ผ้าใบ1 ชิ้น
 ด้ายเย็บผ้า1 ชิ้น
เครื่องมือที่ต้องใช้:
 จักรเย็บผ้า
 กรรไกร
 ตลับเมตร
 ดินสอ
4
4
Bind the edges and cut the ventilators
Bind the edges and cut the ventilators
Fold back the edges of the opening and the bottom edge of the cover and bind them with wide webbing, 3 in across, with eyelets at the seams for the stay ropes. Near the apex cut three triangular ventilators 8 in long and 4 in wide at the bottom, and hem their edges.
วัสดุสำหรับขั้นตอนนี้:
 แถบผ้าฝ้ายทอ1 ชิ้น
 ห่วงหมุดย้ำ22 ชิ้นด้ายเย็บผ้า1 ชิ้น
เครื่องมือที่ต้องใช้:
จักรเย็บผ้ากรรไกร ค้อน
5
5
Make the wall
Make the wall
Make the wall of the same cloth, 2 ft 2 in high. Bind its upper edge with webbing and its bottom with canvas, and stitch coarse canvas 6 in wide along the bottom to fill the space between ground and wall. Stitch the top of the wall firmly to the cover along the dotted line of his Fig. 2.
วัสดุสำหรับขั้นตอนนี้:
ผ้าใบ1 ชิ้นแถบผ้าฝ้ายทอ1 ชิ้นด้ายเย็บผ้า1 ชิ้นเครื่องมือที่ต้องใช้:
จักรเย็บผ้ากรรไกร6
6
Fit the apex hoop and hood
Fit the apex hoop and hood
Have a blacksmith make a hoop of 1/4 in round galvanized iron, 6 in in diameter. Stitch the canvas at the apex round the hoop and along the sides, and make the apex into a hood lined with stiff canvas.
วัสดุสำหรับขั้นตอนนี้:
 เหล็กเส้นกลม1 ชิ้นผ้าใบ1 ชิ้นด้ายเย็บผ้า1 ชิ้น
เครื่องมือที่ต้องใช้:
 เข็มเย็บผ้ากรรไกร
7
7
Make the pole, pegs and blocks
Make the pole, pegs and blocks
Make the tent pole 3 in in diameter in two sections with a socket joint, rounded at the top to fit the apex; its length is about 10 ft (our figure from step 1). Cut small pegs for the wall loops, stakes for the stay ropes, and a wooden block for each stay rope to hold its end and adjust its length (his Fig. 6).
วัสดุสำหรับขั้นตอนนี้:
 เสาไม้1 ชิ้น
 หลักไม้1 ชิ้น
 แถบไม้เนื้อแข็ง1 ชิ้น
เครื่องมือที่ต้องใช้:
 เลื่อยมือ
 สว่านมือหมุนพร้อมดอก
8
8
Pitch it
Pitch it
Raise the cover on the pole. Fasten the wall down with loops of stout line on its lower edge and small pegs driven through them into the ground. Run the stay ropes from the eyelets in the cover to stakes in the ground, through the blocks, and adjust them until the cover is tight.
วัสดุสำหรับขั้นตอนนี้:
 เชือกฝ้ายตีเกลียว1 ชิ้น
เครื่องมือที่ต้องใช้:
ค้อน9
9
Troubleshooting
Troubleshooting
Bell tent troubleshooting.
Flow
Loading...
10
10
History and honest limits
History and honest limits
From **The Boy Mechanic**, edited by H. H. Windsor, Popular Mechanics, Chicago, 1913, p. 190, "How to Make a Bell Tent", credited to the Cleveland Plain Dealer; text checked on the 1913 scan. He gives no pole length, number of stay ropes or peg sizes: the pole length is our geometry. Thread, tools and metric figures are ours.
วัสดุ
9- 3 ชิ้นตัวยึดตำแหน่ง
- 4 ชิ้นตัวยึดตำแหน่ง
- 2 ชิ้นตัวยึดตำแหน่ง
- 22 ชิ้นตัวยึดตำแหน่ง
- 1 ชิ้นตัวยึดตำแหน่ง
- 1 ชิ้นตัวยึดตำแหน่ง
- 1 ชิ้นตัวยึดตำแหน่ง
- 1 ชิ้นตัวยึดตำแหน่ง
- 1 ชิ้นตัวยึดตำแหน่ง
เครื่องมือที่จำเป็น
8- ตัวยึดตำแหน่ง
- ตัวยึดตำแหน่ง
- 1 vendor sell this, none ship to you yetตัวยึดตำแหน่ง
- 1 vendor sell this, none ship to you yetตัวยึดตำแหน่ง
- ตัวยึดตำแหน่ง
- ตัวยึดตำแหน่ง
- ตัวยึดตำแหน่ง
- ตัวยึดตำแหน่ง
พิมพ์เขียวนี้สร้าง
บลูพริ้นท์ที่เกี่ยวข้อง
บลูพริ้นท์เหล่านี้แบ่งปันความรู้ — เทคนิค วัสดุ หรือหลักการ
CC0 สาธารณสมบัติ
พิมพ์เขียวนี้เผยแพร่ภายใต้ CC0 คุณสามารถคัดลอก แก้ไข แจกจ่าย และใช้งานผลงานนี้เพื่อวัตถุประสงค์ใดก็ได้ โดยไม่ต้องขออนุญาต
สนับสนุนเมกเกอร์โดยซื้อสินค้าผ่านพิมพ์เขียวของพวกเขา ซึ่งพวกเขาจะได้รับ ค่าคอมมิชชันเมกเกอร์ ที่ผู้ขายกำหนด หรือสร้างเวอร์ชันใหม่ของพิมพ์เขียวนี้และรวมเป็นการเชื่อมต่อในพิมพ์เขียวของคุณเพื่อแบ่งรายได้