การทำงานร่วมกัน
ศิลปะ
ความงามและสุขภาพ
งานฝีมือ
วัฒนธรรมและประวัติศาสตร์
ความบันเทิง
สิ่งแวดล้อม
อาหารและเครื่องดื่ม
วิศวกรรมย้อนรอย
วิทยาศาสตร์
กีฬา
เทคโนโลยี
อุปกรณ์สวมใส่
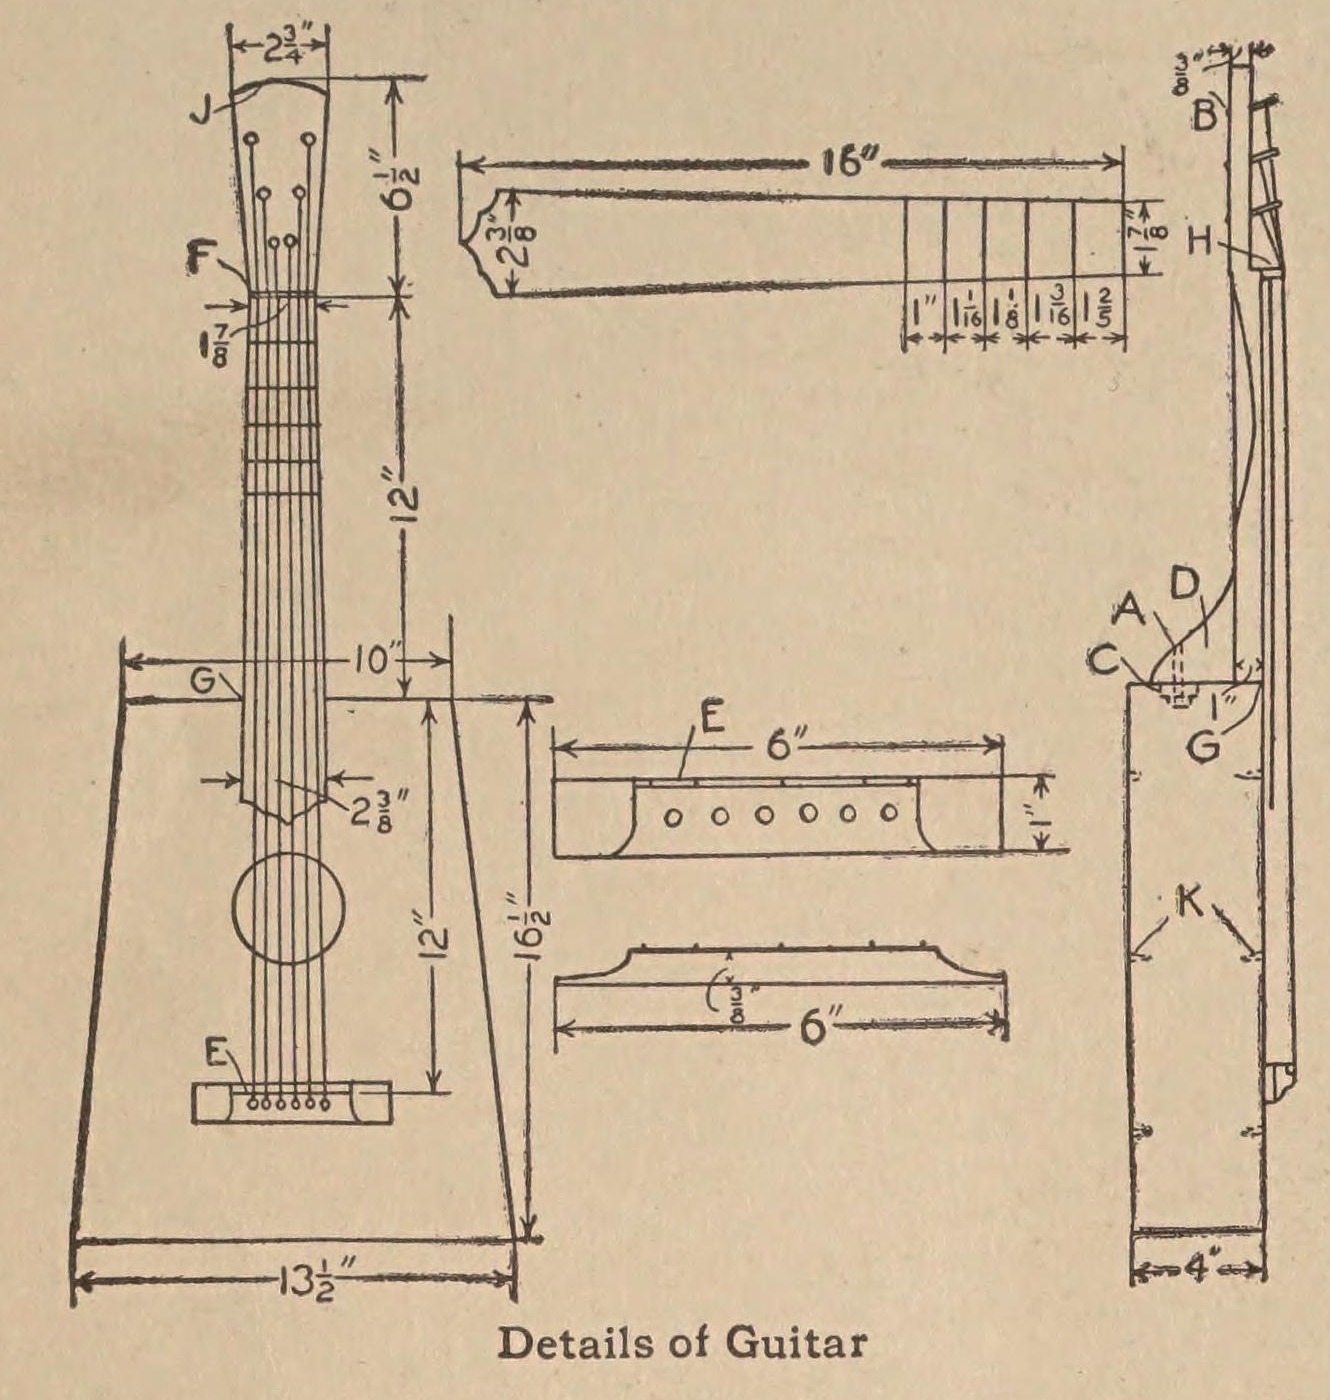


Straight-Sided Guitar: Maple Box, Pine Top, Hatpin Frets and a 24-Inch Scale (Boy Mechanic, 1913)
A six-string guitar "having straight lines, giving it an old-fashioned appearance", from The Boy Mechanic (1913): a tapered box of hard maple with a seasoned soft-pine top, a drawknifed neck, frets cut from hatpins and a 24 in scale. Sizes are read on the 1913 scan.
"If care is taken in selecting the material, and having it thoroughly seasoned, the finished instrument will have a fine tone."
ขั้นสูง
About 1 week, with glue drying
คำแนะนำ
1
1
Cutting list and frets
Cutting list and frets
กำลังโหลดสมุด Jupyter…
2
2
Read The Boy Mechanic
Read The Boy Mechanic
"The sides, ends and bottom are made of hard wood, preferably hard maple, and the top should be made of a thoroughly seasoned piece of soft pine." (J. H. Stoddard, Carbondale, Pa.)
3
3
Cut the pieces
Cut the pieces
Cut from thoroughly seasoned wood: top 3/16 by 14 by 17 in (soft pine); bottom 3/16 by 14 by 17 in, two sides 3/16 by 3-5/8 by 16-3/4 in, and ends 3/16 by 3-5/8 by 13-1/8 in and 9-5/8 in (hard maple); neck 1 by 2-5/16 by 18-1/2 in; fingerboard 3/16 by 2-5/8 by 16 in.
วัสดุสำหรับขั้นตอนนี้:
 แผ่นไม้เนื้อแข็ง1 ชิ้น
 แผ่นไม้สน1 ชิ้น
เครื่องมือที่ต้องใช้:
 เลื่อยมือ
 ตลับเมตร
 ฉากตาย
4
4
Shape the neck and fingerboard
Shape the neck and fingerboard
Taper the neck from G to F and from J to F, with the back rounded, using a drawknife: 2-3/8 in at the heel, 1-7/8 in at the nut F, and a head 2-3/4 in wide and 6-1/2 in long. Taper the fingerboard to match. Glue a piece of hard wood 1/4 in square and 1-7/8 in long across the neck at F as the nut. Glue the fingerboard to the neck and clamp it until the glue sets.
วัสดุสำหรับขั้นตอนนี้:
 แถบไม้เนื้อแข็ง1 ชิ้น
 กาวไม้1 ชิ้น
เครื่องมือที่ต้องใช้:
 มีดสองมือเลื่อยมือ
 แคลมป์แบบบาร์
5
5
Fret the fingerboard
Fret the fingerboard
Mark the frets from the nut using the computed positions in step 1 (fret 1 at 1.347 in, fret 12 at 12 in). His drawing gives only five spaces, 1-2/5, 1-3/16, 1-1/8, 1-1/16 and 1 in; added up they put the 5th fret about 0.3 in short of the true place, so they are shown for history only. Cut pieces from hatpins and fasten them across the fingerboard with small wire staples. Mark accurately: the frets decide the pitch.
วัสดุสำหรับขั้นตอนนี้:
 เข็มกลัดหมวก1 ชิ้น
 ลวดตัวยูตอกไม้1 ชิ้น
เครื่องมือที่ต้องใช้:
 คีมปากแบน
 ค้อนตลับเมตรฉากตาย
6
6
Build the box
Build the box
Glue the sides and ends together, so the body is 10 in wide at the neck end, 13-1/2 in at the tail and 16-1/2 in long. Glue the front on, put heavy weights on top and give the glue time to dry. Fasten pieces of soft wood in the corners as braces, glue a small block C inside the neck end to take the bolt, and glue strips of soft wood K across the front and back to strengthen them. Cut the sound hole in the top as drawn.
วัสดุสำหรับขั้นตอนนี้:
 ไม้ระแนงไม้เนื้ออ่อน1 ชิ้นกาวไม้1 ชิ้น
เครื่องมือที่ต้องใช้:
เลื่อยมือแคลมป์แบบบาร์ สว่านมือหมุนพร้อมดอก
7
7
Fit the neck
Fit the neck
Make the brace D 1 in thick, to any shape you like. Glue the neck to the box and secure it with a carriage bolt at A through the end and block C. Glue the back on and smooth the outside with sandpaper.
วัสดุสำหรับขั้นตอนนี้:
แถบไม้เนื้อแข็ง1 ชิ้น สลักเกลียวหัวกลม1 ชิ้นแผ่นไม้เนื้อแข็ง1 ชิ้นกาวไม้1 ชิ้น
 กระดาษทราย1 ชิ้น
เครื่องมือที่ต้องใช้:
สว่านมือหมุนพร้อมดอกแคลมป์แบบบาร์8
8
Make and place the bridge
Make and place the bridge
Make the bridge 6 in long, 1 in wide and 3/8 in high, with an old hatpin or wire of the same size secured on top with pin staples as the saddle E. Drill six 3/16 in holes in it for the pins. Glue it on the top so the distance from the nut F to the saddle E is just 24 in.
วัสดุสำหรับขั้นตอนนี้:
แถบไม้เนื้อแข็ง1 ชิ้นเข็มกลัดหมวก1 ชิ้นลวดตัวยูตอกไม้1 ชิ้นกาวไม้1 ชิ้นเครื่องมือที่ต้องใช้:
สว่านมือหมุนพร้อมดอกเลื่อยมือตลับเมตร9
9
String it
String it
Fit the turning pegs B in the head and string the guitar, holding the strings in the bridge with the pins. He bought the pegs and strings from a music store.
วัสดุสำหรับขั้นตอนนี้:
 ลูกบิดตั้งสาย1 ชิ้น
 สายกีตาร์1 ชิ้น
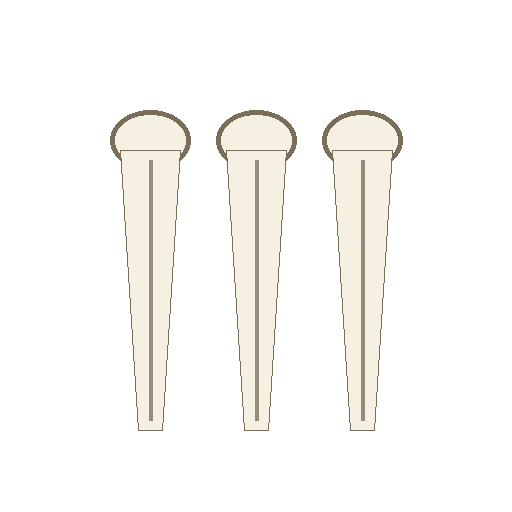 หมุดหย่องกีตาร์1 ชิ้น
เครื่องมือที่ต้องใช้:
สว่านมือหมุนพร้อมดอก10
10
Troubleshooting
Troubleshooting
Guitar troubleshooting.
Flow
Loading...
11
11
History and honest limits
History and honest limits
From **The Boy Mechanic**, edited by H. H. Windsor, Popular Mechanics, Chicago, 1913, p. 320, "A Guitar That Is Easy to Make", sent in by J. H. Stoddard of Carbondale, Pa.; sizes read on the 1913 scan (archive.org boymechanicthing01unse). He dimensions only the first five fret spaces, and they disagree with equal temperament; the fret positions used are computed by us. The sound hole, saddle and string tensions are not dimensioned. The tools and metric figures are ours.
วัสดุ
12- 1 ชิ้นตัวยึดตำแหน่ง
- 1 ชิ้นตัวยึดตำแหน่ง
- 1 ชิ้นตัวยึดตำแหน่ง
- 4 ชิ้นตัวยึดตำแหน่ง
- 2 ชิ้นตัวยึดตำแหน่ง
- 2 ชิ้นตัวยึดตำแหน่ง
- 1 ชิ้นตัวยึดตำแหน่ง
- 1 ชิ้นตัวยึดตำแหน่ง
- 1 ชิ้นตัวยึดตำแหน่ง
- 1 ชิ้นตัวยึดตำแหน่ง
- 1 ชิ้นตัวยึดตำแหน่ง
- 1 ชิ้นตัวยึดตำแหน่ง
พิมพ์เขียวนี้สร้าง
บลูพริ้นท์ที่เกี่ยวข้อง
บลูพริ้นท์เหล่านี้แบ่งปันความรู้ — เทคนิค วัสดุ หรือหลักการ

CC0 สาธารณสมบัติ
พิมพ์เขียวนี้เผยแพร่ภายใต้ CC0 คุณสามารถคัดลอก แก้ไข แจกจ่าย และใช้งานผลงานนี้เพื่อวัตถุประสงค์ใดก็ได้ โดยไม่ต้องขออนุญาต
สนับสนุนเมกเกอร์โดยซื้อสินค้าผ่านพิมพ์เขียวของพวกเขา ซึ่งพวกเขาจะได้รับ ค่าคอมมิชชันเมกเกอร์ ที่ผู้ขายกำหนด หรือสร้างเวอร์ชันใหม่ของพิมพ์เขียวนี้และรวมเป็นการเชื่อมต่อในพิมพ์เขียวของคุณเพื่อแบ่งรายได้