ศิลปะ
ความงามและสุขภาพ
งานฝีมือ
วัฒนธรรมและประวัติศาสตร์
ความบันเทิง
สิ่งแวดล้อม
อาหารและเครื่องดื่ม
วิศวกรรมย้อนรอย
วิทยาศาสตร์
กีฬา
เทคโนโลยี
อุปกรณ์สวมใส่
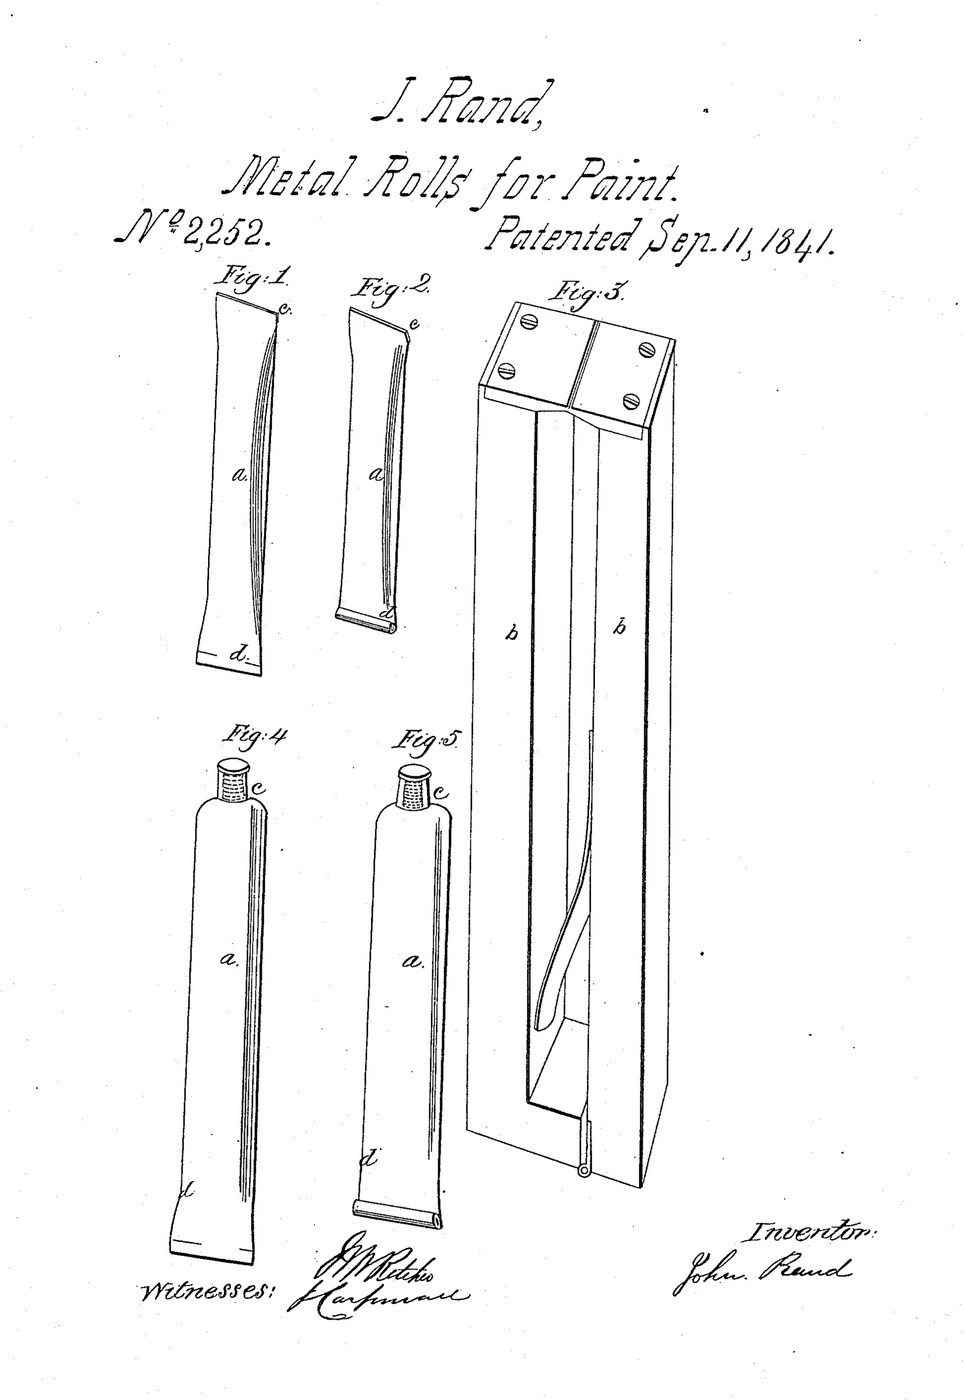


Empty Paint Tube: Soldered Sheet Lead, Rand 1841
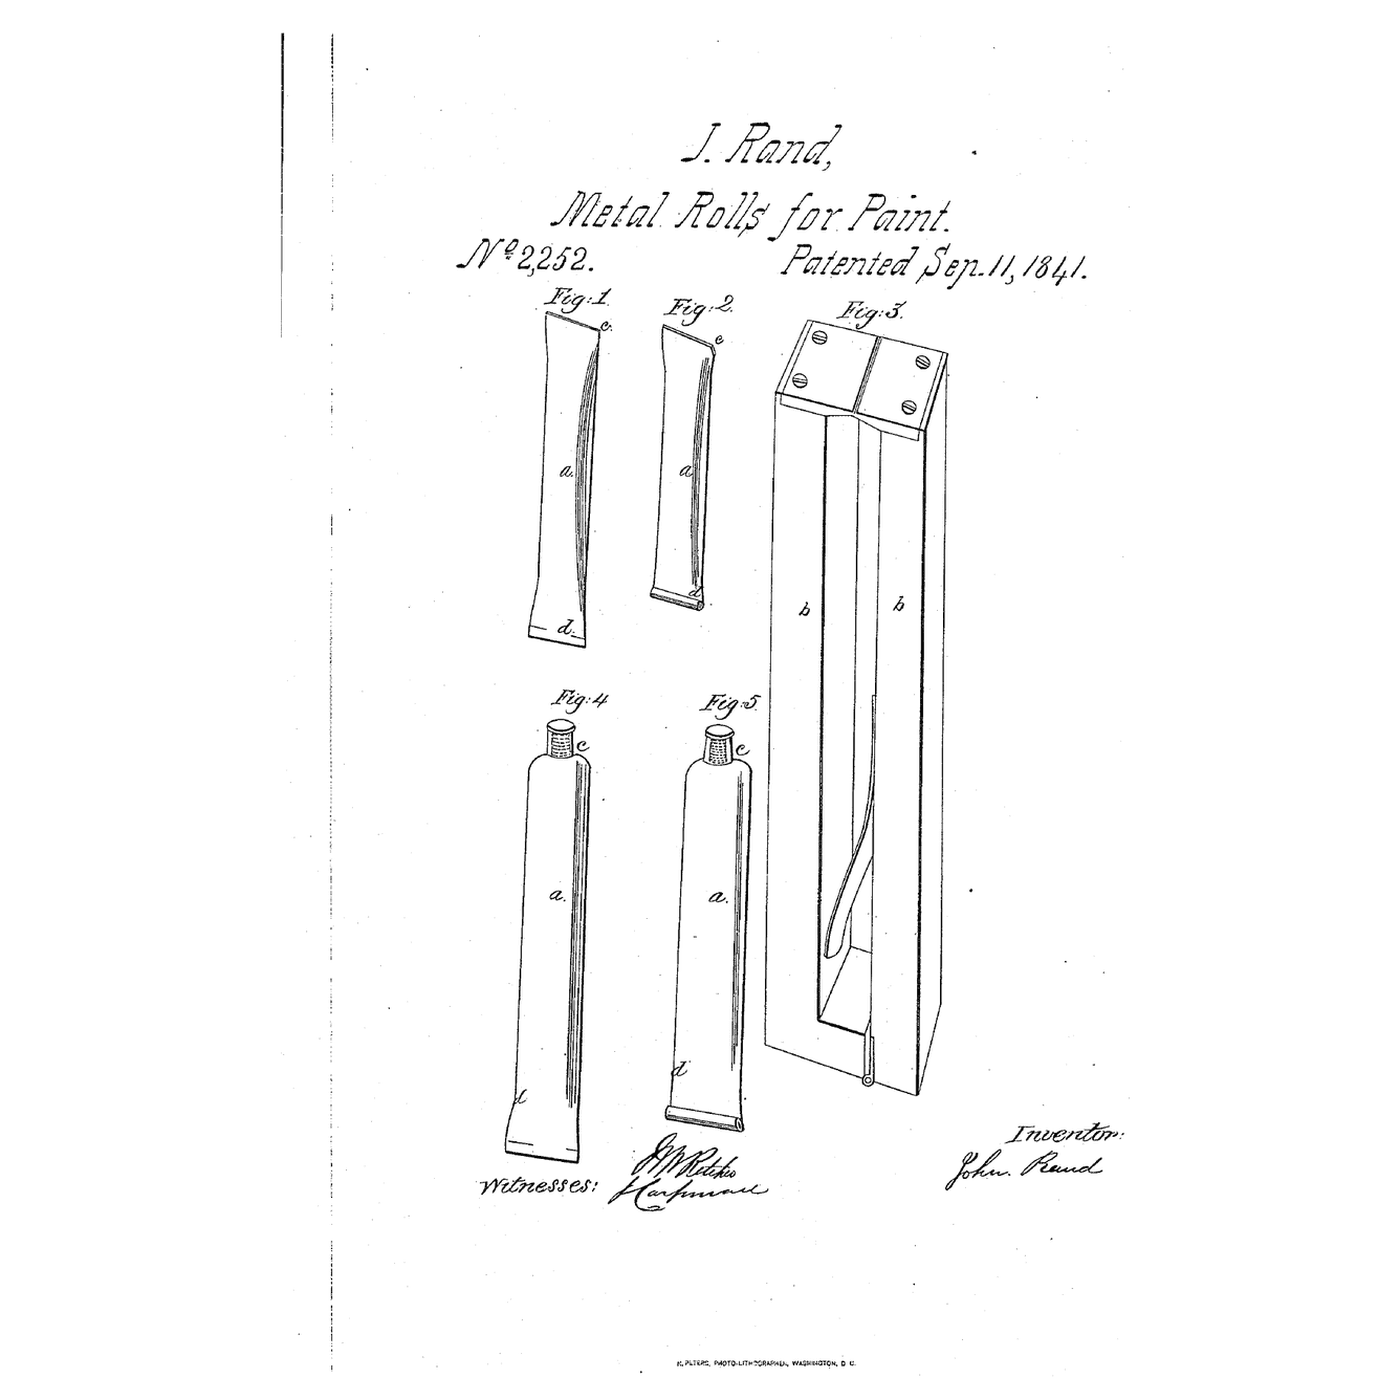
John Rand's 1841 patent names grain-tin, lead and pewter for paint tubes. The metal only has to be thin enough to yield to pressure and stay collapsed. His own tube was drawn tin about 1/75 inch thick, but he writes that a tube of sheet metal with a soldered seam works as well. This is that route in lead: roll a strip round a former, solder the seam, close one end, and leave the other open for filling.
Source: J. Rand, US 2,252 (1841). The sheet thickness, former, flux, size and tools are ours. The picture is the patent's drawing sheet.
ระดับกลาง
1 hour
คำแนะนำ
1
1
Cut the strip
Cut the strip
Cut a strip of thin lead sheet as long as the tube and wide enough to go once round the former with a narrow overlap. Rand asks only for metal thin enough to yield to pressure and stay collapsed; ours is Ure's thinner cast sheet, 1/48 in (0.5 mm). Longer tubes need somewhat thicker metal.
วัสดุสำหรับขั้นตอนนี้:
 แผ่นตะกั่ว1 as required
เครื่องมือที่ต้องใช้:
 กรรไกรตัดแผ่นโลหะ
 ไม้บรรทัด
2
2
Roll it round a former
Roll it round a former
Roll the strip round a round wooden dowel so the edges overlap, and press the seam flat. The dowel and the overlap are ours.
เครื่องมือที่ต้องใช้:
 เดือยไม้
3
3
Solder the seam
Solder the seam
Join the edges by soldering, one of the two ways Rand gives (the other is melting the edges together). Ours: a little rosin flux and tin-lead solder run along the seam with a hot iron, on the dowel. Slide the tube off.
วัสดุสำหรับขั้นตอนนี้:
 ตะกั่วบัดกรีดีบุก-ตะกั่ว1 as required
 ครีมฟลักซ์บัดกรี (ฐานโรซิน)1 as required
เครื่องมือที่ต้องใช้:
 หัวแร้งบัดกรีเดือยไม้
4
4
Close one end
Close one end
Press the edges of one end together with flat pliers (Rand used forceps that leave a groove along the end). Close it by adding a little solder with a hot iron. Leave the other end open: the tube is filled from there and then closed the same way.
วัสดุสำหรับขั้นตอนนี้:
ตะกั่วบัดกรีดีบุก-ตะกั่ว1 as requiredเครื่องมือที่ต้องใช้:
 คีมปากแบนหัวแร้งบัดกรี
วัสดุ
3- 1 as requiredตัวยึดตำแหน่ง
- 2 as requiredตัวยึดตำแหน่ง
- 1 as requiredตัวยึดตำแหน่ง
พิมพ์เขียวนี้สร้าง

บลูพริ้นท์ที่เกี่ยวข้อง
บลูพริ้นท์เหล่านี้แบ่งปันความรู้ — เทคนิค วัสดุ หรือหลักการ

CC0 สาธารณสมบัติ
พิมพ์เขียวนี้เผยแพร่ภายใต้ CC0 คุณสามารถคัดลอก แก้ไข แจกจ่าย และใช้งานผลงานนี้เพื่อวัตถุประสงค์ใดก็ได้ โดยไม่ต้องขออนุญาต
สนับสนุนเมกเกอร์โดยซื้อสินค้าผ่านพิมพ์เขียวของพวกเขา ซึ่งพวกเขาจะได้รับ ค่าคอมมิชชันเมกเกอร์ ที่ผู้ขายกำหนด หรือสร้างเวอร์ชันใหม่ของพิมพ์เขียวนี้และรวมเป็นการเชื่อมต่อในพิมพ์เขียวของคุณเพื่อแบ่งรายได้