การทำงานร่วมกัน
ศิลปะ
ความงามและสุขภาพ
งานฝีมือ
วัฒนธรรมและประวัติศาสตร์
ความบันเทิง
สิ่งแวดล้อม
อาหารและเครื่องดื่ม
วิศวกรรมย้อนรอย
วิทยาศาสตร์
กีฬา
เทคโนโลยี
อุปกรณ์สวมใส่
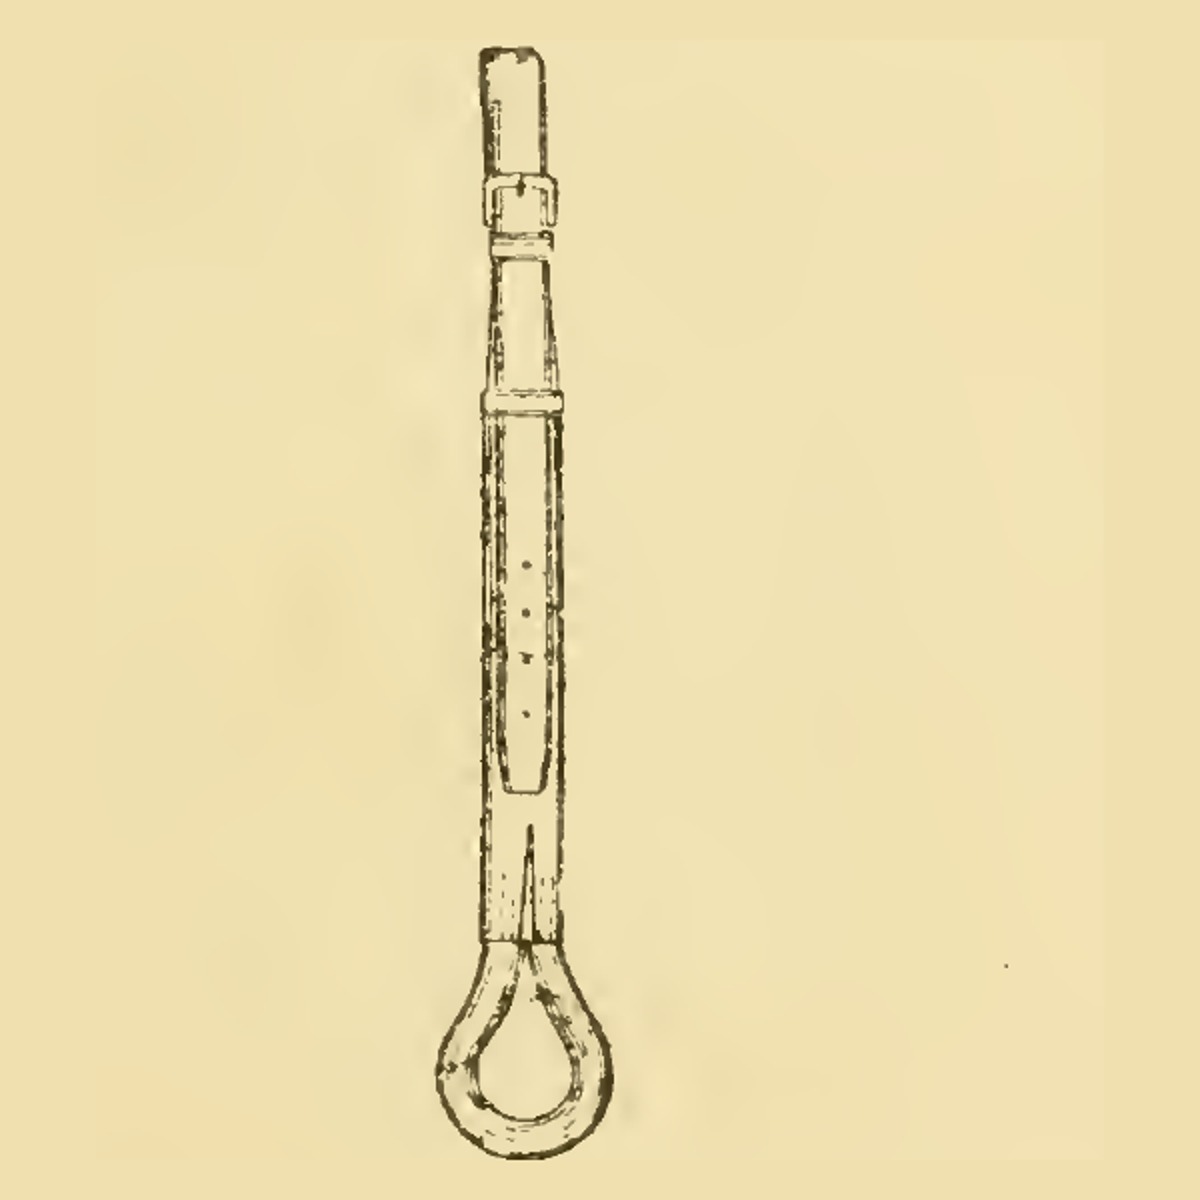


Saddle Crupper: Slit Body, Buckled Billet and Paper-Cored Dock (Hasluck, Saddlery, 1904)
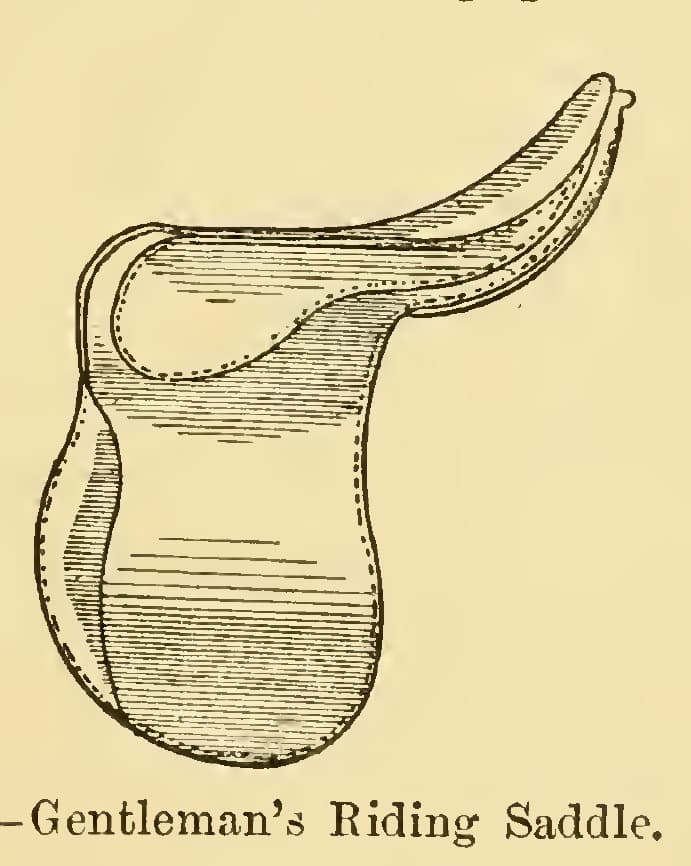
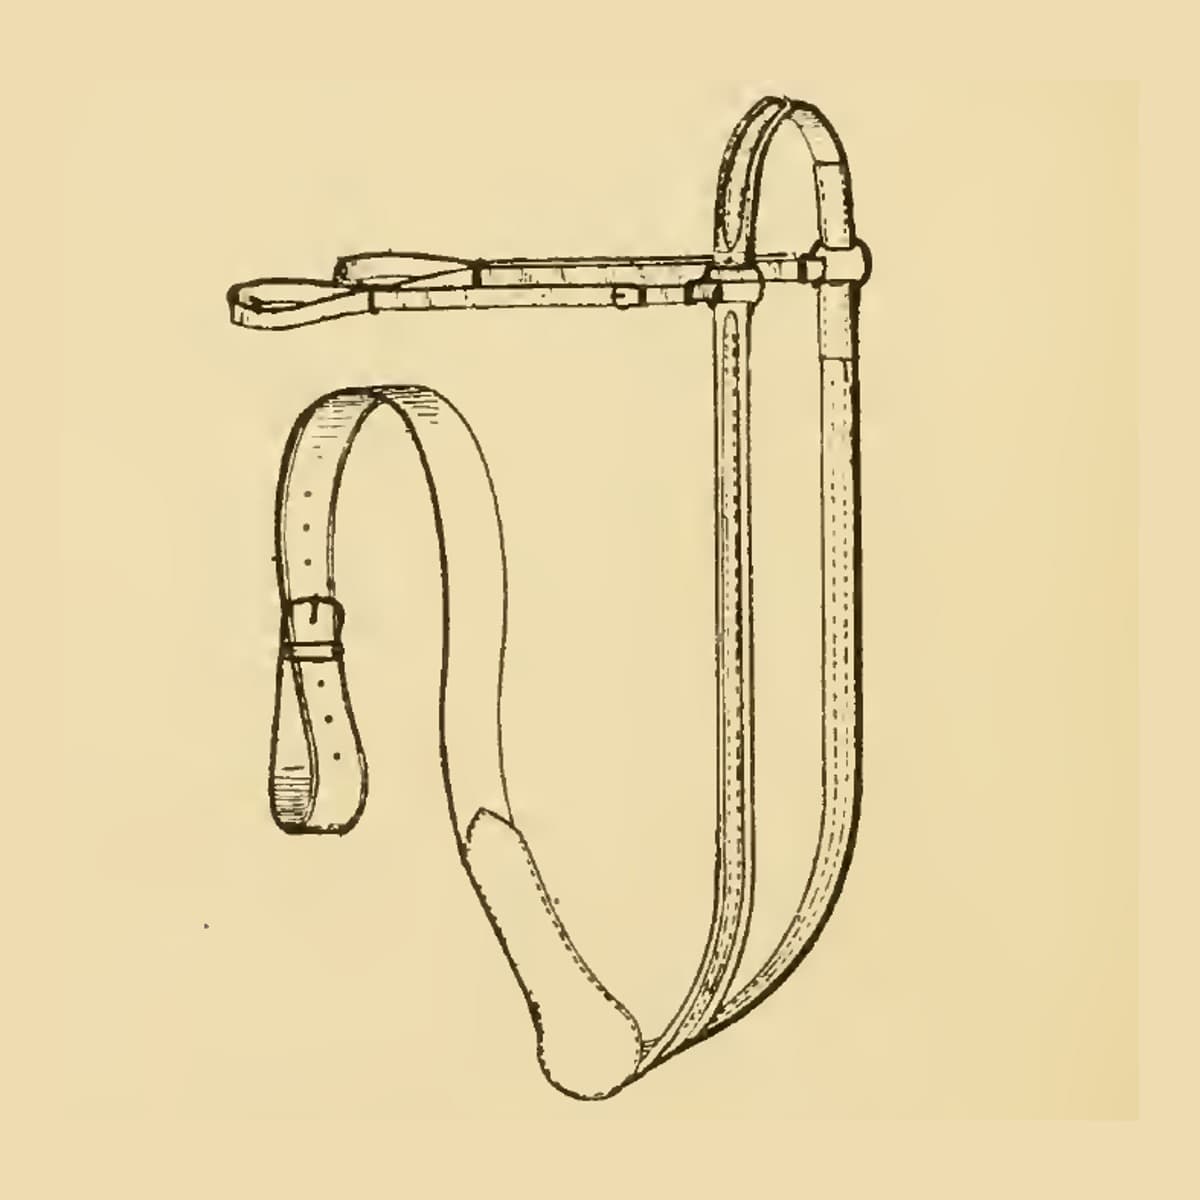
A saddle crupper runs from the back of a riding saddle to a padded loop (the dock) under the horse's tail, so the saddle cannot slide forward. This is the full-sized saddle crupper from Paul N. Hasluck's Saddlery (1904): a slit leather body, a buckled billet, and a dock shaped over string and wet brown paper. Every size is his.
ระดับกลาง
About 1 day
คำแนะนำ
1
1
His sizes in centimetres
His sizes in centimetres
กำลังโหลดสมุด Jupyter…
2
2
Read Saddlery, ch. V
Read Saddlery, ch. V
"Full-sized saddle cruppers (Fig. 9), which are used to prevent the saddle from advancing too much, are made about 1 in. wide, and sometimes a little more."
3
3
Cut the body
Cut the body
Cut the body about 1 in wide (or a little more) and about 1 ft 6 in long. Slit one end for about 5 in and turn the other end in for a 7/8 in buckle. Shave the points of the slits and the end of the chape.
วัสดุสำหรับขั้นตอนนี้:
 หนังทำเครื่องม้า1 ชิ้น
เครื่องมือที่ต้องใช้:
 มีดตัดหนัง
 ตลับเมตร
4
4
Make the billet and set the buckle
Make the billet and set the buckle
Cut a billet as wide as the buckle and 2 ft 4 in long; trim one end for the buckle and shave the other. Edge both pieces, polish the edges and crease them with a hot checker. Put on the buckle and stitch the billet: the first stitch by the buckle goes over the edge and through chape and billet together, the next through the loop. Run four or five stitches towards the point on each side, and come back to the buckle on the other side, making the last stitch over the side the same as the opposite side.
วัสดุสำหรับขั้นตอนนี้:
หนังทำเครื่องม้า1 ชิ้น หัวเข็มขัดเหล็กมีลิ้น1 ชิ้น
 ด้ายลินิน1 ชิ้น
 ขี้ผึ้ง1 ชิ้น
เครื่องมือที่ต้องใช้:
มีดตัดหนัง เครื่องมือลบมุมขอบ
 เครื่องมือขัดขอบหนัง
 เครื่องมือกรีดพับ
 หัวพ่นไฟโพรเพน
 เหล็กหมาด (สว่านเจาะรูมือ)
 เข็มเย็บอานม้าสองเล่ม
 ปากคีบไม้สำหรับเย็บหนัง
5
5
Put on the loop
Put on the loop
Put a loop on the flat lower down the body, about 6 in from the buckle, stitching it across at each end.
วัสดุสำหรับขั้นตอนนี้:
หนังทำเครื่องม้า1 ชิ้นด้ายลินิน1 ชิ้นขี้ผึ้ง1 ชิ้นเครื่องมือที่ต้องใช้:
มีดตัดหนัง แท่งขึ้นรูปห่วงสายเหล็กหมาด (สว่านเจาะรูมือ)เข็มเย็บอานม้าสองเล่ม
6
6
Shape the dock core
Shape the dock core
The dock is much smaller round than a gig crupper dock. Take a piece of string about 1 ft long and roll wet brown paper round it until it is the thickness you need in the middle; thin the ends by cutting the paper before damping it.
วัสดุสำหรับขั้นตอนนี้:
 เชือก1 ชิ้น
 กระดาษห่อของสีน้ำตาล1 ชิ้น
เครื่องมือที่ต้องใช้:
 กรรไกร
 ฟองน้ำตลับเมตร
7
7
Cover the dock
Cover the dock
Cut the dock leather about 1 ft 1 in long; it must be soft and pliable, so damp it before stitching. Stitch it over the core as it is, without cutting a groove, drawing it very tightly over the paper. Dry the dock and finish it in shape.
วัสดุสำหรับขั้นตอนนี้:
หนังทำเครื่องม้า1 ชิ้นด้ายลินิน1 ชิ้นขี้ผึ้ง1 ชิ้นเครื่องมือที่ต้องใช้:
มีดตัดหนังฟองน้ำเหล็กหมาด (สว่านเจาะรูมือ)เข็มเย็บอานม้าสองเล่มปากคีบไม้สำหรับเย็บหนัง8
8
Join the dock and punch the billet
Join the dock and punch the billet
Stitch the dock to the slits with a splice of about 1-1/4 in. Put about a dozen holes in the billet, and vary the lengths to suit the size of horse.
วัสดุสำหรับขั้นตอนนี้:
ด้ายลินิน1 ชิ้นขี้ผึ้ง1 ชิ้นเครื่องมือที่ต้องใช้:
มีดตัดหนังเหล็กหมาด (สว่านเจาะรูมือ)เข็มเย็บอานม้าสองเล่ม เครื่องเจาะรูหนัง
9
9
Troubleshooting
Troubleshooting
Saddle crupper troubleshooting.
Flow
Loading...
10
10
History and honest limits
History and honest limits
From **Saddlery**, edited by Paul N. Hasluck, David McKay, 1904 (archive.org saddlery00hasl), chapter V, "Saddle Cruppers, Breastplates, and Other Accessories", saddle cruppers, pp. 40-41, Fig. 9; every fraction was read on the scan. He does not say how the billet fastens to the saddle; check against Fig. 9 and your saddle. The thread, tools and metric figures are ours.
วัสดุ
6- 4 ชิ้นตัวยึดตำแหน่ง
- 1 ชิ้นตัวยึดตำแหน่ง
- 4 ชิ้นตัวยึดตำแหน่ง
- 4 ชิ้นตัวยึดตำแหน่ง
- 1 ชิ้นตัวยึดตำแหน่ง
- 1 ชิ้นตัวยึดตำแหน่ง
เครื่องมือที่จำเป็น
13- ตัวยึดตำแหน่ง
- 1 vendor sell this, none ship to you yetตัวยึดตำแหน่ง
- ตัวยึดตำแหน่ง
- ตัวยึดตำแหน่ง
- ตัวยึดตำแหน่ง
- ตัวยึดตำแหน่ง
- ตัวยึดตำแหน่ง
- ตัวยึดตำแหน่ง
- ตัวยึดตำแหน่ง
- ตัวยึดตำแหน่ง
- ตัวยึดตำแหน่ง
- ตัวยึดตำแหน่ง
- ตัวยึดตำแหน่ง
พิมพ์เขียวนี้สร้าง
บลูพริ้นท์ที่เกี่ยวข้อง
บลูพริ้นท์เหล่านี้แบ่งปันความรู้ — เทคนิค วัสดุ หรือหลักการ
CC0 สาธารณสมบัติ
พิมพ์เขียวนี้เผยแพร่ภายใต้ CC0 คุณสามารถคัดลอก แก้ไข แจกจ่าย และใช้งานผลงานนี้เพื่อวัตถุประสงค์ใดก็ได้ โดยไม่ต้องขออนุญาต
สนับสนุนเมกเกอร์โดยซื้อสินค้าผ่านพิมพ์เขียวของพวกเขา ซึ่งพวกเขาจะได้รับ ค่าคอมมิชชันเมกเกอร์ ที่ผู้ขายกำหนด หรือสร้างเวอร์ชันใหม่ของพิมพ์เขียวนี้และรวมเป็นการเชื่อมต่อในพิมพ์เขียวของคุณเพื่อแบ่งรายได้