การทำงานร่วมกัน
ศิลปะ
ความงามและสุขภาพ
งานฝีมือ
วัฒนธรรมและประวัติศาสตร์
ความบันเทิง
สิ่งแวดล้อม
อาหารและเครื่องดื่ม
วิศวกรรมย้อนรอย
วิทยาศาสตร์
กีฬา
เทคโนโลยี
อุปกรณ์สวมใส่
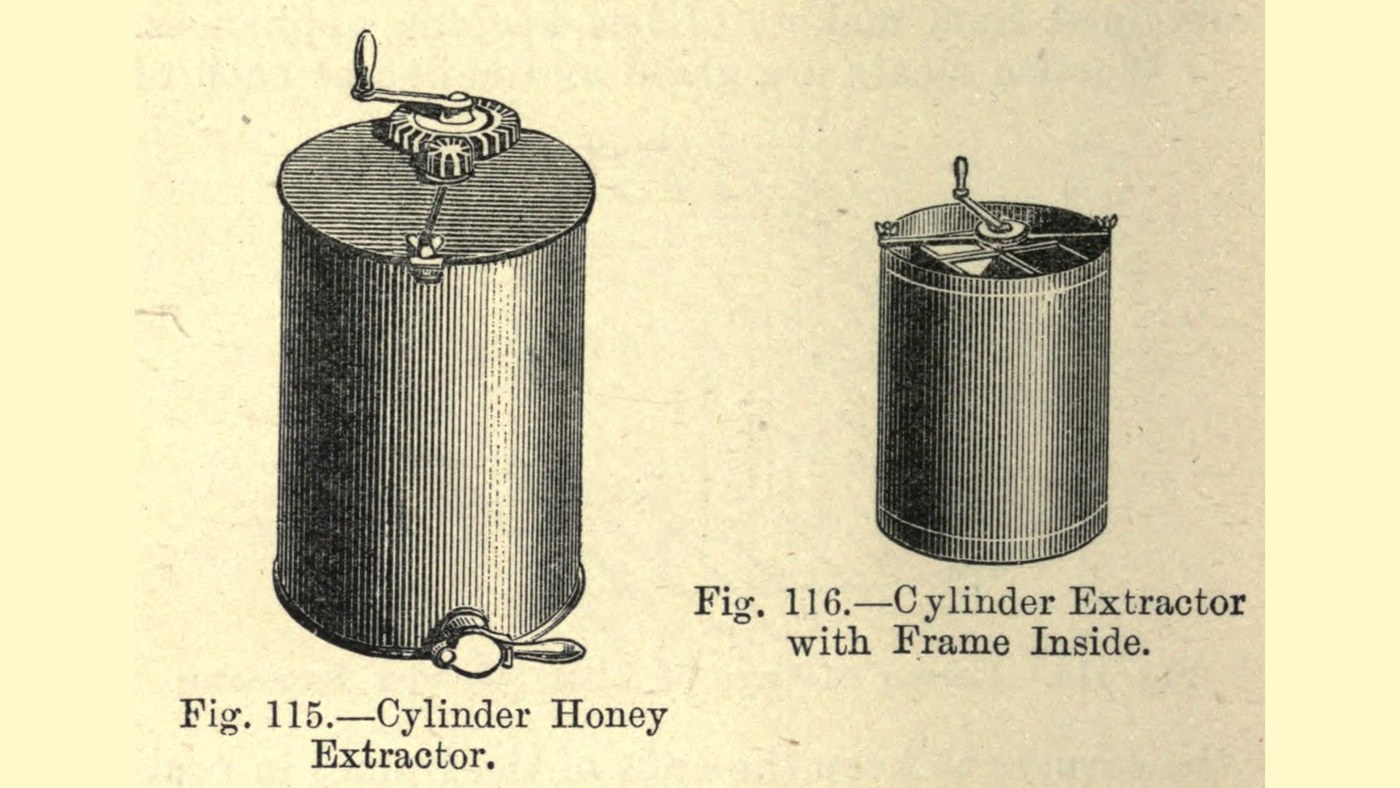


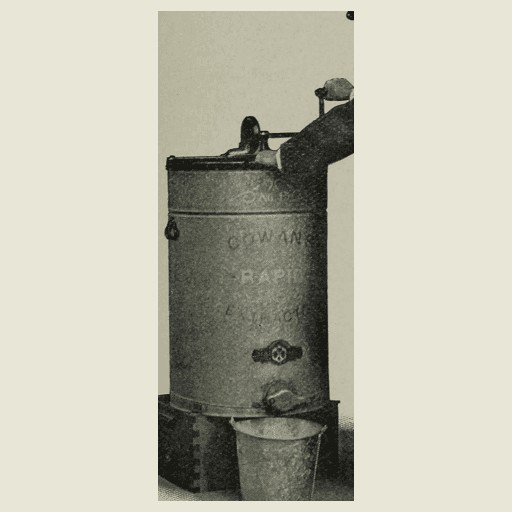
Honey Extractor: a Tinplate Cylinder Extractor (Hasluck, 1905)
A two-comb honey extractor built by a tinsmith: a soldered tinplate frame carrying two wire-netting comb baskets on a 1/2 in spindle, spun by bought gearing inside a tinplate cylinder with a sloping bottom that drains through a treacle valve.
Only the frame and combs revolve, not the can and the honey already thrown out, so it starts and stops easily; a comb that turns lighter tells you its side is empty.
Source: P. N. Hasluck, Beehives and Bee Keepers' Appliances (1905), pp. 122-132. Picture: the book's Figs. 115-116.
ขั้นสูง
Unknown
คำแนะนำ
1
1
Make the two bands
Make the two bands
Take three sheets of tinplate 17 in by 12 1/2 in and cut one into six strips 2 in wide; pare the edges straight. Join three strips end to end by turning 1/4 in over at the ends, hooking them together, hammering flat and touching with solder; do the same with the other three. Cut each to 45 in and wire both edges with wire about 1/8 in diameter (about No. 10 gauge), 44 in long: turn the edge over nearly 1/2 in with mallet and stake, lay the wire in, and hammer the tin down round it. Use fine solder with a large proportion of tin throughout. Bend each strip in a wooden vice into a rectangular band 12 in by 10 in, square at the corners and not in winding, wired edge outwards; solder the overlapping inch.
วัสดุสำหรับขั้นตอนนี้:
 แผ่นเหล็กชุบดีบุก3 17 x 12 1/2 in sheets
 ลวดเหล็กดัด1 about 1/8 in, No. 10
 ตะกั่วบัดกรีดีบุก-ตะกั่ว1 ชิ้น
เครื่องมือที่ต้องใช้:
 กรรไกรตัดแผ่นโลหะ
 ค้อนไม้
 หลัก
 หัวแร้งบัดกรี
 ปากกาจับชิ้นงานหน้าโต๊ะ
2
2
Fit the bridges
Fit the bridges
From another sheet cut two pieces 12 in by 3 1/2 in. Wire both edges with wires only 10 in long placed in the middle, leaving 1 in free at each end, and hammer the turned edges flat at the ends. Turn the unwired ends up sharp to make a tin stool 10 in long with legs 1 in high. Fasten one across each band the narrow way, equidistant from the short sides, with solder and small rivets. The bridges carry the spindle.
วัสดุสำหรับขั้นตอนนี้:
แผ่นเหล็กชุบดีบุก1 ชิ้นลวดเหล็กดัด1 ชิ้น หมุดย้ำเหล็ก1 ชิ้นตะกั่วบัดกรีดีบุก-ตะกั่ว1 ชิ้น
เครื่องมือที่ต้องใช้:
กรรไกรตัดแผ่นโลหะค้อนไม้หลักหัวแร้งบัดกรี ค้อน
3
3
Make the four slides
Make the four slides
Cut four pieces of tinplate 16 1/2 in by 3 1/8 in and cut small rectangles out of the corners. Turn over and hammer down 1/4 in at each long edge and 1/2 in at one short end. Turn the long edges up at right angles and the short end too, making a trough open at one end with the other end twice as high as the sides. Touch the corners with solder, nip off the sharp corners of the projecting end and round them with a file.
วัสดุสำหรับขั้นตอนนี้:
แผ่นเหล็กชุบดีบุก1 ชิ้นตะกั่วบัดกรีดีบุก-ตะกั่ว1 ชิ้นเครื่องมือที่ต้องใช้:
กรรไกรตัดแผ่นโลหะค้อนไม้หลักหัวแร้งบัดกรี ตะไบโลหะ
4
4
Assemble the frame
Assemble the frame
Lay one band on the bench, bridge up. Stand a slide, stopped end down, in a corner with its back against a long side of the band, hold the two with a small cramp and two pieces of wood, check with the square, and run solder between them; do the other three. Put the upper band over the tops of the slides; if a slide is out of true, unsolder and reset it. Both bridges must face upwards so they do not hold honey.
วัสดุสำหรับขั้นตอนนี้:
ตะกั่วบัดกรีดีบุก-ตะกั่ว1 ชิ้นเครื่องมือที่ต้องใช้:
 แคลมป์ตัวซี
 ฉากตายหัวแร้งบัดกรี
5
5
Make the comb baskets
Make the comb baskets
Cut four pieces of wire netting, two 15 in by 9 5/8 in and two 1/4 in narrower. Bind each round with tinplate strips 3/4 in wide overlapping 3/8 in each side, soldering every wire to the tin, then turning the tin over and soldering every wire again. Solder up four strips 41 in by 2 1/4 in, turn the edges over 1/4 in and turn one edge up square, so the section is an L with legs 1 1/2 in and 1/4 in. Cut the narrow rib with a chisel at the bends and bend each strip into the three sides of a half-basket, the short side 9 3/4 in on two and 1/8 in less on the other two. Solder the framed netting against the rib. On the wider pair turn over the 5/8 in that projects with a short wire in it as a pull; on the narrower pair clip some off and turn 1/4 in down. Cut a hole in the end of each half for the frame's top bar. Solder two crossing wires 1/8 in thick over the netting, joined in the middle and bent flat, to stop it bulging.
วัสดุสำหรับขั้นตอนนี้:
 โลหะที่ไม่ทราบ1 wire netting, metal not given (never zinc)แผ่นเหล็กชุบดีบุก1 ชิ้นลวดเหล็กดัด1 1/8 inตะกั่วบัดกรีดีบุก-ตะกั่ว1 ชิ้น
เครื่องมือที่ต้องใช้:
กรรไกรตัดแผ่นโลหะค้อนไม้หลักหัวแร้งบัดกรี สกัดเย็น
6
6
Make the cylinder
Make the cylinder
Take a tinplate 55 in by 26 in, wire the top and bottom edges with 1/4 in wire, bend it into a cylinder and solder the joint. Cut a bottom about 1/2 in larger than the cylinder's diameter, turn its edge up 1/4 in, set it in sloping, turn the flange down and solder it firmly to the sides. Fit the treacle valve at the lowest point. Solder a bearing for the spindle at the centre of the bottom, its underside filed to the slope so its top is level. Rivet two bands of hoop iron 1/8 in thick and 1 1/4 in wide under the beads.
วัสดุสำหรับขั้นตอนนี้:
แผ่นเหล็กชุบดีบุก1 55 x 26 inลวดเหล็กดัด1 1/4 in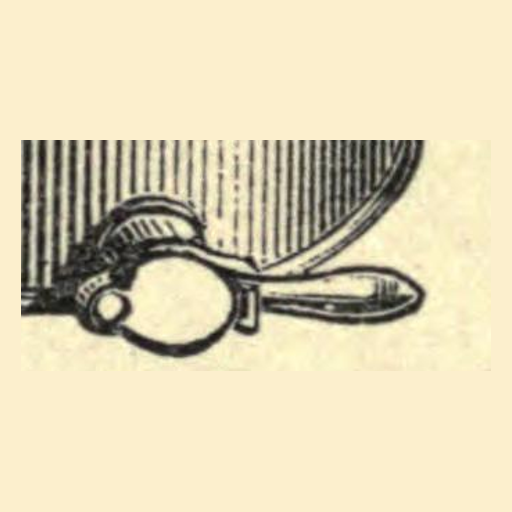 ก๊อกน้ำผึ้ง1 ชิ้น
 เหล็กแบนกล้าละมุน1 hoop iron 1/8 x 1 1/4 inหมุดย้ำเหล็ก1 ชิ้นตะกั่วบัดกรีดีบุก-ตะกั่ว1 ชิ้น
เครื่องมือที่ต้องใช้:
กรรไกรตัดแผ่นโลหะค้อนไม้หลักหัวแร้งบัดกรีตะไบโลหะ สว่านมือค้อน
7
7
Fit the spindle
Fit the spindle
Make the spindle once the can is finished and its length is known: 1/2 in round iron or steel, tinned all over, with the lower end brought to a long cone to run in the bottom bearing. Pass it through the middle of both bridges so the cages run true, with the tops of the cages 2 in below the top of the can, and solder it to the bridges. Strengthen the hold with tin washers 1 1/2 in diameter, beaten saucer-shaped, with holes made a little small and turned out until the spindle passes; solder them to spindle and bridges.
วัสดุสำหรับขั้นตอนนี้:
 เหล็กเส้นกลมเหล็กกล้าละมุน1 1/2 in roundแผ่นเหล็กชุบดีบุก1 ชิ้นตะกั่วบัดกรีดีบุก-ตะกั่ว1 ชิ้น
เครื่องมือที่ต้องใช้:
ตะไบโลหะหัวแร้งบัดกรีกรรไกรตัดแผ่นโลหะค้อน8
8
Fit the cross-bar, gearing and covers
Fit the cross-bar, gearing and covers
Attach bolts to the top hoop, one of them breaking the joint of the hoop, to hold a cross-bar 1 1/4 in wide, long enough to reach across, drilled for the bolts and the spindle; make it 1/2 in thick when gearing is used, and fasten it with fly nuts or hexagon nuts. Key the pinion to the spindle and run the toothed wheel on a stud riveted to the cross-bar. Rivet a pair of handles to the sides, and make two flat covers, one each side of the cross-bar, with edges turned down to embrace the rim, like a saucepan cover.
วัสดุสำหรับขั้นตอนนี้:
เหล็กแบนกล้าละมุน1 cross-bar 1 1/4 x 1/2 in ชุดสลักเกลียวหกเหลี่ยมคละขนาด1 ชิ้น
 น็อตปีกผีเสื้อ1 ชิ้น
 เฟืองพิเนียน1 ชิ้น
 เฟืองขับตาม1 ชิ้นหมุดย้ำเหล็ก1 ชิ้นแผ่นเหล็กชุบดีบุก1 ชิ้น
เครื่องมือที่ต้องใช้:
สว่านมือค้อนกรรไกรตัดแผ่นโลหะค้อนไม้วัสดุ
12- 1 55 x 26 inตัวยึดตำแหน่ง
- 1 1/4 inตัวยึดตำแหน่ง
- 7 ชิ้นตัวยึดตำแหน่ง
- 3 ชิ้นตัวยึดตำแหน่ง
- 1 wire netting, metal not given (never zinc)ตัวยึดตำแหน่ง
- 1 ชิ้นตัวยึดตำแหน่ง
- 1 cross-bar 1 1/4 x 1/2 inตัวยึดตำแหน่ง
- 1 1/2 in roundตัวยึดตำแหน่ง
- ตัวยึดตำแหน่ง
- 1 ชิ้นตัวยึดตำแหน่ง
- 1 ชิ้นตัวยึดตำแหน่ง
- 1 ชิ้นตัวยึดตำแหน่ง
เครื่องมือที่จำเป็น
11- ตัวยึดตำแหน่ง
- ตัวยึดตำแหน่ง
- ตัวยึดตำแหน่ง
- 2 vendors sell this, none ship to you yetตัวยึดตำแหน่ง
- ตัวยึดตำแหน่ง
- ตัวยึดตำแหน่ง
- ตัวยึดตำแหน่ง
- ตัวยึดตำแหน่ง
- ตัวยึดตำแหน่ง
- ตัวยึดตำแหน่ง
- ตัวยึดตำแหน่ง
พิมพ์เขียวนี้สร้าง
CC0 สาธารณสมบัติ
พิมพ์เขียวนี้เผยแพร่ภายใต้ CC0 คุณสามารถคัดลอก แก้ไข แจกจ่าย และใช้งานผลงานนี้เพื่อวัตถุประสงค์ใดก็ได้ โดยไม่ต้องขออนุญาต
สนับสนุนเมกเกอร์โดยซื้อสินค้าผ่านพิมพ์เขียวของพวกเขา ซึ่งพวกเขาจะได้รับ ค่าคอมมิชชันเมกเกอร์ ที่ผู้ขายกำหนด หรือสร้างเวอร์ชันใหม่ของพิมพ์เขียวนี้และรวมเป็นการเชื่อมต่อในพิมพ์เขียวของคุณเพื่อแบ่งรายได้