ศิลปะ
ความงามและสุขภาพ
งานฝีมือ
วัฒนธรรมและประวัติศาสตร์
ความบันเทิง
สิ่งแวดล้อม
อาหารและเครื่องดื่ม
วิศวกรรมย้อนรอย
วิทยาศาสตร์
กีฬา
เทคโนโลยี
อุปกรณ์สวมใส่
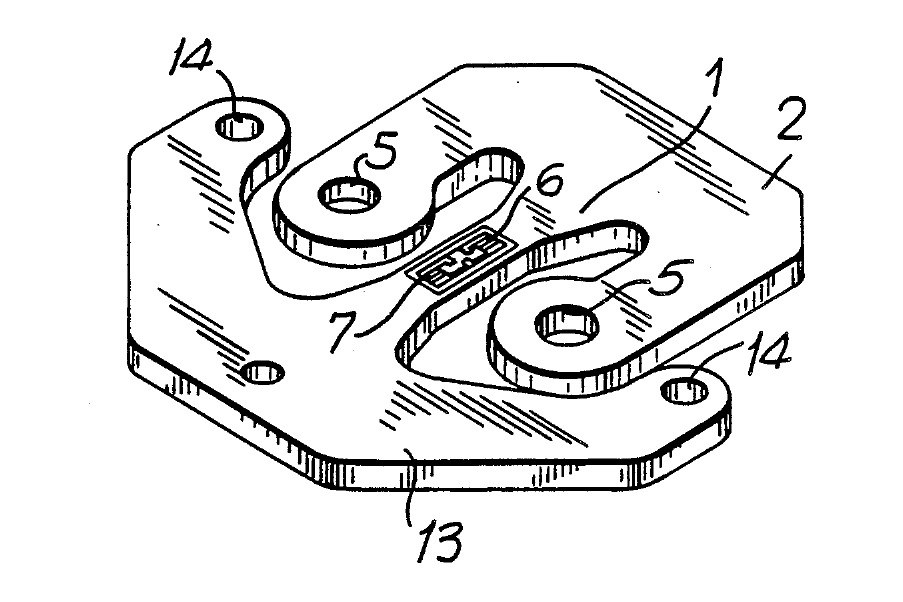


Load Cell: Flat One-Piece Stamping with a U-Shaped Loading Element (Angel, 1991)
A load cell cut in one piece from flat metal, cheap enough to put four in every scale and thin enough to hide in a low floor scale. A beam in the middle carries two strain gauges; a U-shaped arm round it takes the load; a second U-shaped arm holds it down.
Result: a flat load cell whose beam bends into an S under load, stretching one gauge and squeezing the other. It stays accurate when the load is off-centre.
Source: S. Angel, US Patent 4,993,506 (1991). Unknown: the metal, its thickness and all sizes. Ours: bonded wire strain gauges and epoxy. Picture: patent drawing (Fig. 3).
ขั้นสูง
1 day
คำแนะนำ
1
1
Stamp the cell from thin metal
Stamp the cell from thin metal
Stamp the cell in one piece from thin flat metal. A flexure beam runs down the middle, narrowed at its centre. A U-shaped loading element joins one end of the beam; its two arms reach past the beam's mid-point, each with a hole, and the two holes face each other across the beam's centre. A U-shaped mounting element joins the other end, outside the loading element, with screw holes on a line through the beam's centre. Set the beam's ends by a change in width, not thickness. Not given: the metal, its thickness and the sizes.
วัสดุสำหรับขั้นตอนนี้:
 โลหะที่ไม่ทราบ1 thin flat stock
เครื่องมือที่ต้องใช้:
 เครื่องปั๊มโลหะ
 ขนาดที่ไม่ทราบ
2
2
Bond the two strain gauges
Bond the two strain gauges
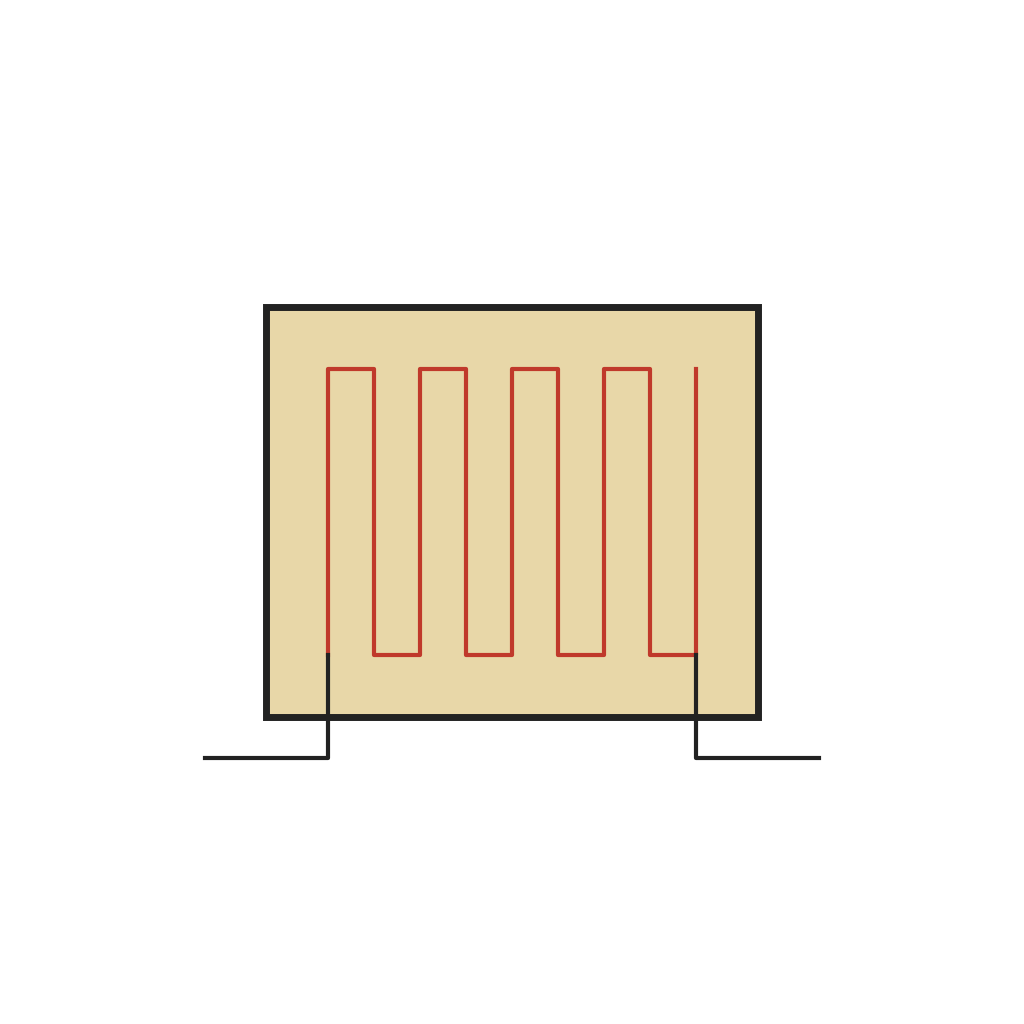
Bond two strain gauges side by side on one face of the narrow middle of the beam. Put their centres at equal distances either side of the beam's centre, and at equal distances from its two edges. Under load the beam bends into an S: one gauge is stretched and rises in resistance, the other is squeezed and falls by the same amount. Wire them as one half of a Wheatstone bridge. The patent allows strain gauges, thick-film resistors or semiconductor sensors. Ours: bonded wire gauges set in epoxy.
วัสดุสำหรับขั้นตอนนี้:
 สเตรนเกจแบบลวดติดผิว2 ชิ้น
 อีพ็อกซีสองส่วน1 a little
 สายไฟต่อวงจร1 short leads
 ลวดตะกั่วบัดกรี1 a little
เครื่องมือที่ต้องใช้:
 หัวแร้งบัดกรี
3
3
Mount and check
Mount and check
Screw the mounting element down onto small flat raised pads on a rigid plate, so the rest of the cell hangs free to bend. Press on the two loading holes: the half-bridge gives a signal in step with the load. Because the gauges sit symmetrically, the reading holds even when the two arms carry unequal shares, as long as their total is the same. Ours: check the gauges with a meter.
เครื่องมือที่ต้องใช้:
 มัลติมิเตอร์
วัสดุ
5- 1 thin flat stockตัวยึดตำแหน่ง
- 2 ชิ้นตัวยึดตำแหน่ง
- 1 a littleตัวยึดตำแหน่ง
- 1 short leadsตัวยึดตำแหน่ง
- 1 a littleตัวยึดตำแหน่ง
เครื่องมือที่จำเป็น
4- ตัวยึดตำแหน่ง
- ตัวยึดตำแหน่ง
- 2 vendors sell this, none ship to you yetตัวยึดตำแหน่ง
- ตัวยึดตำแหน่ง
วัสดุจากพิมพ์เขียวที่เชื่อมต่อ
พิมพ์เขียวนี้สร้าง

CC0 สาธารณสมบัติ
พิมพ์เขียวนี้เผยแพร่ภายใต้ CC0 คุณสามารถคัดลอก แก้ไข แจกจ่าย และใช้งานผลงานนี้เพื่อวัตถุประสงค์ใดก็ได้ โดยไม่ต้องขออนุญาต
สนับสนุนเมกเกอร์โดยซื้อสินค้าผ่านพิมพ์เขียวของพวกเขา ซึ่งพวกเขาจะได้รับ ค่าคอมมิชชันเมกเกอร์ ที่ผู้ขายกำหนด หรือสร้างเวอร์ชันใหม่ของพิมพ์เขียวนี้และรวมเป็นการเชื่อมต่อในพิมพ์เขียวของคุณเพื่อแบ่งรายได้