ศิลปะ
ความงามและสุขภาพ
งานฝีมือ
วัฒนธรรมและประวัติศาสตร์
ความบันเทิง
สิ่งแวดล้อม
อาหารและเครื่องดื่ม
วิศวกรรมย้อนรอย
วิทยาศาสตร์
กีฬา
เทคโนโลยี
อุปกรณ์สวมใส่
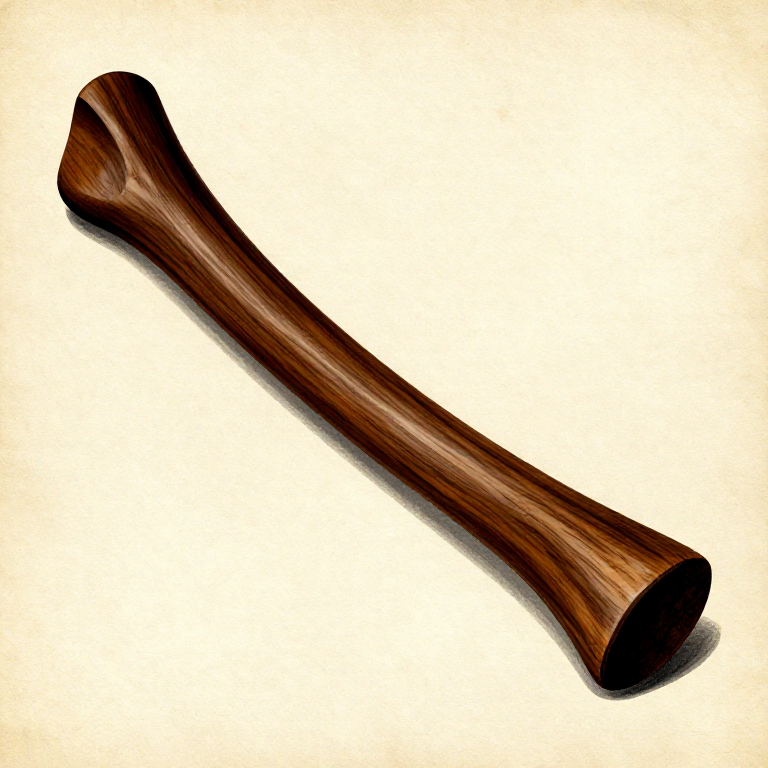
Making a Prehistoric Throwing Stick — The Simplest Hunting Weapon
The throwing stick — also called a rabbit stick, kylie, or hunting boomerang — is one of the oldest and simplest hunting weapons ever devised. Archaeological specimens from Schoeningen in Germany date to approximately 300,000 years ago, and ethnographic records from Aboriginal Australia, Native North America, ancient Egypt, and India document its use across every inhabited continent. Unlike the returning boomerang (which is a specialized aerodynamic variant designed for bird flushing rather than direct impact), the hunting throwing stick is a non-returning weapon designed to strike and kill small game at distances of 30 to 50 metres. It works by combining the aerodynamic properties of a flat, curved airfoil with the kinetic energy of a dense hardwood projectile. When thrown with a sidearm or overarm spin, the stick rotates in flight, presenting a wide striking surface that greatly increases the probability of hitting a fast-moving target like a running rabbit or flushing bird. A well-made throwing stick from dense hardwood weighs 300 to 600 grams and delivers enough force on impact to kill a rabbit or ground bird instantly. This blueprint teaches selection of naturally curved wood, shaping for aerodynamic flight, fire-hardening, and throwing technique.
เริ่มต้น
1-2 hours
คำแนะนำ
1
1
Select a Naturally Curved Hardwood Branch
Select a Naturally Curved Hardwood Branch
Search for a dense hardwood branch with a natural curve of approximately 10 to 20 degrees along its length. The branch should be 40 to 60 cm long and 3 to 5 cm in diameter. Ideal woods include oak, mulga (in Australia), maple, ash, hickory, or any locally available dense hardwood. The natural curve is essential — bending a straight branch introduces stress that weakens the wood, while a branch that grew in a curve has grain that follows the curve, maintaining full strength. Check the wood by flexing it gently — it should feel stiff and unyielding, not springy. Reject any branch with knots, insect damage, or cross-grain where a side branch forked off.
วัสดุสำหรับขั้นตอนนี้:
 Hardwood Sapling1 ชิ้น
2
2
Remove the Bark
Remove the Bark
Strip all bark from the branch using a flint knife, scraping from the thick end toward the thin end to follow the grain direction. Bark left on the stick adds weight without structural benefit, traps moisture that leads to rot, and creates an uneven aerodynamic surface. Scrape down to the clean, pale heartwood underneath. If the wood is green (freshly cut), the bark will peel easily. On drier wood, use the flint knife edge at a low angle to shave the bark away in thin strips.
เครื่องมือที่ต้องใช้:
 Flint Knife
3
3
Shape the Cross-Section for Aerodynamic Flight
Shape the Cross-Section for Aerodynamic Flight
Using a flint knife and sandstone, shape the cross-section of the stick into a plano-convex airfoil: flat on one side (the underside) and gently convex on the other (the top). This cross-section generates lift during spinning flight, keeping the stick airborne longer and extending its effective range. Shave the underside flat by placing the stick on a flat stone and scraping lengthwise with the flint knife. Round the topside by scraping from the centre outward toward both edges. The finished cross-section should resemble a shallow D-shape — flat bottom, rounded top — approximately 3 to 4 cm wide and 1.5 to 2 cm thick at the centre.
เครื่องมือที่ต้องใช้:
Flint Knife Sandstone (Abrasive)
4
4
Taper Both Ends
Taper Both Ends
Taper the last 5 to 8 cm of each end to a blunt, rounded point. The tips should be thinner than the centre but not knife-sharp — overly thin tips break on impact with the ground. Aim for tips approximately 1 to 1.5 cm thick and 2 cm wide. Symmetrical tapering at both ends ensures balanced rotation during flight. An unbalanced throwing stick wobbles and veers off course. Test the balance by resting the stick on your extended finger at the midpoint — it should sit level or very close to level.
เครื่องมือที่ต้องใช้:
Flint Knife5
5
Smooth the Entire Surface
Smooth the Entire Surface
Sand the entire surface of the shaped stick using a piece of sandstone, working with the grain. Remove all tool marks, rough spots, and splinters. A smooth surface reduces air resistance during flight and prevents the stick from snagging on the hand during release. Pay particular attention to the flat underside — any ridges or bumps will disrupt the airflow and reduce the aerodynamic lift. The finished surface should feel uniformly smooth to the touch.
เครื่องมือที่ต้องใช้:
Sandstone (Abrasive)6
6
Fire-Harden the Throwing Stick
Fire-Harden the Throwing Stick
Hold the shaped stick over hot coals (not open flame) and rotate it slowly and continuously to heat the surface evenly. The wood should darken to a tan or light brown colour — this indicates the surface fibres are drying and the lignin is beginning to polymerize, creating a harder, more impact-resistant shell. Do not let the wood char black or catch fire — black char is structite wood that has lost its structural strength. The heating process takes 10 to 15 minutes of patient, continuous rotation. Focus extra time on the tips, which bear the most impact stress.
7
7
Allow the Stick to Cool and Season
Allow the Stick to Cool and Season
After fire-hardening, set the throwing stick aside to cool completely. If the wood was green, the heating process has driven off much of the surface moisture, but the interior may still be damp. For best results, allow the stick to dry in shade for 2 to 3 days before heavy use. A fully seasoned throwing stick is noticeably lighter and harder than a green one. Do not dry it in direct sun, which can cause surface cracking as the exterior dries faster than the interior.
8
8
Learn the Throwing Technique
Learn the Throwing Technique
Grip the throwing stick at one end with the flat side facing downward (toward the ground) and the curved shape opening away from your body. Hold it at shoulder height, angled slightly above horizontal. Throw with a firm sidearm or overarm motion, snapping your wrist at the moment of release to impart spin. The stick should leave your hand rotating in a near-horizontal plane, flat side down, and fly in a straight line toward the target. Release when your arm is fully extended and pointing directly at the target. The spinning rotation is critical — it stabilizes flight and presents the maximum striking width to the target.
9
9
Practice and Range Finding
Practice and Range Finding
Practice throwing at a target (a bundle of grass or a mark on the ground) at distances of 10, 20, 30, and 40 metres. At 10 metres the stick should arrive with considerable force and minimal drop. At 30 to 40 metres you will need to release at a slightly upward angle to compensate for gravity. The effective killing range depends on the stick's weight and the thrower's strength — most practitioners find 20 to 35 metres to be the reliable zone for accurate, lethal throws against small game. Accuracy improves rapidly with practice: Aboriginal Australian hunters historically achieved remarkable precision with daily use from childhood.
10
10
Hunting Applications and Tactics
Hunting Applications and Tactics
The throwing stick is most effective against small ground game (rabbits, hares, ground-nesting birds, lizards) and low-flying birds. For ground game, the horizontal spinning rotation means the stick sweeps a striking arc much wider than the animal itself, compensating for imprecise aim. The traditional hunting approach is to stalk within 20 to 30 metres of the quarry using cover, then throw when the animal breaks from hiding — the spinning stick covers the distance faster than the animal can react. For flushing birds, throw into a flock as it lifts off the ground. The throwing stick is reusable indefinitely unless it strikes a rock and cracks.
วัสดุ
1- 1 ชิ้นตัวยึดตำแหน่ง
วัสดุจากพิมพ์เขียวที่เชื่อมต่อ
บลูพริ้นท์ที่เกี่ยวข้อง
บลูพริ้นท์เหล่านี้แบ่งปันความรู้ — เทคนิค วัสดุ หรือหลักการ
Related blueprints
Other builds that share materials, tools, or techniques with this one.
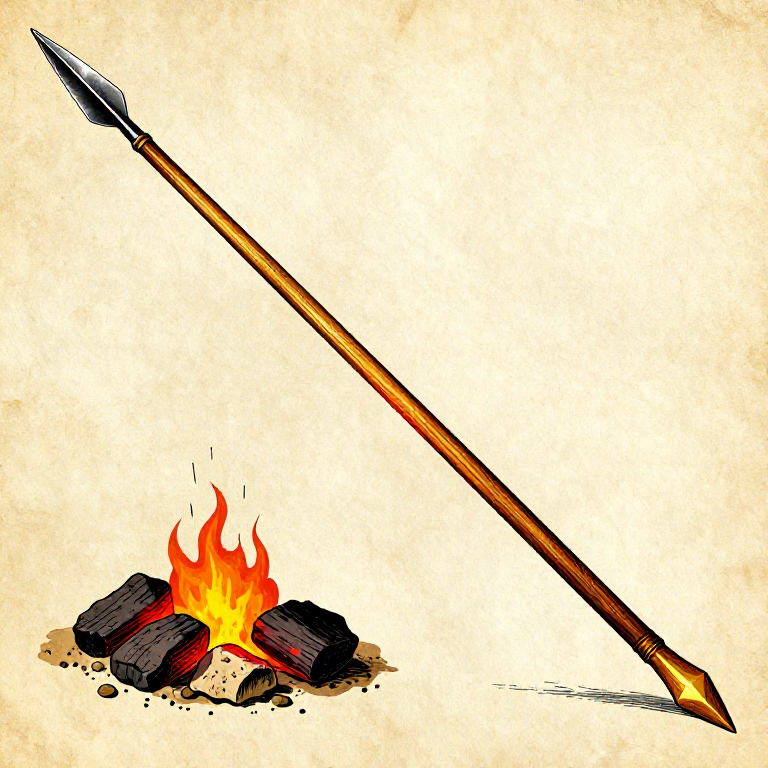
Making a Fire-Hardened Hunting Spear — The Oldest Weaponsurvival

Making a Leather Sling — The Shepherd's Projectile Weaponsurvival
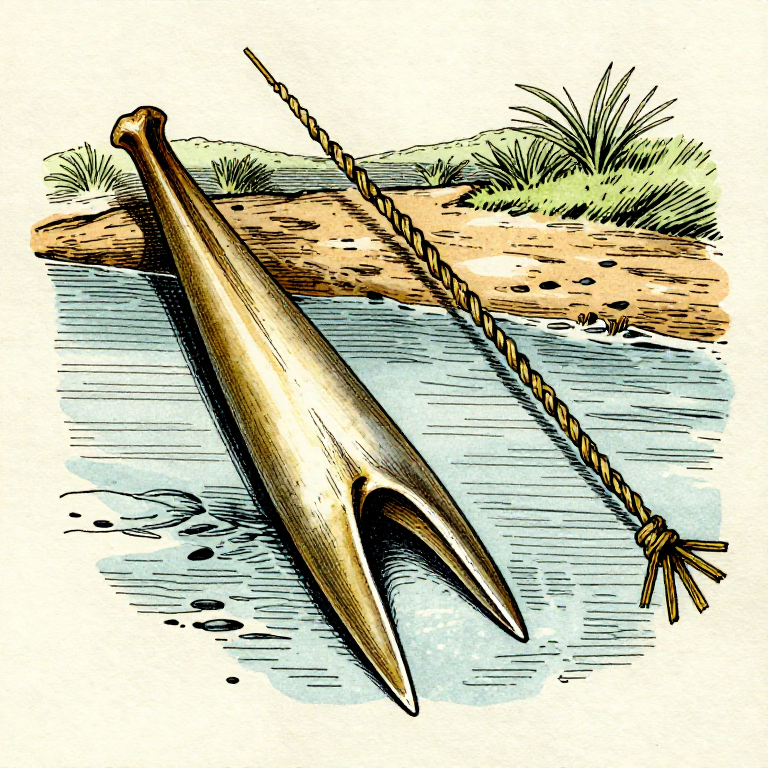
Making a Bone Fish Gorge — The Oldest Fishing Devicesurvival
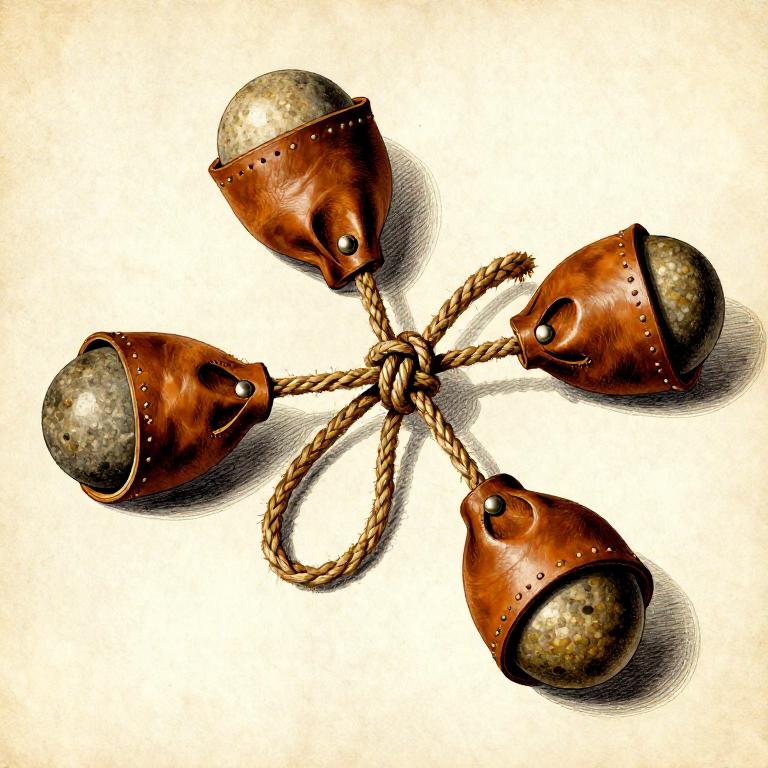
Making Bolas — Weighted Throwing Weapon for Huntingsurvival
Starting Fire with a Hand Drill — The Simplest Friction Fire Methodsurvival
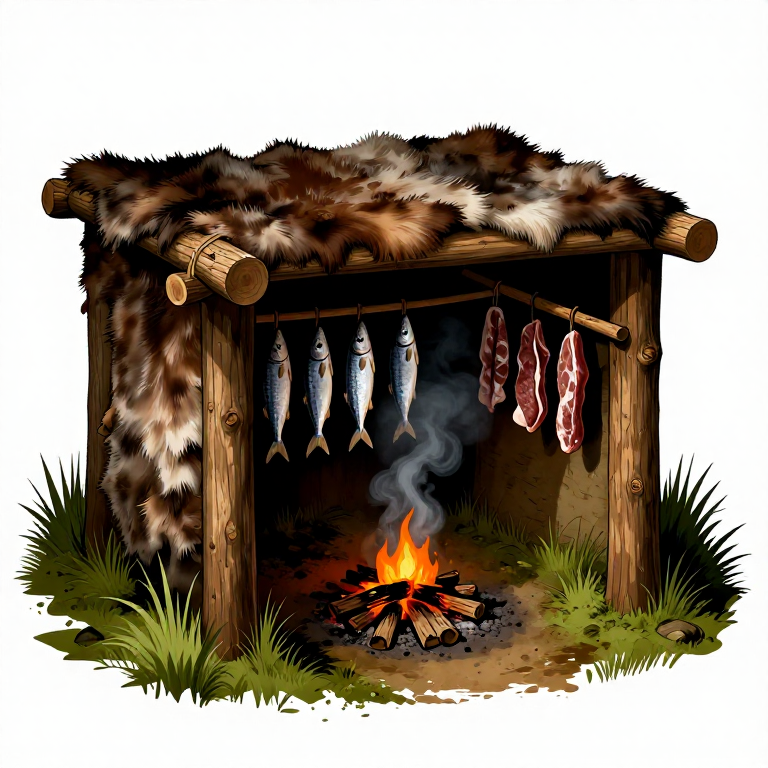
Building a Prehistoric Smokehouse — Semi-Permanent Pole Frame for Meat and Fish Preservationsurvival
CC0 สาธารณสมบัติ
พิมพ์เขียวนี้เผยแพร่ภายใต้ CC0 คุณสามารถคัดลอก แก้ไข แจกจ่าย และใช้งานผลงานนี้เพื่อวัตถุประสงค์ใดก็ได้ โดยไม่ต้องขออนุญาต
สนับสนุนเมกเกอร์โดยซื้อสินค้าผ่านพิมพ์เขียวของพวกเขา ซึ่งพวกเขาจะได้รับ ค่าคอมมิชชันเมกเกอร์ ที่ผู้ขายกำหนด หรือสร้างเวอร์ชันใหม่ของพิมพ์เขียวนี้และรวมเป็นการเชื่อมต่อในพิมพ์เขียวของคุณเพื่อแบ่งรายได้