ศิลปะ
ความงามและสุขภาพ
งานฝีมือ
วัฒนธรรมและประวัติศาสตร์
ความบันเทิง
สิ่งแวดล้อม
อาหารและเครื่องดื่ม
วิศวกรรมย้อนรอย
วิทยาศาสตร์
กีฬา
เทคโนโลยี
อุปกรณ์สวมใส่


The Tank-Headed Self-Feeding Brush: Soap in the Tank, a Plate to Meter It
Scrubbing a floor means going back to the bucket every few strokes.
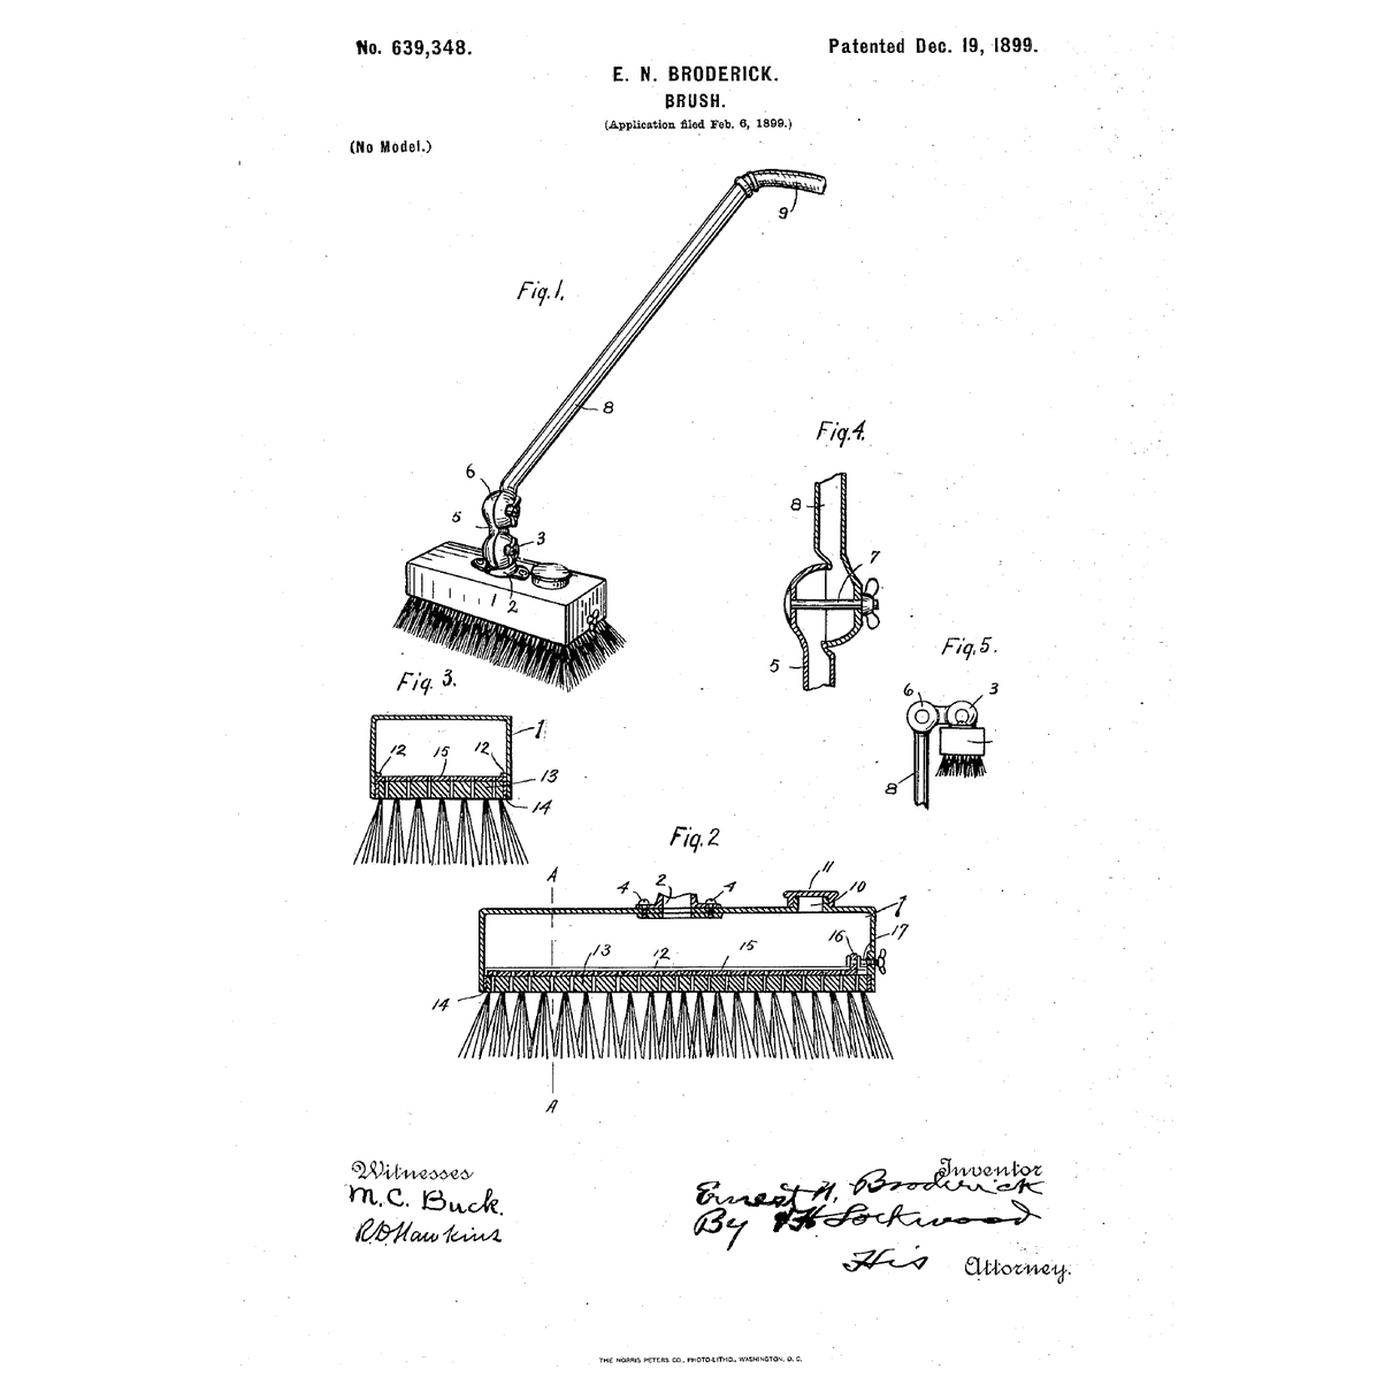
Ernest N. Broderick of Indianapolis received US 639,348, dated 19 December 1899, for a cleaning brush with a small tank on its perforated top, fed through a hollow handle from a hose; a perforated plate slid by a screw sets how far the holes open, and soap in the tank turns the water to suds — "a self-feeding brush."
This rung works out how the sliding plate opens the holes, then builds the tank on a scrub brush and measures the flow at each plate setting.
ระดับกลาง
About 4 hours
คำแนะนำ
1
1
Open area of the plate
Open area of the plate
กำลังโหลดสมุด Jupyter…
2
2
A scrubbing brush before it
A scrubbing brush before it
The embedded blueprint holds two brush heads on a sprung holder. Broderick puts a water tank on the head and feeds it through the handle.
3
3
Read US 639,348
Read US 639,348
"When used for scrubbing, the hose can be connected to a hydrant, and thus supply the desired amount of water to the brush, making it unnecessary to dip the brush into the bucket or tub of water. In other words, my device is a self-feeding brush. Should I desire to use soapy water, I can insert through the openings 10 particles of soap or soap powder. In this way I get soapsuds, which I use in scrubbing as it is needed, keeping the brush constantly supplied."
4
4
Perforate the brush back
Perforate the brush back
Drill fourteen 4 mm holes through the scrub brush's back between the tufts, in two rows 30 mm apart.
วัสดุสำหรับขั้นตอนนี้:
 แปรงขัด1 ชิ้น
เครื่องมือที่ต้องใช้:
 ปากกาจับชิ้นงานหน้าโต๊ะ
 สว่านไร้สาย
 ชุดดอกสว่าน
 ปากกาเมจิกถาวร
 ไม้บรรทัด
 แว่นตานิรภัยใส
5
5
Make the sliding plate
Make the sliding plate
Cut an aluminium plate 10 mm shorter than the back. Drill it through the back's holes, then file its end square. Rivet two guide strips to the back's top so it slides lengthwise.
วัสดุสำหรับขั้นตอนนี้:
 แผ่นอะลูมิเนียม1 ชิ้น
 หมุดย้ำแบบดึง1 ชิ้น
เครื่องมือที่ต้องใช้:
 กรรไกรตัดแผ่นโลหะสว่านไร้สายชุดดอกสว่าน
 ตะไบ (ตะไบมือ)
 ชุดปืนย้ำหมุด
6
6
Build the tank
Build the tank
Fold an aluminium box 50 mm deep to the back's size with a lid. Drill the lid for a 25 mm filling hole and a handle socket. Seal it to the back with silicone and screws.
วัสดุสำหรับขั้นตอนนี้:
แผ่นอะลูมิเนียม1 ชิ้นหมุดย้ำแบบดึง1 ชิ้น ซิลิโคนยาแนว1 ชิ้น
 ตะปูเกลียวไม้ #8 x 1 นิ้ว1 ชิ้น
เครื่องมือที่ต้องใช้:
กรรไกรตัดแผ่นโลหะปากกาจับชิ้นงานหน้าโต๊ะชุดปืนย้ำหมุดสว่านไร้สายชุดดอกสว่าน ถุงมือหนังสำหรับทำงาน
7
7
Fit the adjusting screw
Fit the adjusting screw
Run an M4 screw through a nut epoxied on the tank's end wall so its tip pushes the plate. Turn it to close or open the holes.
วัสดุสำหรับขั้นตอนนี้:
 สกรูเกลียวมิล1 ชิ้น
 น็อตหกเหลี่ยม1 ชิ้น
 อีพ็อกซีสองส่วน1 ชิ้น
เครื่องมือที่ต้องใช้:
สว่านไร้สายชุดดอกสว่าน ชุดไขควง
8
8
Fit the handle
Fit the handle
Fix 1.2 m of 15 mm copper tube in the socket with brass fittings. Fit a ball valve and hose connector at its top.
วัสดุสำหรับขั้นตอนนี้:
 ท่อทองแดง1 ชิ้น
 ข้อต่อทองเหลือง1 ชิ้น
 วาล์วบอล1 ชิ้น
 เทปพันเกลียว PTFE1 ชิ้น
เครื่องมือที่ต้องใช้:
 คัตเตอร์ตัดท่อ
 ประแจเลื่อน
9
9
The patent drawing
The patent drawing
US 639,348 drawing sheet, public domain (expired patent).
10
10
Measure the flow at each setting
Measure the flow at each setting
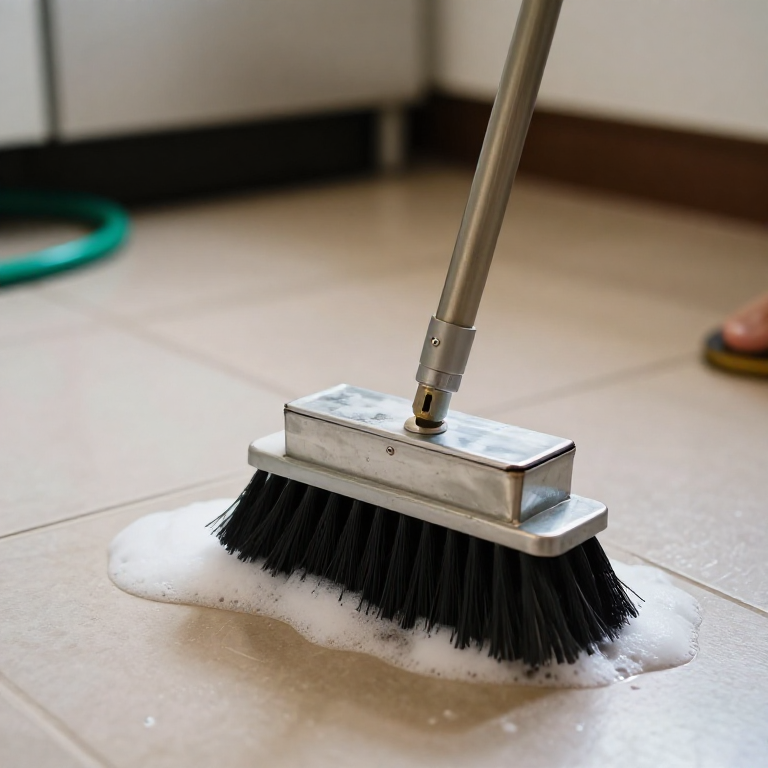
Connect the garden hose. Set the plate fully open, half and nearly shut, and catch the water for 30 s each in the jug. Then add a squirt of soap through the filling hole and scrub.
วัสดุสำหรับขั้นตอนนี้:
 สายยางรดน้ำ1 ชิ้น
 น้ำ1 ชิ้น
 สบู่คาสตีล (ชนิดเหลว)1 ชิ้น
เครื่องมือที่ต้องใช้:
 เหยือกตวง
 นาฬิกาจับเวลา
 เวอร์เนียร์ดิจิทัล 6 นิ้ว
11
11
A brush that floods, starves or leaks
A brush that floods, starves or leaks
Tank-headed self-feeding brush troubleshooting.
Flow
Loading...
12
12
History and honest limits
History and honest limits
**Ernest N. Broderick** of Indianapolis filed US 639,348 on 6 February 1899; it is dated 19 December 1899. Rubber or leather strips seal the tank to the brush-top. Two hollow adjustable joints, ground to fit and clamped by a bolt, let the handle be set at any angle, for floors, walls, windows or dusting high furniture; with compressed air instead of water it blows dust away, and a mop or duster may replace the brush.
**Honest limits.** Our handle is fixed; his joints are not built here. The notebook gives open area, not flow through a real hole. Your flows are the result.
วัสดุ
15- 1 ชิ้นตัวยึดตำแหน่ง
- 1 ชิ้นตัวยึดตำแหน่ง
- 2 ชิ้นตัวยึดตำแหน่ง
- 1 ชิ้นตัวยึดตำแหน่ง
- ตัวยึดตำแหน่ง
- 1 ชิ้นตัวยึดตำแหน่ง
- 1 ชิ้นตัวยึดตำแหน่ง
- 1 ชิ้นตัวยึดตำแหน่ง
- 1 ชิ้นตัวยึดตำแหน่ง
- 1 ชิ้นตัวยึดตำแหน่ง
- 1 ชิ้นตัวยึดตำแหน่ง
- 1 ชิ้นตัวยึดตำแหน่ง
- สายยางรดน้ำค่าคอมมิชชัน 10%1 ชิ้นตัวยึดตำแหน่ง
- 1 ชิ้นตัวยึดตำแหน่ง
- 1 ชิ้นตัวยึดตำแหน่ง
เครื่องมือที่จำเป็น
16- ตัวยึดตำแหน่ง
- 1 vendor sell this, none ship to you yetตัวยึดตำแหน่ง
- ตัวยึดตำแหน่ง
- ตัวยึดตำแหน่ง
- ตัวยึดตำแหน่ง
- ตัวยึดตำแหน่ง
- ตัวยึดตำแหน่ง
- ตัวยึดตำแหน่ง
- ตัวยึดตำแหน่ง
- ตัวยึดตำแหน่ง
- ตัวยึดตำแหน่ง
- ตัวยึดตำแหน่ง
- ตัวยึดตำแหน่ง
- ตัวยึดตำแหน่ง
- ตัวยึดตำแหน่ง
- ตัวยึดตำแหน่ง
บลูพริ้นท์ที่เกี่ยวข้อง
บลูพริ้นท์เหล่านี้แบ่งปันความรู้ — เทคนิค วัสดุ หรือหลักการ



CC0 สาธารณสมบัติ
พิมพ์เขียวนี้เผยแพร่ภายใต้ CC0 คุณสามารถคัดลอก แก้ไข แจกจ่าย และใช้งานผลงานนี้เพื่อวัตถุประสงค์ใดก็ได้ โดยไม่ต้องขออนุญาต
สนับสนุนเมกเกอร์โดยซื้อสินค้าผ่านพิมพ์เขียวของพวกเขา ซึ่งพวกเขาจะได้รับ ค่าคอมมิชชันเมกเกอร์ ที่ผู้ขายกำหนด หรือสร้างเวอร์ชันใหม่ของพิมพ์เขียวนี้และรวมเป็นการเชื่อมต่อในพิมพ์เขียวของคุณเพื่อแบ่งรายได้