
การทำงานร่วมกัน
ศิลปะ
ความงามและสุขภาพ
งานฝีมือ
วัฒนธรรมและประวัติศาสตร์
ความบันเทิง
สิ่งแวดล้อม
อาหารและเครื่องดื่ม
วิศวกรรมย้อนรอย
วิทยาศาสตร์
กีฬา
เทคโนโลยี
อุปกรณ์สวมใส่
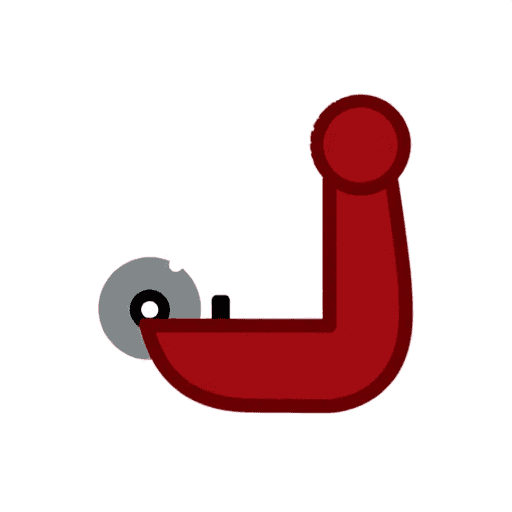
Sprung-Leg Tubing Cutter: a Bent Rod With a Disk Outside and a Roller Inside, the Handle's Screw Bends One Leg In (Zeiler, 1958)
Forge

สร้างโดย

Forge

13. พฤศจิกายน 2026NO
8
0
0
0
0

Sprung-Leg Tubing Cutter: a Bent Rod With a Disk Outside and a Roller Inside, the Handle's Screw Bends One Leg In (Zeiler, 1958)

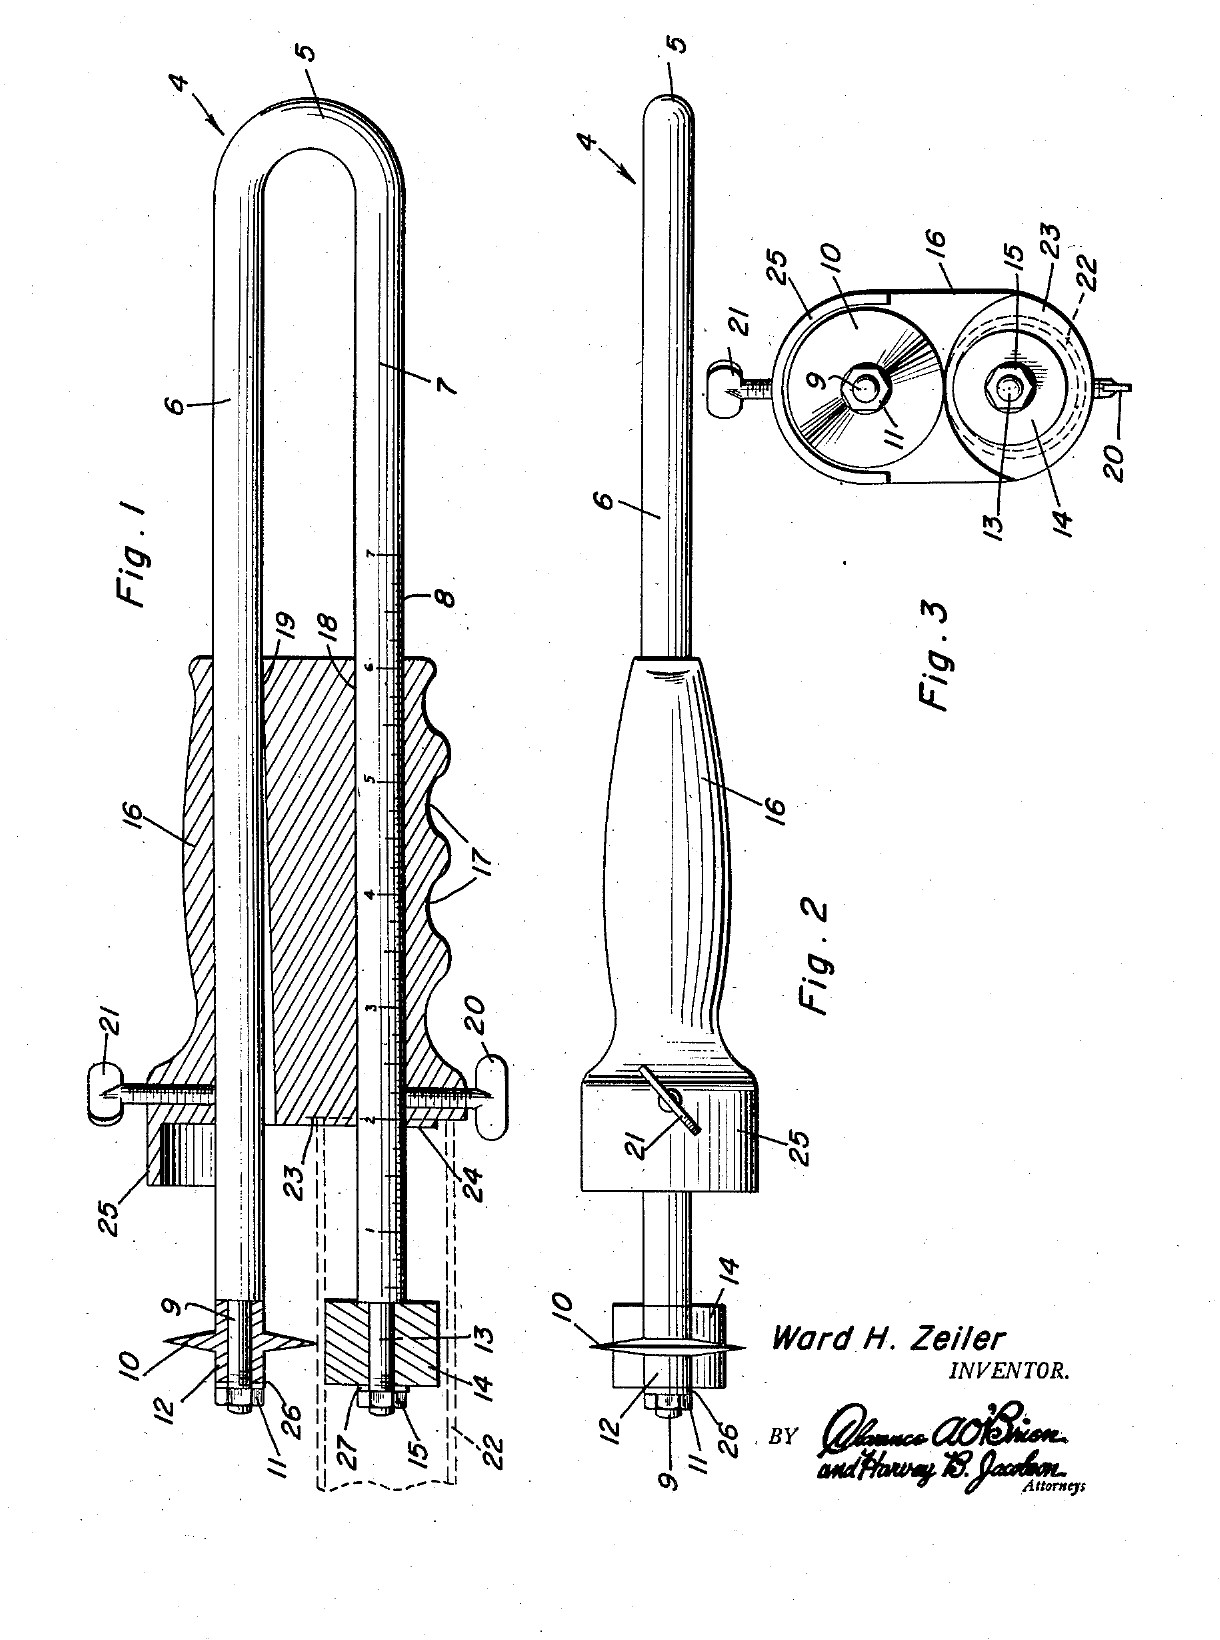
Ward H. Zeiler of Holyoke, Colorado, received US 2,821,781, dated 4 February 1958, for a plumber's tubing cutter that cuts a tube square, to length, near its end. The frame is one springy rod bent into a U. The lower leg goes into the tube and carries a roller. The upper leg carries a cutting disk outside the tube. A handle slides along both legs. Its front end stops against the tube end, so the cut length is read off a scale on the lower leg. A screw in the handle bends the upper leg in and presses the disk onto the tube, and turning the tool cuts it off. All sizes are ours.
ระดับกลาง
About 2 days

คำแนะนำ

1

Why the frame must spring

กำลังโหลดสมุด Jupyter…
2

Read US 2,821,781

"The leg 7 is then inserted in the tube 22 and the roller 14 and the projection 24 are engaged in the upper portion of said tube. The screw 21 is then tightened for bending the leg 6 of the frame 4, thus engaging the knife 10 with the periphery of the tube 22."
3

Print the template

The bent frame, its ends, the disk, roller and handle at 1:1, with the oval bore, the screws and the scale. print at 100 % (check the 50 mm bar).
ไฟล์แบบPDFCC0 - Free
4

Bend the frame

Cut 470 mm of 6 mm spring steel wire. Heat the middle 40 mm red with the torch and bend it round a 10 mm bar into a U with the legs 16 mm apart, and straighten the legs parallel. Heat the last 25 mm of each leg red and let it cool slowly in the dying forge, so the ends are soft enough to file and thread. Leave the rest of the legs as they are: they must spring.

วัสดุสำหรับขั้นตอนนี้:

ลวดเหล็กสปริงลวดเหล็กสปริง1 ชิ้น

เครื่องมือที่ต้องใช้:

หัวเป่าเชื่อมทองเหลืองหัวเป่าเชื่อมทองเหลือง
เตาตีเหล็กเตาตีเหล็ก
คีมช่างตีเหล็กคีมช่างตีเหล็ก
ปากกาจับชิ้นงานหน้าโต๊ะปากกาจับชิ้นงานหน้าโต๊ะ
ค้อนหัวกลมค้อนหัวกลม
เลื่อยตัดเหล็กเลื่อยตัดเหล็ก
ถุงมืองานเชื่อมถุงมืองานเชื่อม
แว่นนิรภัยแว่นนิรภัย
5

Thread the leg ends

Turn or file the last 24 mm of each leg to 5 mm, leaving a square shoulder, and cut an M5 thread on the last 8 mm with the die.

เครื่องมือที่ต้องใช้:

เครื่องกลึงโลหะเครื่องกลึงโลหะ
หัวจับกลึงสามจับหัวจับกลึงสามจับ
มีดกลึงมีดกลึง
ชุดตะไบชุดตะไบ
ชุดต๊าปและดายทำเกลียวชุดต๊าปและดายทำเกลียว
เวอร์เนียร์ดิจิทัล 6 นิ้วเวอร์เนียร์ดิจิทัล 6 นิ้ว
น้ำมันตัดกลึงน้ำมันตัดกลึง
6

Turn the disk and the roller

Disk: chuck a tool steel bar, turn 12 mm of it to 18 mm, drill it 5 mm, and turn the front 6 mm to a 50 degree edge, sharp in its middle. Turn the next 4 mm down to a 10 mm hub and part it off. Roller: turn 10 mm mild steel bar 16 mm long and drill it 5.2 mm, so it spins freely on the leg.

วัสดุสำหรับขั้นตอนนี้:

แท่งเหล็กกล้าเครื่องมือแท่งเหล็กกล้าเครื่องมือ1 ชิ้น
เหล็กเส้นกลมเหล็กกล้าละมุนเหล็กเส้นกลมเหล็กกล้าละมุน1 ชิ้น

เครื่องมือที่ต้องใช้:

เครื่องกลึงโลหะเครื่องกลึงโลหะ
หัวจับกลึงสามจับหัวจับกลึงสามจับ
มีดกลึงมีดกลึง
มีดตัดงานกลึงมีดตัดงานกลึง
ชุดดอกสว่านนำศูนย์ชุดดอกสว่านนำศูนย์
ชุดดอกสว่านชุดดอกสว่าน
เวอร์เนียร์ดิจิทัล 6 นิ้วเวอร์เนียร์ดิจิทัล 6 นิ้ว
แว่นนิรภัยแว่นนิรภัย
7

Harden and temper

Heat the disk to a cherry red, until a magnet no longer sticks, and quench it in water, moving it about. Rub it bright with a stone, warm it on a piece of steel plate over the fire, and quench again as soon as it turns a light straw colour.

เครื่องมือที่ต้องใช้:

เตาตีเหล็กเตาตีเหล็ก
คีมช่างตีเหล็กคีมช่างตีเหล็ก
แม่เหล็กเล็กแม่เหล็กเล็ก
ถังชุบน้ำถังชุบน้ำ
น้ำน้ำ
หินลับมีดหินลับมีด
ถุงมืองานเชื่อมถุงมืองานเชื่อม
แว่นนิรภัยแว่นนิรภัย
8

Make the handle

Saw 90 mm of 32 mm aluminium bar and face the ends. Drill two 6.2 mm holes through it lengthways, 16 mm apart, each 8 mm off the centre. With a round file, open the front 70 mm of the upper hole towards the lower one, 1.8 mm at the front face, tapering to nothing. Drill and tap M6 into the upper hole from the top, 12 mm from the front, and into the lower hole from below, 14 mm from the front. Saw and file away the lower half of the front 8 mm, leaving a 10 mm round boss round the lower hole. File three finger grooves underneath.

วัสดุสำหรับขั้นตอนนี้:

แท่งอะลูมิเนียมกลมแท่งอะลูมิเนียมกลม1 ชิ้น

เครื่องมือที่ต้องใช้:

เลื่อยตัดเหล็กเลื่อยตัดเหล็ก
เครื่องกลึงโลหะเครื่องกลึงโลหะ
หัวจับกลึงสามจับหัวจับกลึงสามจับ
สว่านแท่นสว่านแท่น
ปากกาจับชิ้นงานของเครื่องปากกาจับชิ้นงานของเครื่อง
ชุดดอกสว่านชุดดอกสว่าน
ชุดต๊าปและดายทำเกลียวชุดต๊าปและดายทำเกลียว
ชุดตะไบชุดตะไบ
ชุดตะไบเข็มชุดตะไบเข็ม
เวอร์เนียร์ดิจิทัล 6 นิ้วเวอร์เนียร์ดิจิทัล 6 นิ้ว
9

Make the guard

Cut a strip of brass sheet 12 mm wide and 50 mm long, bend it into a half round hood that reaches 12 mm past the handle's front over the disk, and fix its back end on top of the handle with two small screws.

วัสดุสำหรับขั้นตอนนี้:

แผ่นทองเหลืองแผ่นทองเหลือง1 ชิ้น
สกรูหัวจมหกเหลี่ยมสกรูหัวจมหกเหลี่ยม2 ชิ้น

เครื่องมือที่ต้องใช้:

เลื่อยตัดเหล็กเลื่อยตัดเหล็ก
ชุดตะไบชุดตะไบ
สว่านแท่นสว่านแท่น
ชุดดอกสว่านชุดดอกสว่าน
ชุดต๊าปและดายทำเกลียวชุดต๊าปและดายทำเกลียว
ปากกาจับชิ้นงานหน้าโต๊ะปากกาจับชิ้นงานหน้าโต๊ะ
10

Assemble

Slide the handle onto the legs from the open end, the upper leg in the oval bore. Put the disk on the upper leg's end, hub outwards, then a washer and an M5 nut, snug enough that the disk still turns. Fit the roller the same way on the lower leg. Screw in the M6 feed screw on top and the setscrew below.

วัสดุสำหรับขั้นตอนนี้:

แหวนรองแบนแหวนรองแบน2 ชิ้น
น็อตหกเหลี่ยมน็อตหกเหลี่ยม2 ชิ้น
สกรูหัวจมหกเหลี่ยมสกรูหัวจมหกเหลี่ยม1 ชิ้น
สกรูหนอนปลายเว้าสกรูหนอนปลายเว้า1 ชิ้น

เครื่องมือที่ต้องใช้:

ประแจเลื่อนประแจเลื่อน
ชุดประแจหกเหลี่ยมชุดประแจหกเหลี่ยม
11

Mark the scale

Slide the handle so its recess face is 20 mm from the disk's edge and lock it. File a nick across the lower leg at the handle's back face and mark it 20. File a nick every 10 mm towards the bend, deeper every 50 mm. The handle's back face now reads the cut length.

เครื่องมือที่ต้องใช้:

ชุดตะไบเข็มชุดตะไบเข็ม
เวอร์เนียร์ดิจิทัล 6 นิ้วเวอร์เนียร์ดิจิทัล 6 นิ้ว
12

Cut a tube to length

Set the handle to the length you want and lock the setscrew. Push the lower leg into the tube until the end bears in the recess, with the roller and boss against the inside. Tighten the feed screw until the disk touches. Turn the tool round the tube, giving the screw a little more each turn, until the end drops off. Clean the cut with a deburring tool.

วัสดุสำหรับขั้นตอนนี้:

ท่อทองแดงท่อทองแดง1 ชิ้น

เครื่องมือที่ต้องใช้:

ปากกาจับชิ้นงานหน้าโต๊ะปากกาจับชิ้นงานหน้าโต๊ะ

เครื่องมือลบครีบเครื่องมือลบครีบ
ชุดประแจหกเหลี่ยมชุดประแจหกเหลี่ยม
เวอร์เนียร์ดิจิทัล 6 นิ้วเวอร์เนียร์ดิจิทัล 6 นิ้ว
13

Troubleshooting

Sprung-leg tubing cutter troubleshooting.

Flow

Loading...
14

History and honest limits

**Ward H. Zeiler** of Holyoke, Colorado, US 2,821,781, dated 4 February 1958, filed 23 November 1956. He claimed "a substantially U-shaped resilient frame including legs extending slidably through the bores" and "a feed screw ... for bending said one leg within the confines of the handle for engaging the cutting disk with the tube". His frame was "suitable resilient metal"; ours is spring steel wire. His handle was a metal sleeve with a guard formed on it; ours is aluminium bar with a brass guard. The patent gives no sizes; all of ours are ours.

วัสดุ

10

เครื่องมือที่จำเป็น

28

ไฟล์ออกแบบ

1

CC0 สาธารณสมบัติ

พิมพ์เขียวนี้เผยแพร่ภายใต้ CC0 คุณสามารถคัดลอก แก้ไข แจกจ่าย และใช้งานผลงานนี้เพื่อวัตถุประสงค์ใดก็ได้ โดยไม่ต้องขออนุญาต

สนับสนุนเมกเกอร์โดยซื้อสินค้าผ่านพิมพ์เขียวของพวกเขา ซึ่งพวกเขาจะได้รับ ค่าคอมมิชชันเมกเกอร์ ที่ผู้ขายกำหนด หรือสร้างเวอร์ชันใหม่ของพิมพ์เขียวนี้และรวมเป็นการเชื่อมต่อในพิมพ์เขียวของคุณเพื่อแบ่งรายได้

การสนทนา

(0)

เข้าสู่ระบบ เพื่อร่วมการสนทนา

กำลังโหลดความคิดเห็น...