İşbirliği
SANAT
GÜZELLİK & SAĞLIK
ZANAAT
KÜLTÜR & TARİH
EĞLENCE
ÇEVRE
YİYECEK & İÇECEK
TERS MÜHENDİSLİK
BİLİMLER
SPOR
TEKNOLOJİ
GİYİLEBİLİR ÜRÜNLER
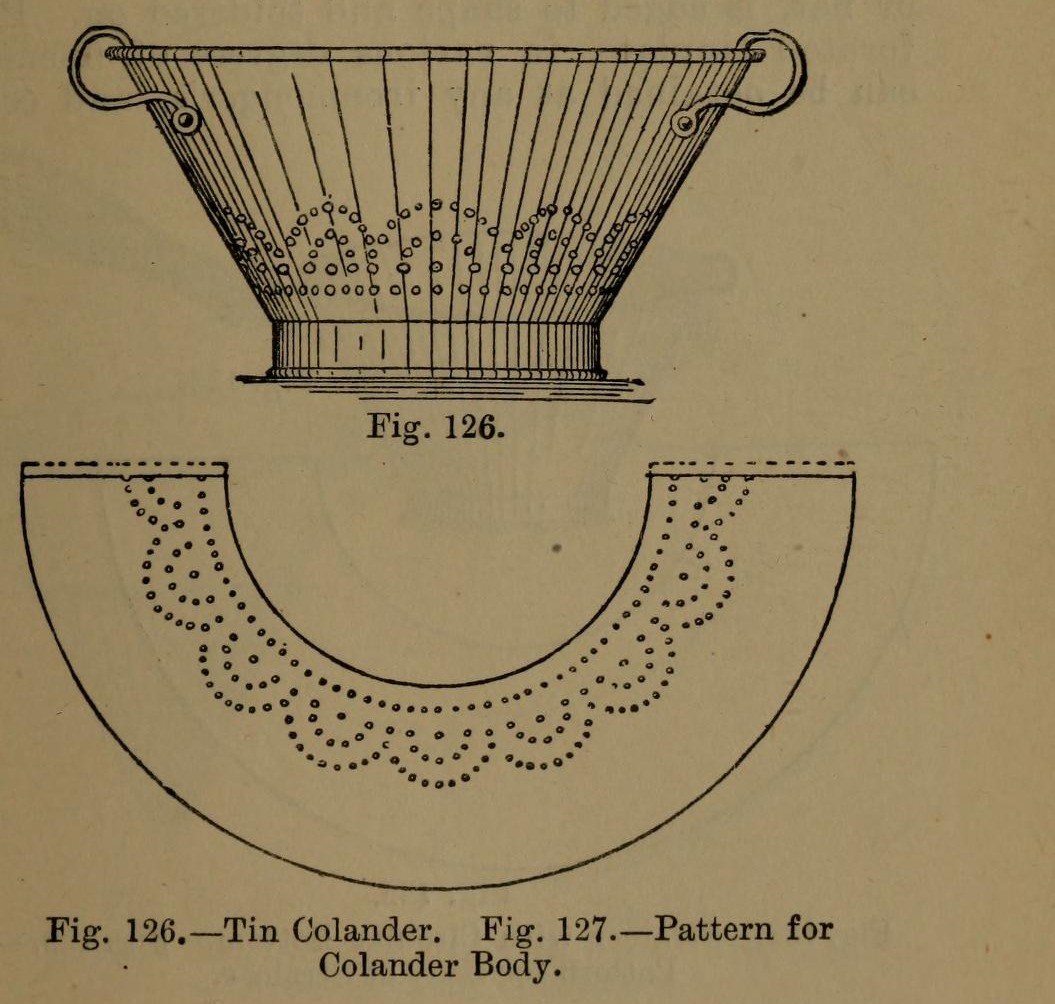


Colander: a Tinplate Colander with Perforated Body and Bottom (Hasluck, 1907)
A tinsmith's colander for straining: a tapered tinplate body and a hollowed bottom, both punched full of holes, standing on a wired hoop, with two bow handles.
The body pattern is a ring segment: outer radius = top diameter, inner radius = bottom diameter, which gives sides at 60 degrees.
Source: Paul N. Hasluck, Tinplate Work (1907), pp. 50-51. Unknown: sizes, solder. Picture: Figs. 126-127 of the book.
Orta
Unknown
Talimatlar
1
1
Set out the body pattern
Set out the body pattern
Choose the top and bottom diameters. On tinplate, strike an arc with radius equal to the top diameter and, from the same centre, one equal to the bottom diameter (Fig. 127); the sides then slope at 60 degrees. Mark the rows of holes, add edges for a grooved seam and the wire, and cut it out.
Bu adım için malzemeler:
 Teneke sac1 body
Gerekli aletler:
 Pergel
 Çizecek
 Sac makası
2
2
Break, punch and planish the body
Break, punch and planish the body
'Break' the pattern through the rollers, turning it the opposite way each pass, so it won't crease when bent. Punch the holes on a hardwood block, then flatten and planish the burrs.
Gerekli aletler:
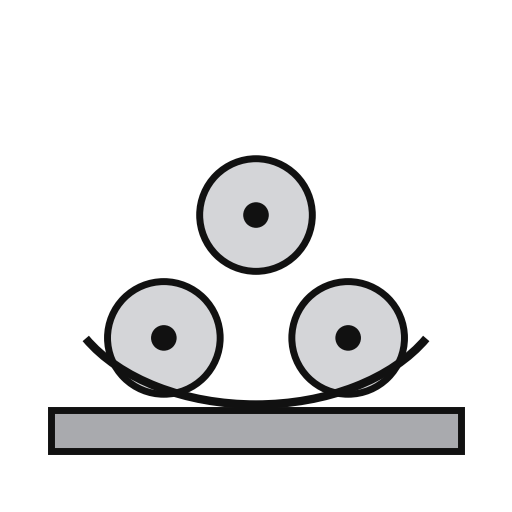 Sac bükme silindirleri
 Sac delme zımbası
 Sert Ahşap Blok
 Perdah çekici
3
3
Seam and wire the body
Seam and wire the body
Set off the edges for a grooved seam, bend the body to shape and seam it. Solder the seam inside. Set off an edge on the wide end and wire it with No. 10 B.W.G. wire. If you like, raise a swage about 1 1/2 in below the wired edge: it stiffens the colander and looks better.
Bu adım için malzemeler:
 Demir tel1 No. 10 B.W.G.
 Kalay-kurşun lehim1 seam
Gerekli aletler:
 Ahşap Tokmak
 Kazık
 Elektrikli Havya
 Dekapan
4
4
Make and fit the bottom
Make and fit the bottom
Cut out the bottom, hollow it and edge it to fit the small end. Inside, mark circles from 1 in across at the centre, each 1 in wider than the last, out to the edge. Punch holes at short intervals round them and flatten the burrs on an upturned hollowing hammer. Solder the bottom on.
Bu adım için malzemeler:
Teneke sac1 bottomKalay-kurşun lehim1 bottomGerekli aletler:
PergelSac makasıSac delme zımbasıPerdah çekiciElektrikli HavyaDekapan5
5
Add the hoop and handles
Add the hoop and handles
Cut a strip 1 1/2 in wide, as long as the circumference of the bottom. Wire it with No. 10 B.W.G., round it, seam it and solder it on as the foot. Rivet a pair of bow handles opposite each other at the top.
Bu adım için malzemeler:
Teneke sac1 hoopDemir tel1 hoopKalay-kurşun lehim1 hoop Sap2 bow handles
 Demir perçinler1 number not given
Gerekli aletler:
Sac makasıElektrikli HavyaDekapan Perçin çekici
6
6
Clean and scald
Clean and scald
Clean with turpentine and whiting, then polish with dry whiting. Before first use, steep it a short time in boiling water, as for any metal article for the kitchen.
Gerekli aletler:
 Terebentin
 Kalsiyum karbonat (tebeşir tozu)
 Su
Malzemeler
5- 1 hoopYer Tutucu
- 1 hoopYer Tutucu
- 1 hoopYer Tutucu
- 2 bow handlesYer Tutucu
- 1 number not givenYer Tutucu
Gerekli Aletler
15- Yer Tutucu
- Yer Tutucu
- Yer Tutucu
- Yer Tutucu
- Yer Tutucu
- Yer Tutucu
- Yer Tutucu
- Yer Tutucu
- Yer Tutucu
- Yer Tutucu
- Yer Tutucu
- Yer Tutucu
- Yer Tutucu
- Yer Tutucu
- Yer Tutucu
Bağlı Plan Malzemeleri


Bu planla yapılan
CC0 Kamu Malı
Bu plan CC0 lisansıyla yayınlanmıştır. İzin almadan kopyalayabilir, değiştirebilir, dağıtabilir ve herhangi bir amaçla kullanabilirsiniz.
Planı üzerinden ürün satın alarak Maker'ı destekleyin, böylece Maker Komisyonu Satıcılar tarafından belirlenen komisyonu kazanırlar veya bu Planın yeni bir versiyonunu oluşturun ve gelir paylaşımı için kendi Planınıza bağlantı olarak ekleyin.