SANAT
GÜZELLİK & SAĞLIK
ZANAAT
KÜLTÜR & TARİH
EĞLENCE
ÇEVRE
YİYECEK & İÇECEK
TERS MÜHENDİSLİK
BİLİMLER
SPOR
TEKNOLOJİ
GİYİLEBİLİR ÜRÜNLER
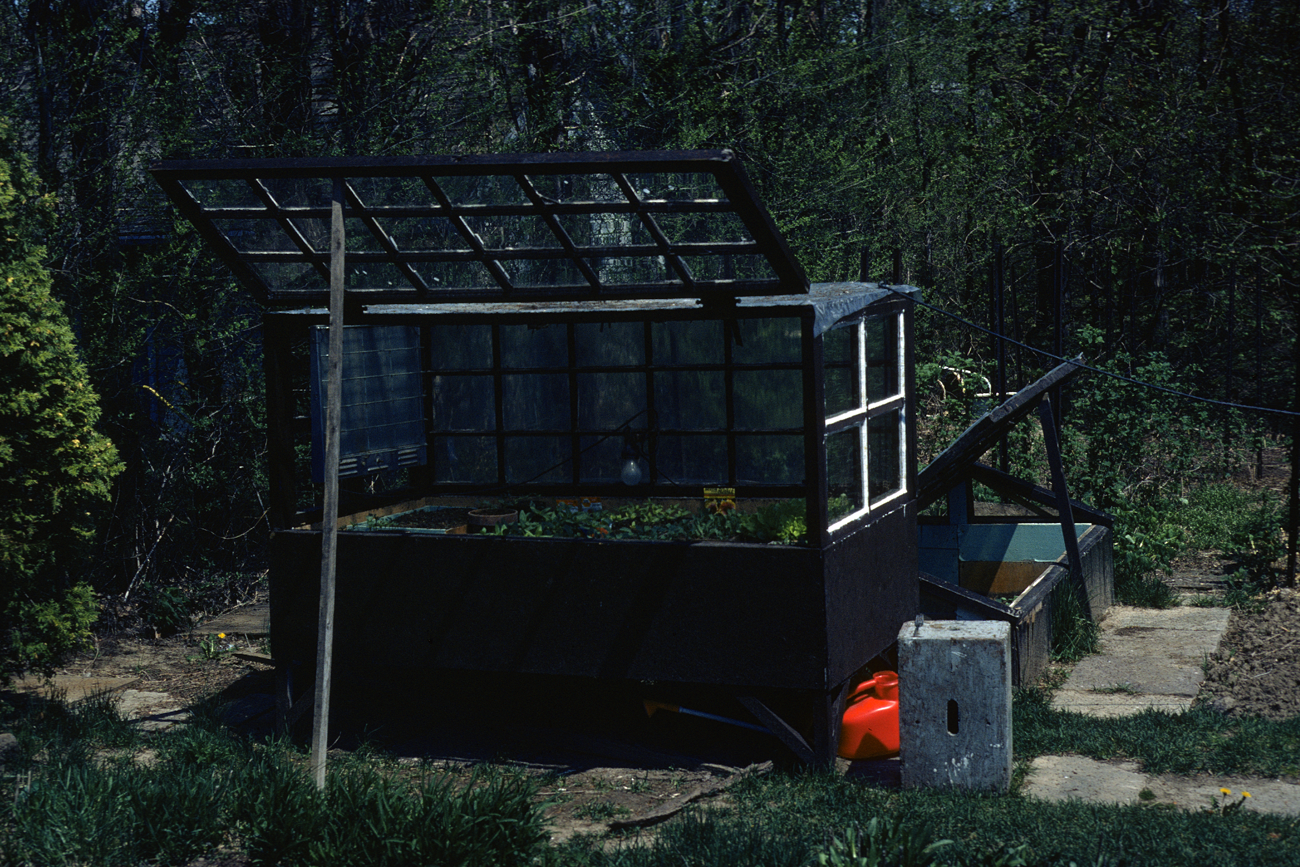
WayneRay (Wikimedia Commons) · CC BY-SA 4.0
Hardening Off and Transplanting — Moving Seedlings Outdoors Safely
A seedling raised warm and sheltered indoors will be scorched, wind-whipped or chilled if you plant it straight out. HARDEN it off first — toughen it up over a week or two of gradually longer trips outside — then transplant it with as little root disturbance as possible. A buildable school project in acclimatization and transplant shock.
Başlangıç
One to two weeks to harden, then plant out
Talimatlar
1
1
Soft plants need toughening
Soft plants need toughening
A seedling grown indoors is soft: still air, steady warmth and weak light have given it thin leaves, a tender skin and a weak stem. Plant it straight outdoors and real sun, wind and cold nights shock it — it wilts, scorches or stops dead. So you toughen it first, a process called hardening off.
2
2
Start with a sheltered hour
Start with a sheltered hour
About a week or two before planting out, set the plants outside in a SHELTERED, shady spot for just an hour or two, then bring them back in. This first, gentle taste of outdoor air and light begins toughening them without a shock.
3
3
Increase exposure each day
Increase exposure each day
Each day give them a little longer outside and a little more sun and breeze, and start leaving them out overnight once nights are mild. A cold frame makes this easy — open the lid by day, close it at night — steadily working up to a full day and night outdoors.
Bu adım için malzemeler:
 Cold Frame1 adet
4
4
Prepare the bed and water first
Prepare the bed and water first
Once hardened (and past the last frost, for tender crops), prepare the planting bed with compost and water both the seedling AND the planting hole an hour before. Moist roots and moist soil slide together far better than dry ones.
Bu adım için malzemeler:
 Compost1 bag
Gerekli aletler:
 Garden Trowel
5
5
Transplant gently
Transplant gently
Ease each seedling out keeping its rootball whole — the less you tear the roots, the less it sulks. Plant it at the SAME depth it grew (the exception is tomatoes, which grow roots along a buried stem, so plant them deep), settle the soil around it, and firm gently so there are no air pockets.
6
6
Water in and shade if hot
Water in and shade if hot
Water each transplant in well straight away to settle soil around the roots, and label it. Transplant on a cool, overcast day or in the evening rather than blazing noon, and give a little shade for a day or two in hot weather while the roots take hold.
Bu adım için malzemeler:
 Adhesive Labels1 yaprak
Gerekli aletler:
 Water Spray Bottle
7
7
Compendium — acclimatization and transplant shock
Compendium — acclimatization and transplant shock
Two ideas govern moving a plant into the world. The first is ACCLIMATIZATION: a living plant physically remodels itself to suit its conditions, and a coddled indoor seedling has built itself for an easy life — a thin waxy cuticle, big soft leaves, a slender stem — because it never needed more. Expose it gradually to sun, wind and cool, and it toughens in response: it thickens the waxy cuticle that stops it drying out, makes smaller sturdier leaves, and lays down stronger stem tissue (wind-flexing literally triggers thicker, stiffer stems). Rushed all at once, that same exposure instead scorches the tender leaves and desiccates the plant faster than its soft skin can cope — hence the slow week of lengthening trips outdoors. The second idea is TRANSPLANT SHOCK: whenever you lift a plant you inevitably damage some of the fine root hairs that do most of the water uptake, so for a few days the roots can't drink as fast as the leaves lose water, and the plant wilts. Everything in good transplanting works to shrink that gap — keeping the rootball intact so fewer roots are lost, watering plant and soil so water is freely available, planting into cool moist evening conditions so the leaves lose less, and shading afterwards to ease demand — giving the roots time to knit into the new soil and catch up. Master hardening off and gentle transplanting and the seedlings you raised indoors step into the garden and barely break stride; skip them and a windowsill full of promise can collapse in an afternoon. The same care applies to any tender young plant — a rooted cutting, a sweet-potato slip — leaving the nursery for the open ground.
Malzemeler
3- 1 adetYer Tutucu
- 1 yaprakYer Tutucu
Gerekli Aletler
2- Yer Tutucu
- Yer Tutucu
İlgili Blueprint'ler
Bu blueprint'ler bilgi paylaşır — teknikler, malzemeler veya ilkeler
Related blueprints
Other builds that share materials, tools, or techniques with this one.

Starting Seeds Indoors — Raising Seedlings for a Head Start
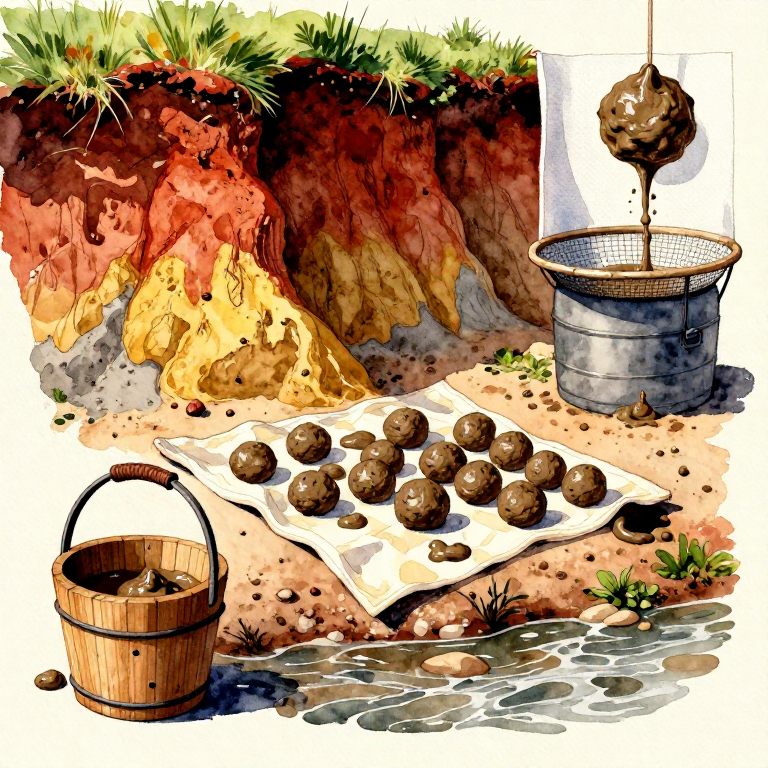
Harvesting and Preparing Wild Clay from Riverbanksceramics
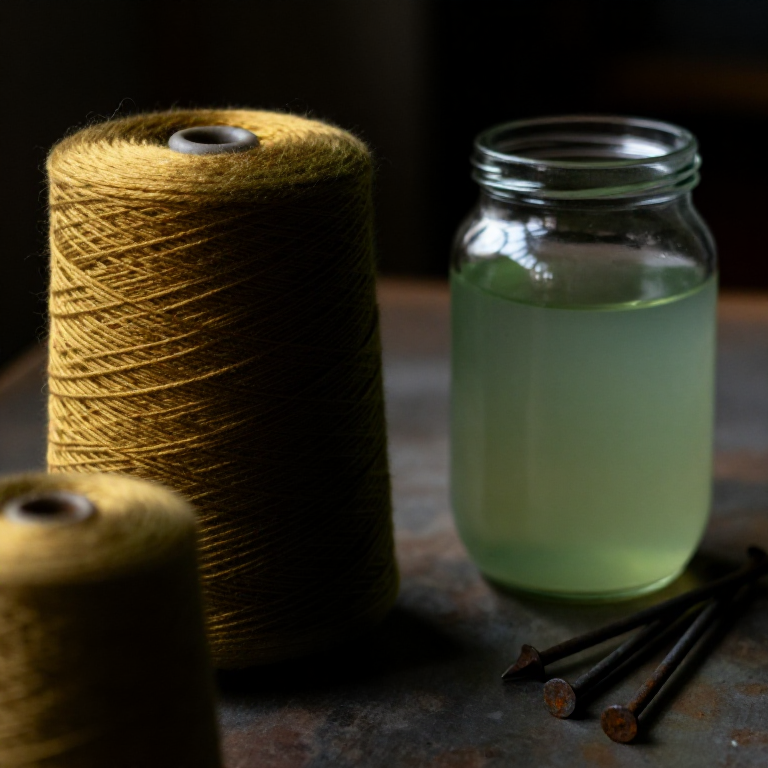
Iron Saddening — Darkening and Shifting Natural Dye Colours with Iron Watertextiles

Making a Stone Chisel — Splitting and Grooving Toolstoneworking

Forging an Iron Chain — Bending, Welding, and LinkingMetalworking
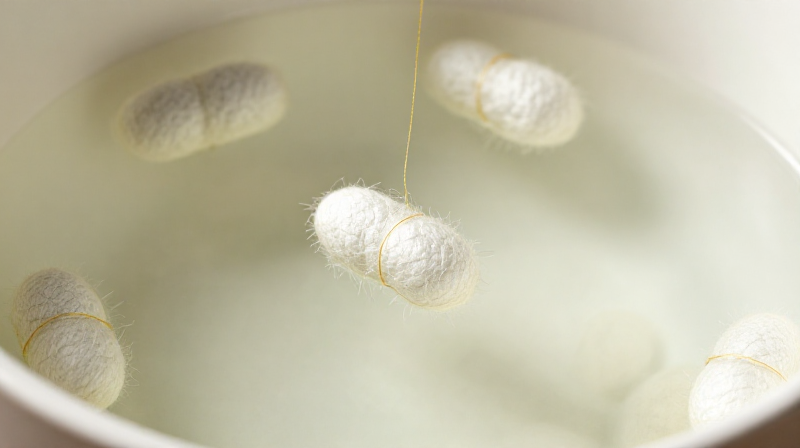
Reeling Silk from Cocoons — Unwinding the Continuous Filamenttextiles
CC0 Kamu Malı
Bu plan CC0 lisansıyla yayınlanmıştır. İzin almadan kopyalayabilir, değiştirebilir, dağıtabilir ve herhangi bir amaçla kullanabilirsiniz.
Planı üzerinden ürün satın alarak Maker'ı destekleyin, böylece Maker Komisyonu Satıcılar tarafından belirlenen komisyonu kazanırlar veya bu Planın yeni bir versiyonunu oluşturun ve gelir paylaşımı için kendi Planınıza bağlantı olarak ekleyin.