Turning a Wooden Bowl on a Lathe — Faceplate Turning
Talimatlar
Mount the Blank and Turn the Outside
Mount the Blank and Turn the Outside
Attach the bowl blank to a faceplate using screws driven into what will become the bottom of the bowl. Mount the faceplate on the lathe headstock. Set the lathe to a low speed appropriate for the blank diameter — as a guideline, a 20cm diameter blank should start at approximately 600-800 RPM. Stand to the side (not in line with the spinning blank) when first starting the lathe in case the blank is unbalanced. Using a bowl gouge, round the outside of the blank by cutting from larger diameter toward smaller, riding the bevel of the gouge against the wood. Shape the exterior profile — a gentle curve from the rim down to the foot. Form a tenon (a short cylindrical projection) on the base that will fit your scroll chuck jaws.
Bu adım için malzemeler:
 Maple Bowl Blank1 piece adet
 Sandpaperassorted sheets adet
 Allergy-Safe Food Storage Kit50-100ml ml
Gerekli aletler:
 Wood Lathe
 Gouge
Gouge Lathe Chuck (4-Jaw Scroll, 4-inch)
 Face Shield
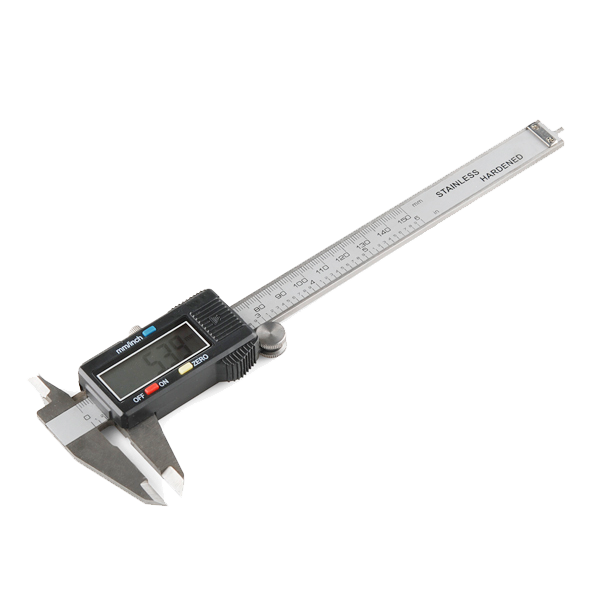 Digital Calipers - 152.4 mm
Reverse-Mount and Hollow the Interior
Reverse-Mount and Hollow the Interior
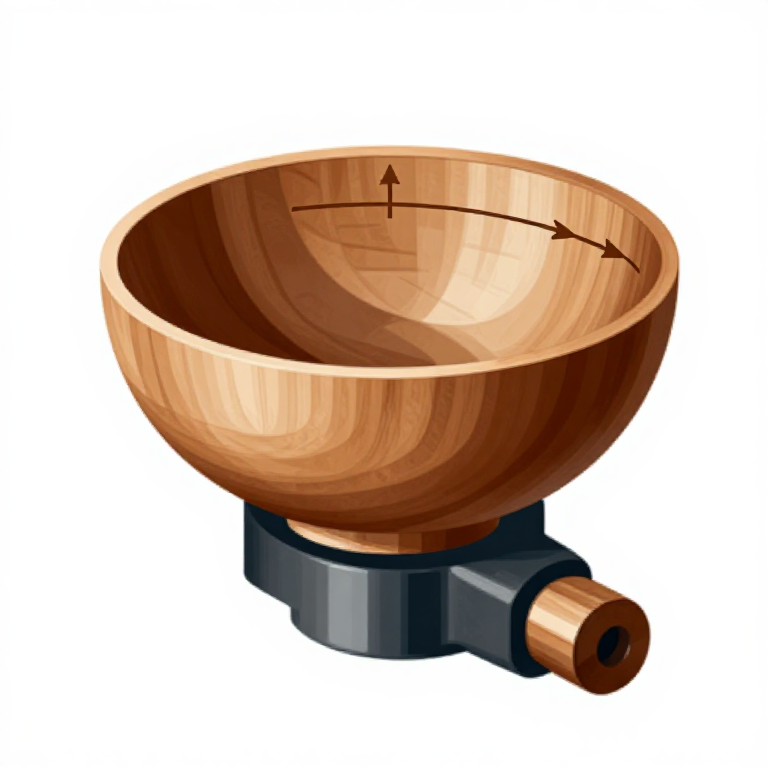
Remove the faceplate, grip the tenon in a four-jaw scroll chuck, and remount the bowl with the open face toward the tailstock. Begin hollowing from the centre outward using the bowl gouge. Cut from the centre toward the rim in a sweeping arc, riding the bevel. The wall thickness should be approximately 8-10mm initially — measure frequently with calipers. Never reach over the spinning bowl to cut the far side — always cut on the near side (between you and the centre) to maintain control. As the interior deepens, reduce lathe speed to maintain safe peripheral speed. Hollowing the bottom flat last provides maximum support during wall cutting.
Refine the Wall Thickness
Refine the Wall Thickness
Make finishing cuts with a freshly sharpened gouge, taking light passes to achieve the final wall thickness of approximately 5-8mm (thinner for decorative bowls, thicker for functional kitchen bowls). Uniform wall thickness is important: thick spots dry at a different rate than thin spots, causing warping. Check thickness by holding a light source inside the bowl — light transmission through thin areas reveals thickness variations. The interior curve should be a smooth, continuous arc with no ridges, bumps, or flat spots. A sharp gouge produces a surface that requires minimal sanding. Tool marks indicate the gouge needs sharpening or the cutting technique needs adjustment.
Sand on the Lathe
Sand on the Lathe
With the lathe running at moderate speed, sand the bowl progressively through grits: 80 (to remove tool marks), 120, 180, 220, and 320 or 400 (for a smooth finish). Sand the interior first, then the exterior. Sand across the grain direction as well as with the rotation to avoid circular scratch patterns. Between each grit, stop the lathe and sand briefly by hand with the grain to remove any circular scratches. Remove all sanding dust between grits with a clean cloth — residual coarse particles will scratch the surface during finer sanding. End grain areas require extra attention as they resist sanding and show scratches more prominently.
Apply Finish and Part Off
Apply Finish and Part Off
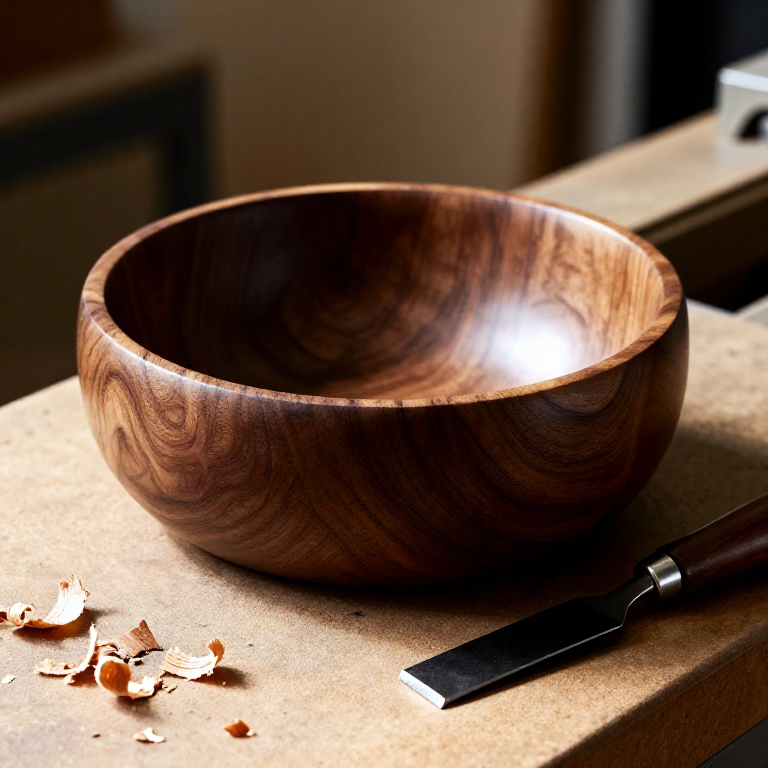
Apply finish while the bowl is still mounted on the lathe. For food-contact bowls, use food-safe mineral oil, walnut oil, or a friction polish made from shellac and oil. Apply the finish with the lathe spinning slowly, distributing it evenly over the surface, then increase speed and buff with a clean cloth to build shine from friction heat. For decorative bowls, lacquer or oil-wax blends provide more durable protection. After finishing the interior and exterior, remove the bowl from the chuck and address the foot. Either turn a decorative recess in the base using a jam chuck (a waste block turned to friction-fit the bowl rim), or simply sand the chuck marks smooth by hand and sign the base. The finished bowl should be thin, symmetrical, and smoothly curved with an even finish that highlights the wood's natural beauty.
Malzemeler
3- 1 piece adetYer Tutucu
- 50-100ml adetYer Tutucu
Gerekli Aletler
6- Yer Tutucu
- Faceplate or screw chuck
- Yer Tutucu
You can swap these in
Can't get one of the materials? Swap it for an equivalent — these work just as well.
- Instead of Sandpaper (120 Grit), try:
 Sandpaper (1000 Grit)
 Wet/Dry Sandpaper Pack (400-3000 Grit)
 Sandpaper (320 Grit)
 Sandpaper Sheet (Grit 220)
 - Instead of Face Shield, try:
 CAN-BUS Shield
 Ardumoto - Motor Driver Shield
 SparkFun Weather Shield
 LiPower Shield
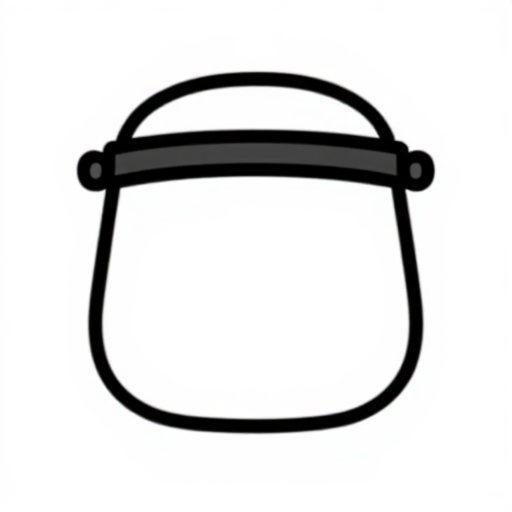 Full Face Shield
 - Instead of Maple Bowl Blank, try:
 Venetian Mask Blank (Papier-Mache)
 Hard Maple Turning Blank
 Stabilized Burl Wood Blank
Recommended for this build
Products makers often use with builds like this one.
 BeeswaxUsed together and in similar builds
 Bench ViseUsed together and in similar builds
 Deer Antler SectionUsed together and in similar builds
 Cordless DrillUsed together and in similar builds
 Drill Bit SetUsed together and in similar builds
 HacksawUsed together and in similar builds
 DeerUsed together and in similar builds
 Boiled Linseed OilUsed together and in similar builds
Related blueprints
Other builds that share materials, tools, or techniques with this one.
CC0 Kamu Malı
Bu plan CC0 lisansıyla yayınlanmıştır. İzin almadan kopyalayabilir, değiştirebilir, dağıtabilir ve herhangi bir amaçla kullanabilirsiniz.
Planı üzerinden ürün satın alarak Maker'ı destekleyin, böylece Maker Komisyonu Satıcılar tarafından belirlenen komisyonu kazanırlar veya bu Planın yeni bir versiyonunu oluşturun ve gelir paylaşımı için kendi Planınıza bağlantı olarak ekleyin.