SANAT
GÜZELLİK & SAĞLIK
ZANAAT
KÜLTÜR & TARİH
EĞLENCE
ÇEVRE
YİYECEK & İÇECEK
TERS MÜHENDİSLİK
BİLİMLER
SPOR
TEKNOLOJİ
GİYİLEBİLİR ÜRÜNLER
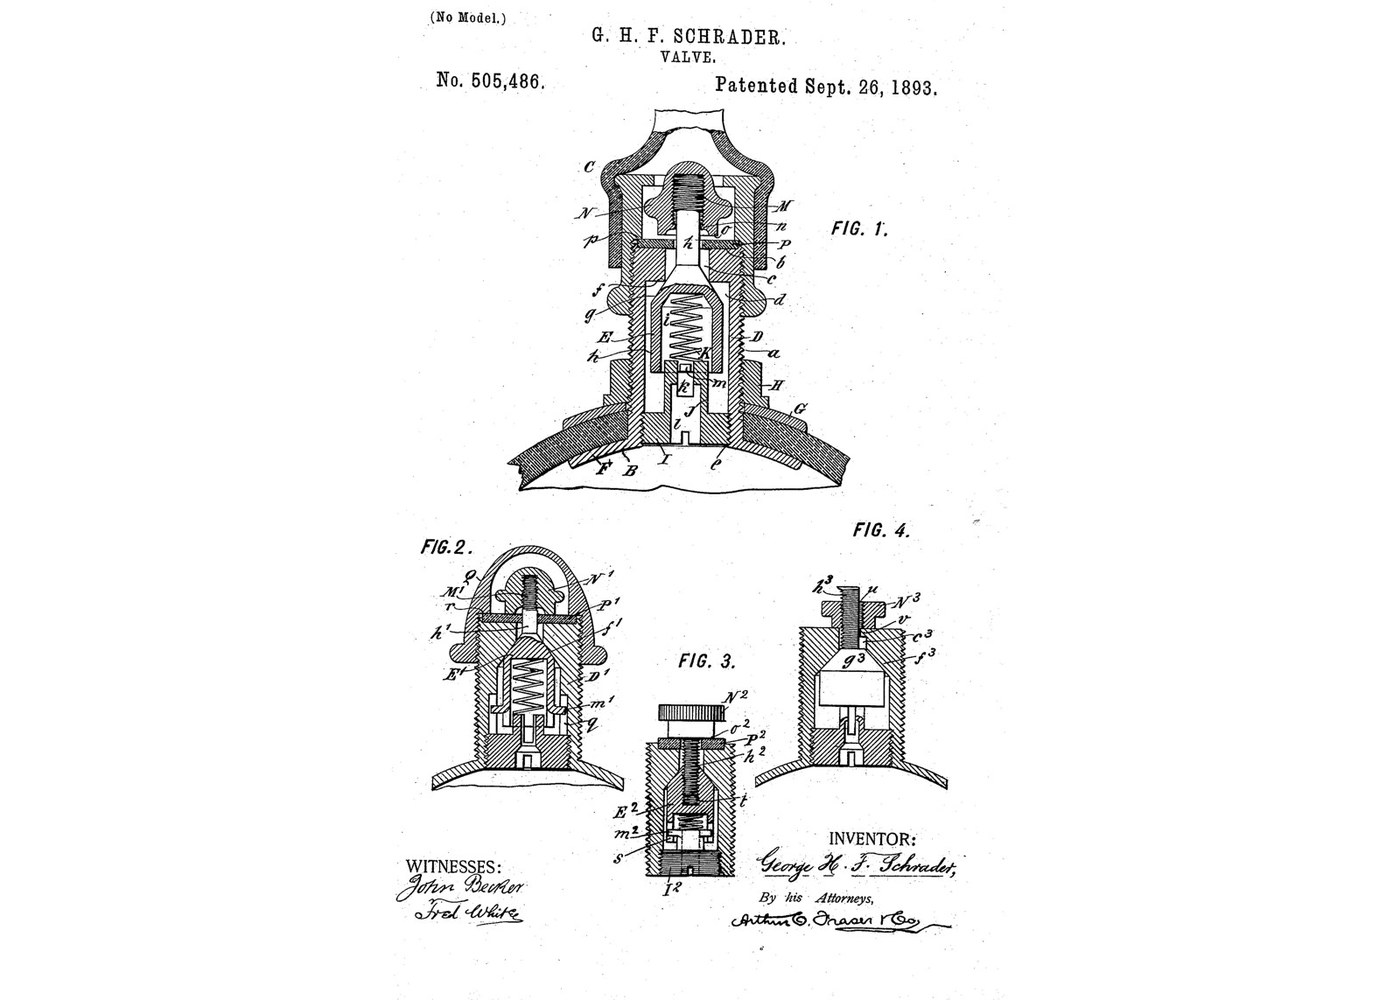


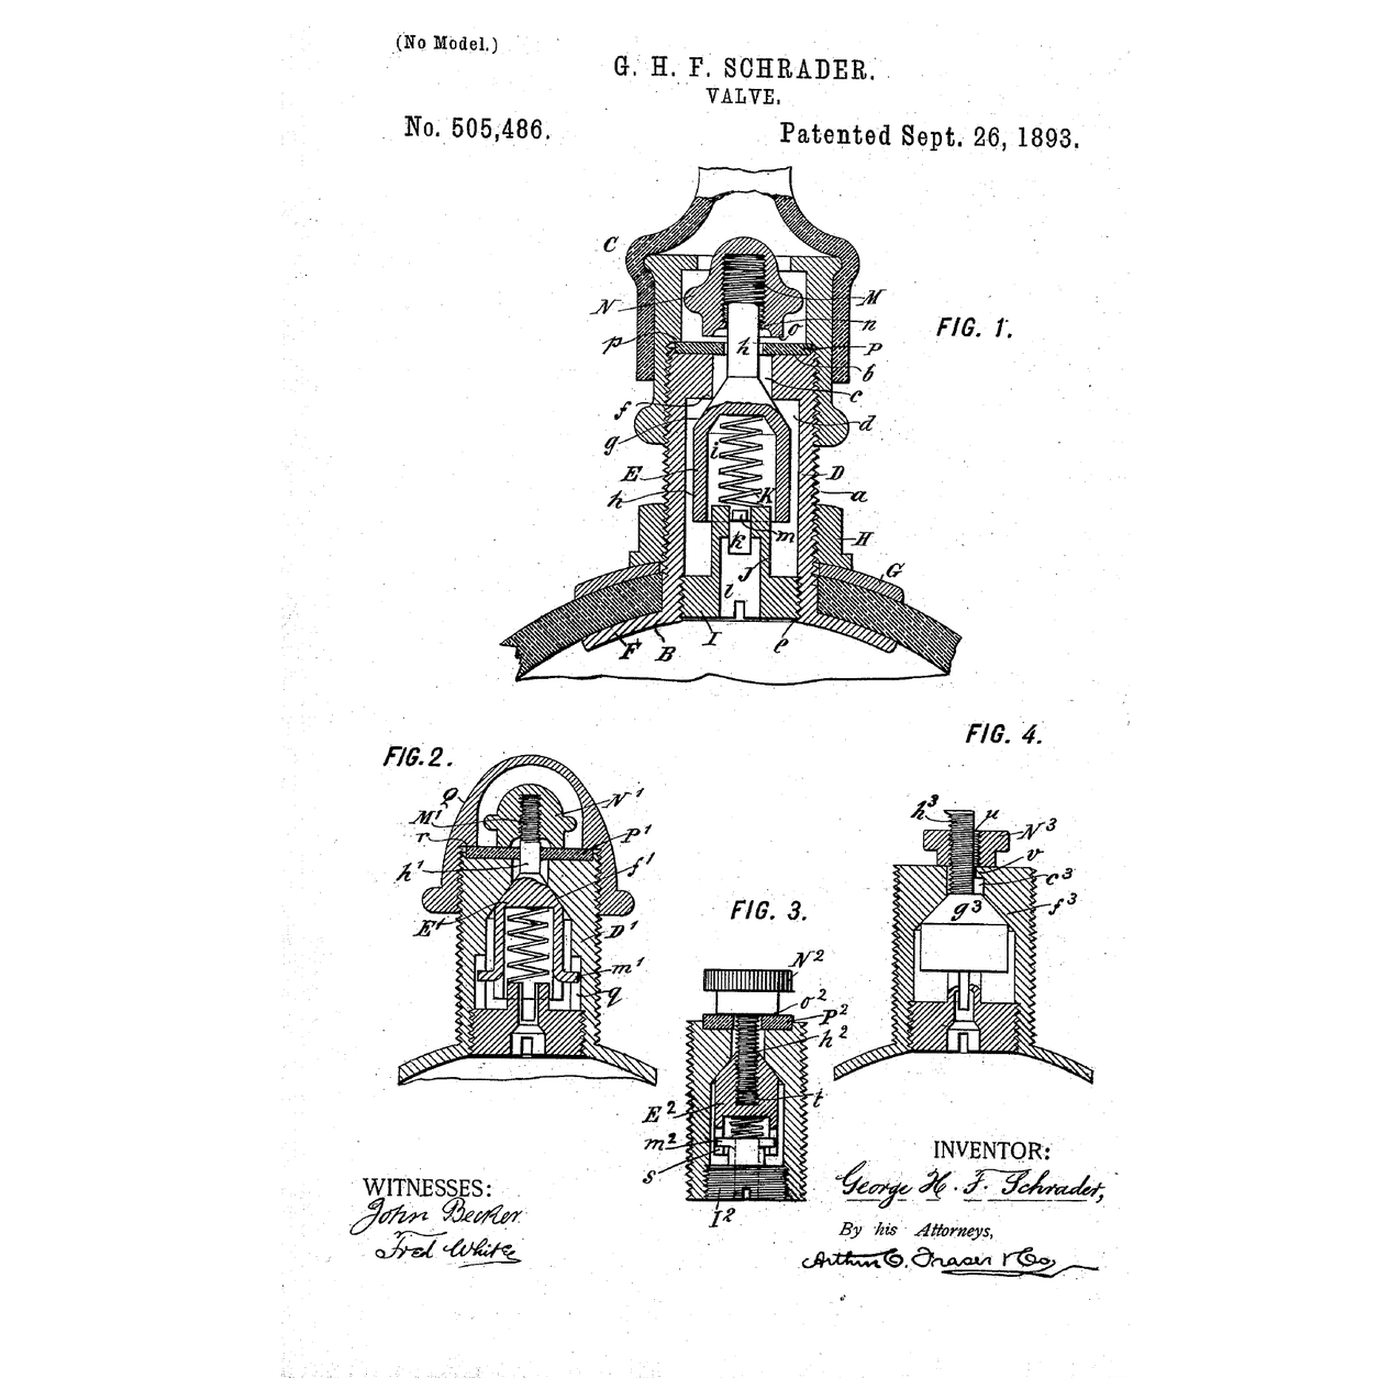
Tire Valve: Spring-Closed Plunger and Locking Hand Nut (Schrader 1893)
Schrader's bicycle-tire valve: a plunger in a tube, pushed onto its seat by a spring and by the air in the tyre. The pump's air lifts it, the tyre's air closes it. A hand nut on the stem then screws down on a washer to lock it tight, and a lip on the nut stops it coming off the stem.
Source: George H. F. Schrader, US 505,486 (1893), Fig. 1. Unknown: the metals, the packing and the sizes. Schrader gives none of them, so they are linked to unknown heads. Lathe work and grinding the seat are ours. Picture: the patent's drawing.
İleri
2 days
Talimatlar
1
1
Turn the casing
Turn the casing
Turn a tube with a flange at its lower end and a thread up its outside, ending in a socketed top face. Bore a narrow aperture down from that face into a wider space, leaving a square-cornered shoulder between them: that corner is the seat. Thread the inside of the lower end. Turn a nut for the outer thread. Unknown: the metal and the sizes.
Bu adım için malzemeler:
 Bilinmeyen metal1 as required
Gerekli aletler:
 Metal Torna Tezgâhı
 Torna kalemi seti (HSS)
 Kılavuz ve pafta takımı
 Kumpas
 Bilinmeyen ölçüler
2
2
Turn the plunger and its plug
Turn the plunger and its plug
Turn the plunger: a conical face that meets the seat, a smooth stem above it rising through the aperture with a threaded head at its end, and below it a hollow cylinder nearly filling the casing, open at the bottom. Turn a plug that screws into the casing's lower end, with a stub that fits loosely inside the hollow, a cross groove across the stub and a hole through the plug. Strike a lug in from the plunger's lower edge so it rides in the groove and stops the plunger turning.
Bu adım için malzemeler:
Bilinmeyen metal1 as requiredGerekli aletler:
Metal Torna TezgâhıTorna kalemi seti (HSS)Kılavuz ve pafta takımı Eğe TakımıBilinmeyen ölçüler
3
3
Make the spring, washers and hand nut
Make the spring, washers and hand nut
Wind a spring to fit inside the plunger's hollow. Cut a packing washer for the socket on top of the casing and a washer for the tyre side. Turn a hand nut that screws onto the stem head, with a seating face underneath, and turn its lip inwards round the stem so it overhangs the head. Unknown: the spring metal and the packing.
Bu adım için malzemeler:
Bilinmeyen metal1 as required Bilinmeyen salmastra2 adet
Gerekli aletler:
Metal Torna Tezgâhı Kombine PenseBilinmeyen ölçüler
4
4
Grind the seat and assemble
Grind the seat and assemble
Grind the plunger's conical face onto the casing seat, as Schrader recommends alongside the washer. Put the spring in the plunger and screw in the plug from below, the lug in the groove. Fit the packing washer in the socket and the hand nut on the stem. Clamp the casing through the tyre between its flange and the outer washer and nut. Pump: the air lifts the plunger. Stop: spring and tyre pressure close it. Screw the hand nut down onto the washer to lock it.
Gerekli aletler:
Kombine Pense Koruyucu gözlük
Malzemeler
2- 1 as requiredYer Tutucu
- 2 adetYer Tutucu
Bu planla yapılan

İlgili Blueprint'ler
Bu blueprint'ler bilgi paylaşır — teknikler, malzemeler veya ilkeler
CC0 Kamu Malı
Bu plan CC0 lisansıyla yayınlanmıştır. İzin almadan kopyalayabilir, değiştirebilir, dağıtabilir ve herhangi bir amaçla kullanabilirsiniz.
Planı üzerinden ürün satın alarak Maker'ı destekleyin, böylece Maker Komisyonu Satıcılar tarafından belirlenen komisyonu kazanırlar veya bu Planın yeni bir versiyonunu oluşturun ve gelir paylaşımı için kendi Planınıza bağlantı olarak ekleyin.