
İşbirliği
SANAT
GÜZELLİK & SAĞLIK
ZANAAT
KÜLTÜR & TARİH
EĞLENCE
ÇEVRE
YİYECEK & İÇECEK
TERS MÜHENDİSLİK
BİLİMLER
SPOR
TEKNOLOJİ
GİYİLEBİLİR ÜRÜNLER
Sprung-Leg Tubing Cutter: a Bent Rod With a Disk Outside and a Roller Inside, the Handle's Screw Bends One Leg In (Zeiler, 1958)
Forge

Oluşturan

Forge

13. Kasım 2026NO
8
0
0
0
0

Sprung-Leg Tubing Cutter: a Bent Rod With a Disk Outside and a Roller Inside, the Handle's Screw Bends One Leg In (Zeiler, 1958)

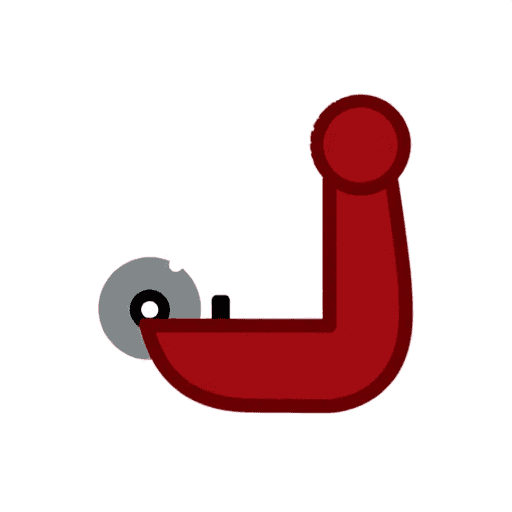
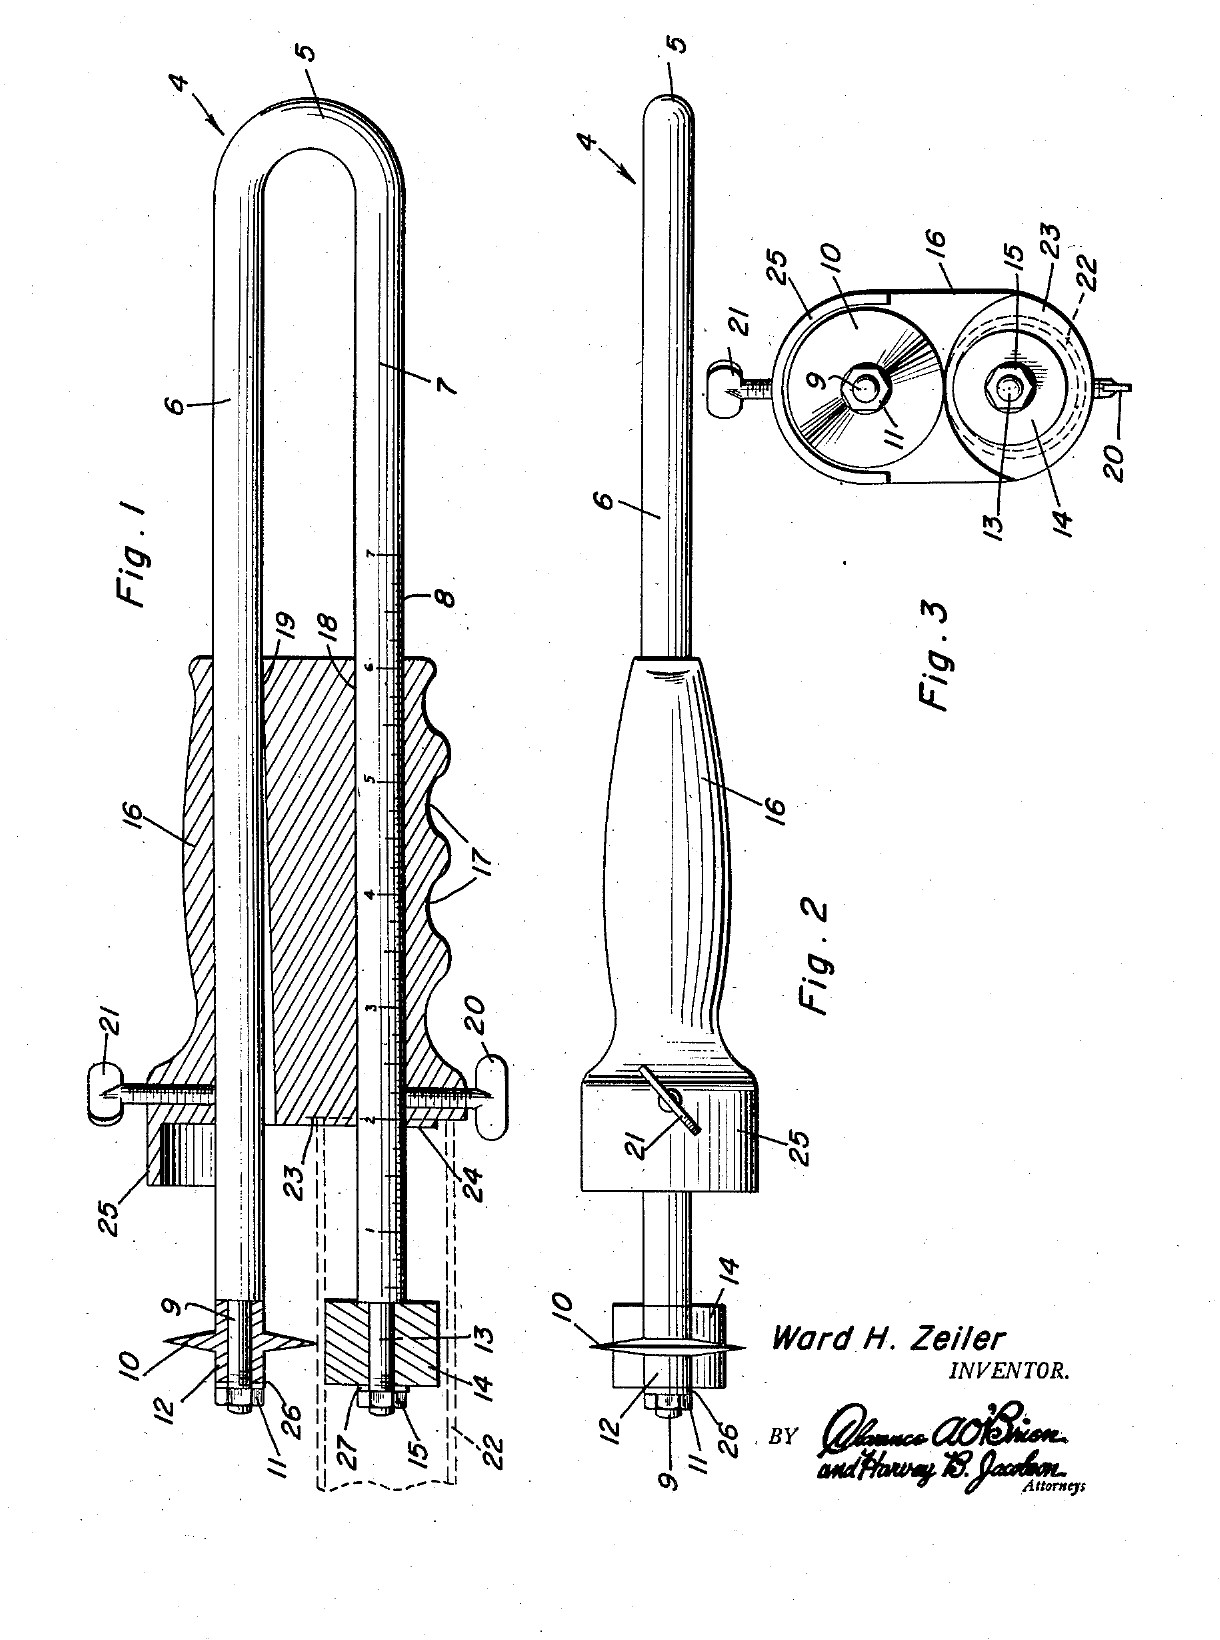
Ward H. Zeiler of Holyoke, Colorado, received US 2,821,781, dated 4 February 1958, for a plumber's tubing cutter that cuts a tube square, to length, near its end. The frame is one springy rod bent into a U. The lower leg goes into the tube and carries a roller. The upper leg carries a cutting disk outside the tube. A handle slides along both legs. Its front end stops against the tube end, so the cut length is read off a scale on the lower leg. A screw in the handle bends the upper leg in and presses the disk onto the tube, and turning the tool cuts it off. All sizes are ours.
Orta
About 2 days

Talimatlar

1

Why the frame must spring

Jupyter defteri yükleniyor…
2

Read US 2,821,781

"The leg 7 is then inserted in the tube 22 and the roller 14 and the projection 24 are engaged in the upper portion of said tube. The screw 21 is then tightened for bending the leg 6 of the frame 4, thus engaging the knife 10 with the periphery of the tube 22."
3

Print the template

The bent frame, its ends, the disk, roller and handle at 1:1, with the oval bore, the screws and the scale. print at 100 % (check the 50 mm bar).
Tasarım DosyasıPDFCC0 - Free
4

Bend the frame

Cut 470 mm of 6 mm spring steel wire. Heat the middle 40 mm red with the torch and bend it round a 10 mm bar into a U with the legs 16 mm apart, and straighten the legs parallel. Heat the last 25 mm of each leg red and let it cool slowly in the dying forge, so the ends are soft enough to file and thread. Leave the rest of the legs as they are: they must spring.

Bu adım için malzemeler:

Yay çeliği telYay çeliği tel1 adet

Gerekli aletler:

Sert lehim şalomasıSert lehim şaloması
Demirci OcağıDemirci Ocağı
Demirci MaşasıDemirci Maşası
Tezgah MengenesiTezgah Mengenesi
Küre başlı çekiçKüre başlı çekiç
Demir TesteresiDemir Testeresi
Kaynak eldivenleriKaynak eldivenleri
Koruyucu gözlükKoruyucu gözlük
5

Thread the leg ends

Turn or file the last 24 mm of each leg to 5 mm, leaving a square shoulder, and cut an M5 thread on the last 8 mm with the die.

Gerekli aletler:

Metal Torna TezgâhıMetal Torna Tezgâhı
3 ayaklı torna aynası3 ayaklı torna aynası
Torna kesici kalemiTorna kesici kalemi
Eğe TakımıEğe Takımı
Kılavuz ve pafta takımıKılavuz ve pafta takımı
Dijital Kumpas 6 İnçDijital Kumpas 6 İnç
Kesme yağıKesme yağı
6

Turn the disk and the roller

Disk: chuck a tool steel bar, turn 12 mm of it to 18 mm, drill it 5 mm, and turn the front 6 mm to a 50 degree edge, sharp in its middle. Turn the next 4 mm down to a 10 mm hub and part it off. Roller: turn 10 mm mild steel bar 16 mm long and drill it 5.2 mm, so it spins freely on the leg.

Bu adım için malzemeler:

Takım çeliği çubukTakım çeliği çubuk1 adet
Yumuşak çelik yuvarlak çubukYumuşak çelik yuvarlak çubuk1 adet

Gerekli aletler:

Metal Torna TezgâhıMetal Torna Tezgâhı
3 ayaklı torna aynası3 ayaklı torna aynası
Torna kesici kalemiTorna kesici kalemi
Kesme kalemiKesme kalemi
Punta matkabı setiPunta matkabı seti
Matkap Ucu TakımıMatkap Ucu Takımı
Dijital Kumpas 6 İnçDijital Kumpas 6 İnç
Koruyucu gözlükKoruyucu gözlük
7

Harden and temper

Heat the disk to a cherry red, until a magnet no longer sticks, and quench it in water, moving it about. Rub it bright with a stone, warm it on a piece of steel plate over the fire, and quench again as soon as it turns a light straw colour.

Gerekli aletler:

Demirci OcağıDemirci Ocağı
Demirci MaşasıDemirci Maşası
Küçük MıknatısKüçük Mıknatıs
Su verme kovasıSu verme kovası
SuSu
Bileği TaşıBileği Taşı
Kaynak eldivenleriKaynak eldivenleri
Koruyucu gözlükKoruyucu gözlük
8

Make the handle

Saw 90 mm of 32 mm aluminium bar and face the ends. Drill two 6.2 mm holes through it lengthways, 16 mm apart, each 8 mm off the centre. With a round file, open the front 70 mm of the upper hole towards the lower one, 1.8 mm at the front face, tapering to nothing. Drill and tap M6 into the upper hole from the top, 12 mm from the front, and into the lower hole from below, 14 mm from the front. Saw and file away the lower half of the front 8 mm, leaving a 10 mm round boss round the lower hole. File three finger grooves underneath.

Bu adım için malzemeler:

Alüminyum yuvarlak çubukAlüminyum yuvarlak çubuk1 adet

Gerekli aletler:

Demir TesteresiDemir Testeresi
Metal Torna TezgâhıMetal Torna Tezgâhı
3 ayaklı torna aynası3 ayaklı torna aynası
Sütunlu MatkapSütunlu Matkap
Makine MengenesiMakine Mengenesi
Matkap Ucu TakımıMatkap Ucu Takımı
Kılavuz ve pafta takımıKılavuz ve pafta takımı
Eğe TakımıEğe Takımı
İğne Eğe Takımıİğne Eğe Takımı
Dijital Kumpas 6 İnçDijital Kumpas 6 İnç
9

Make the guard

Cut a strip of brass sheet 12 mm wide and 50 mm long, bend it into a half round hood that reaches 12 mm past the handle's front over the disk, and fix its back end on top of the handle with two small screws.

Bu adım için malzemeler:

Pirinç LevhaPirinç Levha1 adet
İçten Altıgen Başlı Silindirik Vidaİçten Altıgen Başlı Silindirik Vida2 adet

Gerekli aletler:

Demir TesteresiDemir Testeresi
Eğe TakımıEğe Takımı
Sütunlu MatkapSütunlu Matkap
Matkap Ucu TakımıMatkap Ucu Takımı
Kılavuz ve pafta takımıKılavuz ve pafta takımı
Tezgah MengenesiTezgah Mengenesi
10

Assemble

Slide the handle onto the legs from the open end, the upper leg in the oval bore. Put the disk on the upper leg's end, hub outwards, then a washer and an M5 nut, snug enough that the disk still turns. Fit the roller the same way on the lower leg. Screw in the M6 feed screw on top and the setscrew below.

Bu adım için malzemeler:

Düz PulDüz Pul2 adet
Altıgen SomunAltıgen Somun2 adet
İçten Altıgen Başlı Silindirik Vidaİçten Altıgen Başlı Silindirik Vida1 adet

Çukur uçlu setuskurÇukur uçlu setuskur1 adet

Gerekli aletler:

Kurbağacık anahtarKurbağacık anahtar
Alyan takımıAlyan takımı
11

Mark the scale

Slide the handle so its recess face is 20 mm from the disk's edge and lock it. File a nick across the lower leg at the handle's back face and mark it 20. File a nick every 10 mm towards the bend, deeper every 50 mm. The handle's back face now reads the cut length.

Gerekli aletler:

İğne Eğe Takımıİğne Eğe Takımı
Dijital Kumpas 6 İnçDijital Kumpas 6 İnç
12

Cut a tube to length

Set the handle to the length you want and lock the setscrew. Push the lower leg into the tube until the end bears in the recess, with the roller and boss against the inside. Tighten the feed screw until the disk touches. Turn the tool round the tube, giving the screw a little more each turn, until the end drops off. Clean the cut with a deburring tool.

Bu adım için malzemeler:

Bakır boruBakır boru1 adet

Gerekli aletler:

Tezgah MengenesiTezgah Mengenesi

Çapak alma aletiÇapak alma aleti
Alyan takımıAlyan takımı
Dijital Kumpas 6 İnçDijital Kumpas 6 İnç
13

Troubleshooting

Sprung-leg tubing cutter troubleshooting.

Flow

Loading...
14

History and honest limits

**Ward H. Zeiler** of Holyoke, Colorado, US 2,821,781, dated 4 February 1958, filed 23 November 1956. He claimed "a substantially U-shaped resilient frame including legs extending slidably through the bores" and "a feed screw ... for bending said one leg within the confines of the handle for engaging the cutting disk with the tube". His frame was "suitable resilient metal"; ours is spring steel wire. His handle was a metal sleeve with a guard formed on it; ours is aluminium bar with a brass guard. The patent gives no sizes; all of ours are ours.

Malzemeler

10

Gerekli Aletler

28

Tasarım dosyaları

1

CC0 Kamu Malı

Bu plan CC0 lisansıyla yayınlanmıştır. İzin almadan kopyalayabilir, değiştirebilir, dağıtabilir ve herhangi bir amaçla kullanabilirsiniz.

Planı üzerinden ürün satın alarak Maker'ı destekleyin, böylece Maker Komisyonu Satıcılar tarafından belirlenen komisyonu kazanırlar veya bu Planın yeni bir versiyonunu oluşturun ve gelir paylaşımı için kendi Planınıza bağlantı olarak ekleyin.

Tartışma

(0)

Giriş yapın tartışmaya katılmak için

Yorumlar yükleniyor...