Співпраця
МИСТЕЦТВО
КРАСА ТА ЗДОРОВ'Я
РЕМЕСЛО
КУЛЬТУРА ТА ІСТОРІЯ
РОЗВАГИ
СЕРЕДОВИЩЕ
ЇЖА ТА НАПІЇ
ЗБОРНА ІНЖЕНЕРІЯ
НАУК
СПОРТ
ТЕХНОЛОГІЯ
НОСИМО
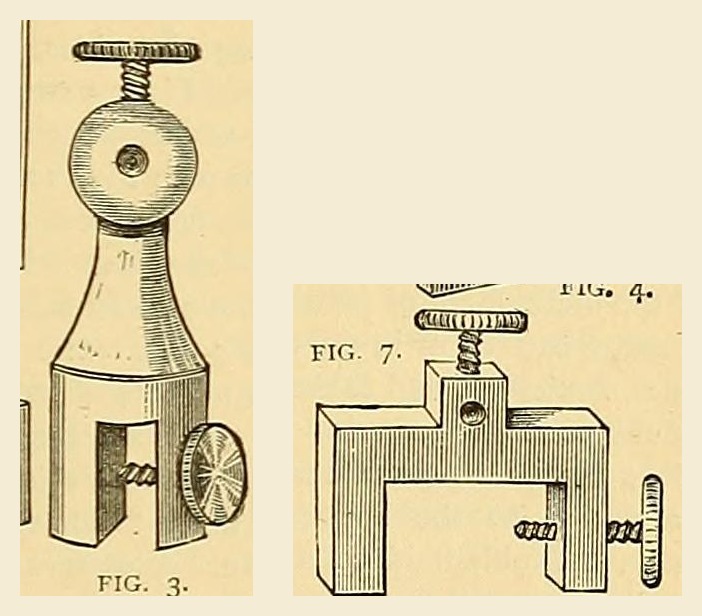


Brass Binding-Screw: Body Turned from 5/8 in. Rod, Thumb Screws from 3/8 in. Rod, and a Bent Brass Clamp (Edwinson, 1881)
The Victorian battery terminal, from George Edwinson's Electro-plating at Home (Amateur Work, 1881): a brass body turned from 1 1/2 in. of 5/8 in. rod, slotted for the plate and bored for the wire, with thumb screws turned from 3/8 in. rod; or a clamp bent hot from a brass strip with a soldered-on wire piece.
Середній
Two hours at the lathe
Інструкції
1
1
His sizes
His sizes
Завантаження блокнота Jupyter…
2
2
Read Edwinson
Read Edwinson
"Those who may have lathes ... may easily turn up a binding-screw ... out of a 1 1/2 in. length of 5/8 in. brass rod."
3
3
Turn the body
Turn the body
Cut 1 1/2 in. (38 mm) of 5/8 in. (16 mm) brass rod and turn the body to shape first (his fig. 3: a round head on a tapering neck over a forked foot).
Матеріали для цього кроку:
 Латунний пруток1 штука
Необхідні інструменти ({count})
 Ножівка по металу
 Токарний верстат по металу
 Відрізний різець
4
4
Slot and bore
Slot and bore
Cut the slot that grips the plate. Bore a hole for the wire through the head, then bore the holes for the screws.
Необхідні інструменти ({count})
 Слюсарні лещатаНожівка по металу
 Напилки (ручний напилок)
 Ручний дриль
5
5
Turn the thumb screws
Turn the thumb screws
Turn the screws from 3/8 in. (9.5 mm) brass rod with plain thumb-screw heads (he says milled heads are a mistake). Cut a fine thread on them and tap the holes to match.
Матеріали для цього кроку:
Латунний пруток1 штукаНеобхідні інструменти ({count})
Токарний верстат по металуВідрізний різець Набір мітчиків і плашок
6
6
Bent clamp (variant)
Bent clamp (variant)
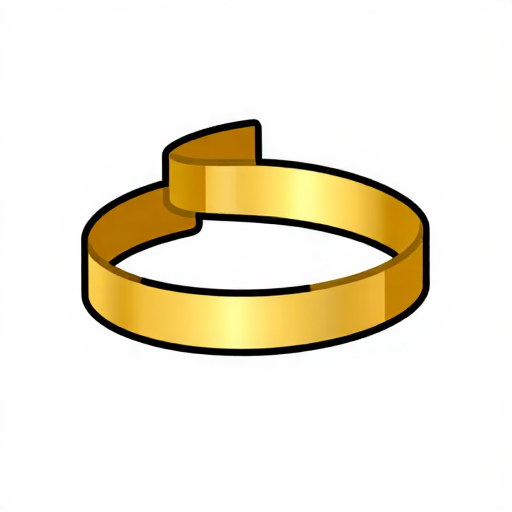
From good malleable brass take a strip 3 in. long, 1/2 in. wide and 1/4 in. thick (76 x 13 x 6 mm). Heat it to a dull red and bend it over a former of hot iron. Cut the piece for the wire and centre screw separately, hard-solder it on and trim it. Fit thumb screws as above. (A clamp may also be cast from a wooden pattern.)
Матеріали для цього кроку:
 Латунна смуга1 штука
 Срібний припій1 штука
Необхідні інструменти ({count})
 Кувальне горно
 Ковальські кліщі
 Молоток
 Пальник для паяння твердим припоємНапилки (ручний напилок)Ручний дрильНабір мітчиків і плашок
7
7
Clean and keep it working
Clean and keep it working
Clean the slot with folded emery cloth and the wire hole with the tang of a file. Now and then oil the screw, work it in and out, and wipe the oil off. Do not screw up too tight.
Необхідні інструменти ({count})
Напилки (ручний напилок)8
8
Troubleshooting
Troubleshooting
Binding-screw troubleshooting.
Flow
Loading...
9
9
History and honest limits
History and honest limits
From George Edwinson, "Electro-plating at Home", **Amateur Work, Illustrated**, vol. I (1881), p. 81 figs. 3 and 7 and p. 99 (checked on the archive.org scan amateurworkillus11881lond). He gives no thread size. Modern panel binding posts add an insulating bush and a banana-plug socket; this is the 1881 brass terminal. The metric figures and the tools are ours.
Матеріали
3- 1 штукаЗаповнювач
- 1 штукаЗаповнювач
- 1 штукаЗаповнювач
Необхідні інструменти
11- Заповнювач
- Заповнювач
- Заповнювач
- Заповнювач
- Заповнювач
- Заповнювач
- Заповнювач
- Заповнювач
- Заповнювач
- Заповнювач
- Заповнювач
За цим кресленням виготовляють

Пов'язані креслення
Ці креслення діляться знаннями — техніки, матеріали або принципи


CC0 Суспільне надбання
Це креслення випущено під ліцензією CC0. Ви можете вільно копіювати, змінювати, поширювати та використовувати цю роботу для будь-яких цілей без запиту дозволу.
Підтримайте мейкера, купуючи продукти через його креслення, де він отримує Комісію мейкера встановлену вендорами, або створіть нову ітерацію цього креслення та включіть його як зв'язок у власне креслення для розподілу доходу.