МИСТЕЦТВО
КРАСА ТА ЗДОРОВ'Я
РЕМЕСЛО
КУЛЬТУРА ТА ІСТОРІЯ
РОЗВАГИ
СЕРЕДОВИЩЕ
ЇЖА ТА НАПІЇ
ЗБОРНА ІНЖЕНЕРІЯ
НАУК
СПОРТ
ТЕХНОЛОГІЯ
НОСИМО
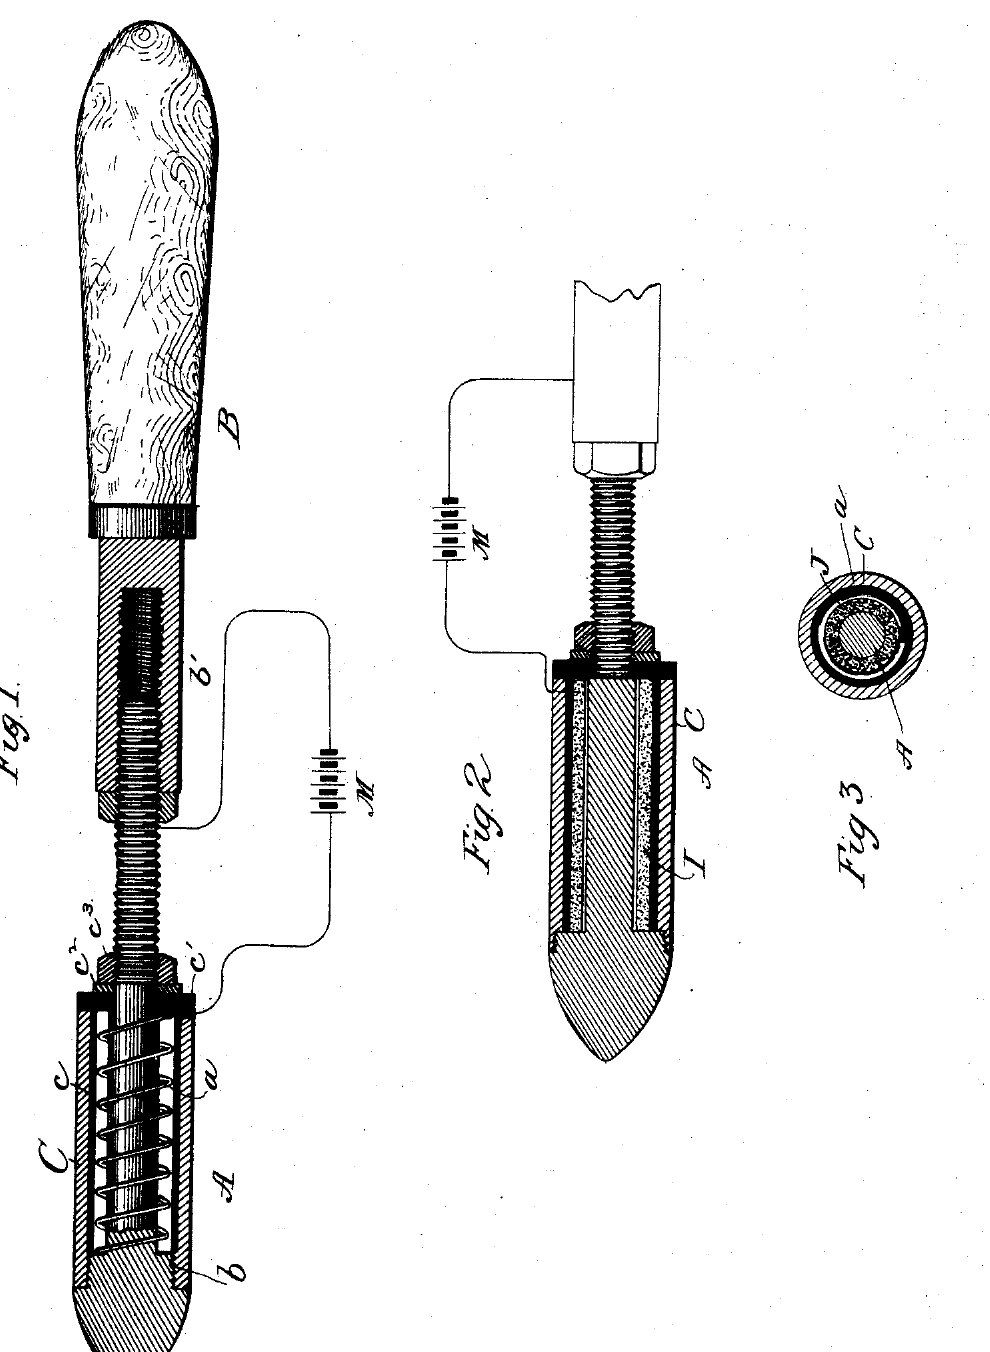


Electric Soldering Iron: Miner, 1890
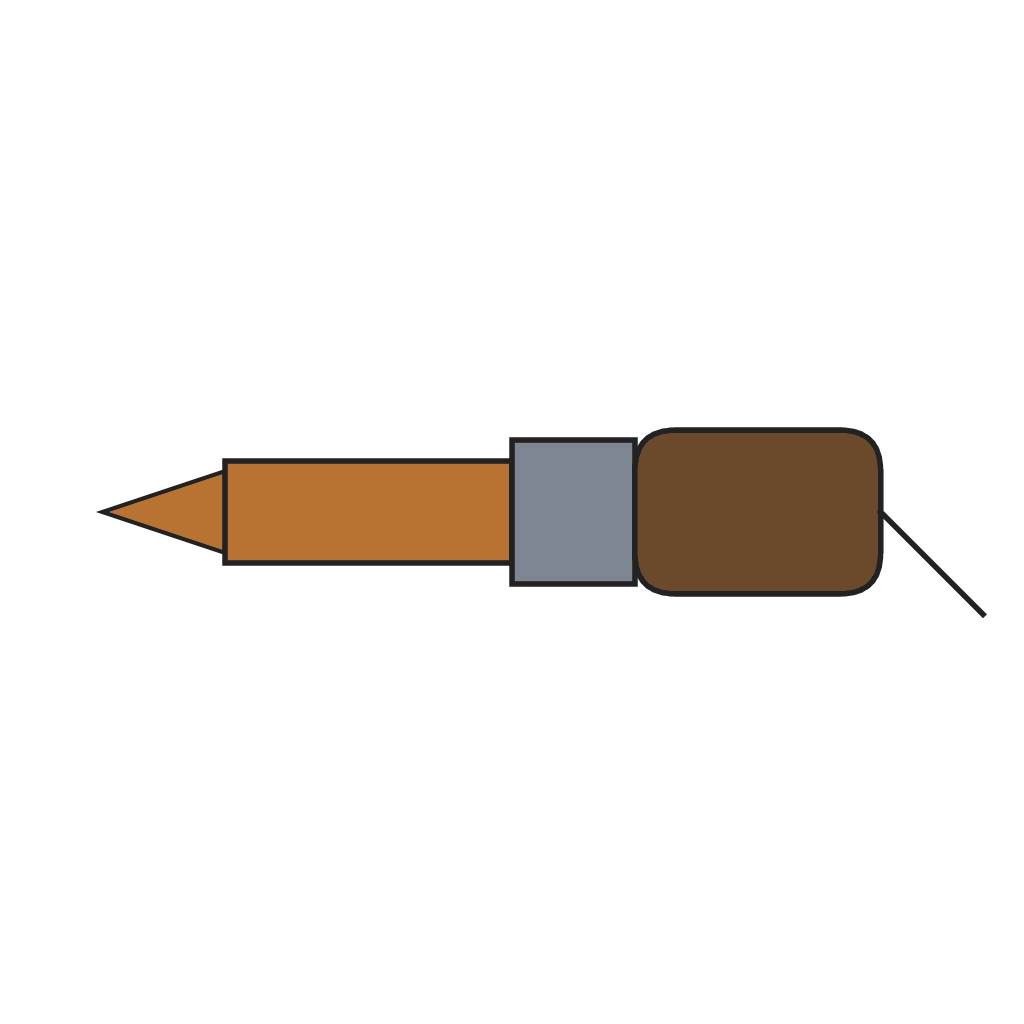
Earlier electric soldering irons heated a hollow copper head from inside, through finely divided carbon pressed against the tip, so the whole outside of the head lost heat to the air. Willard M. Miner of Plainfield, New Jersey, patented the alternative in 1890, US 421,185: keep the copper head solid, which holds its heat longer, and wind the heating resistance round the outside of it, under a shell that concentrates the heat on the copper and stops it escaping. The coil is German silver wire, wound round a reduced part of the head without touching it, with one end connected to the head and the other to the supply.
Середній
Workshop process
Інструкції
1
1
Turn the head
Turn the head
Turn a solid copper head with its point. A little back from the point, cut the head down to a smaller diameter for some distance, leaving a shoulder, and thread a shank at its rear end.
Матеріали для цього кроку:
 Мідний круглий пруток1 штука
Необхідні інструменти ({count})
 Токарний верстат по металу
2
2
Wind the coil
Wind the coil
Coil German silver wire round the reduced part of the head, the coil slightly larger than the head so the two do not touch. Connect one end of the coil to the head at the shoulder; the other end goes to the supply.
Матеріали для цього кроку:
 Дріт опору з нейзильберу1 as required
Необхідні інструменти ({count})
 Пасатижі
3
3
Shell
Shell
Slip on the shell, of brass lined with non-conducting material. Close its inner end with an insulating disc held by a washer and nut on the threaded shank.
Матеріали для цього кроку:
 Латунний кожух із футеровкою1 штука
 Ізолювальний торцевий диск1 штука
Необхідні інструменти ({count})
 Розвідний ключ
4
4
Handle
Handle
Screw the shank into the metal socket in the handle, which takes the second connection.
Матеріали для цього кроку:
 Заготовка держака з твердої деревини1 штука
Матеріали
5- 1 штукаЗаповнювач
- 1 as requiredЗаповнювач
- 1 штукаЗаповнювач
- 1 штукаЗаповнювач
- Заповнювач
Необхідні інструменти
3- Заповнювач
- Заповнювач
- Заповнювач
За цим кресленням виготовляють
Пов'язані креслення
Ці креслення діляться знаннями — техніки, матеріали або принципи

CC0 Суспільне надбання
Це креслення випущено під ліцензією CC0. Ви можете вільно копіювати, змінювати, поширювати та використовувати цю роботу для будь-яких цілей без запиту дозволу.
Підтримайте мейкера, купуючи продукти через його креслення, де він отримує Комісію мейкера встановлену вендорами, або створіть нову ітерацію цього креслення та включіть його як зв'язок у власне креслення для розподілу доходу.