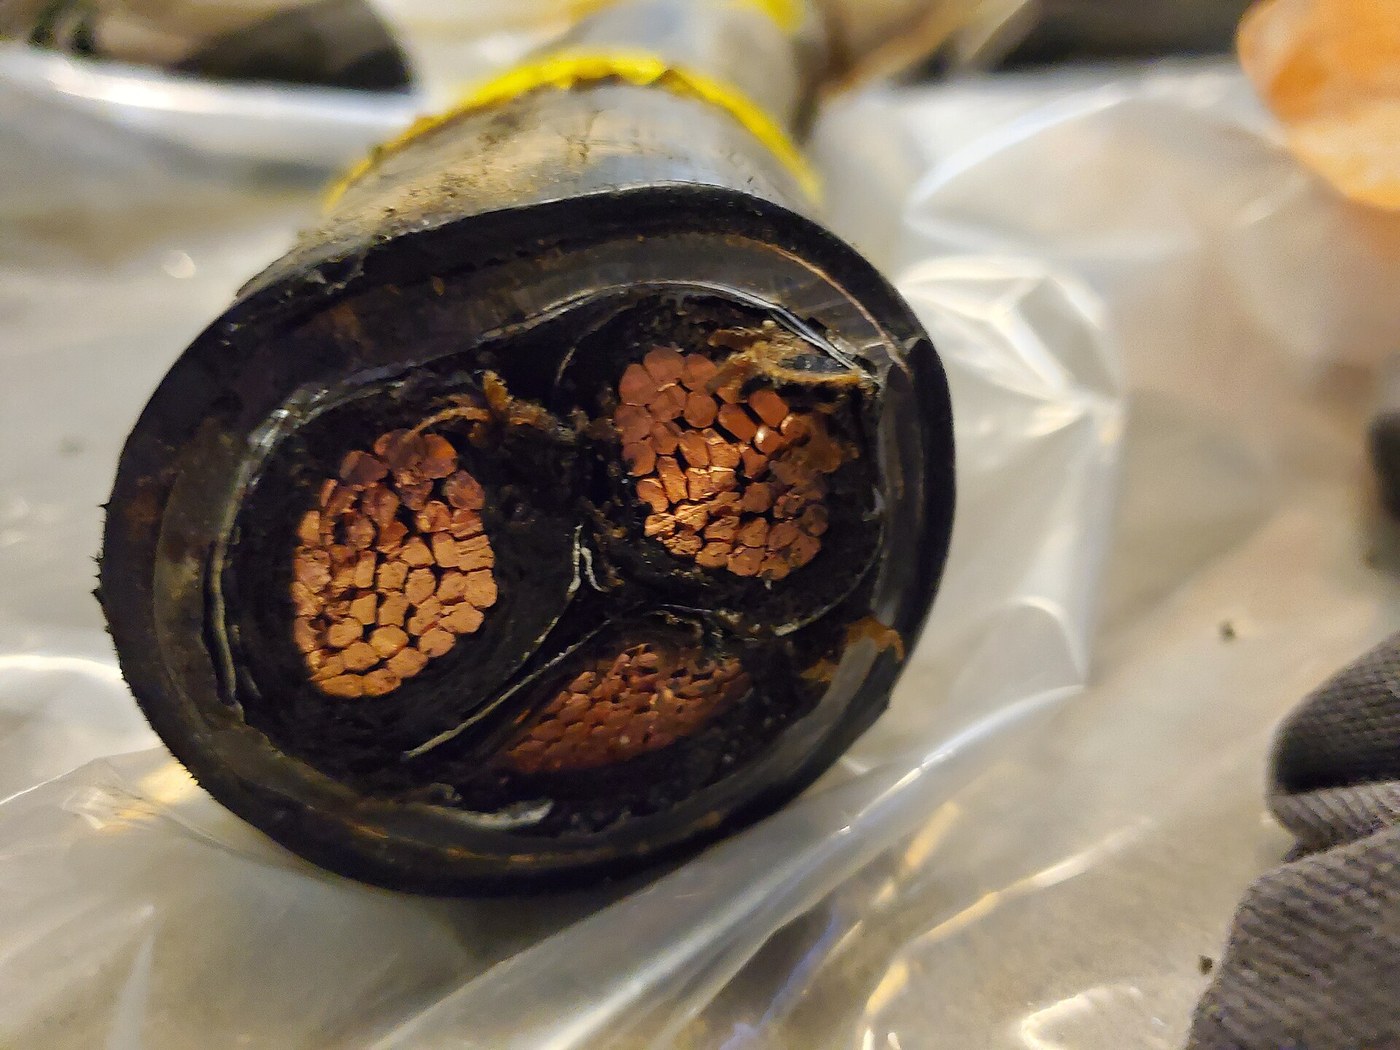


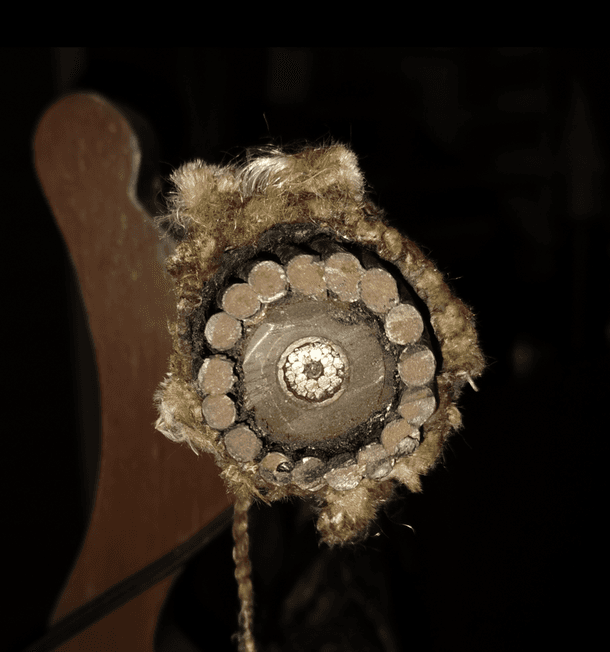
Paper-Insulated Lead-Covered Cable
Інструкції
Prove that dry paper is good and damp paper is useless
Prove that dry paper is good and damp paper is useless
Measure the thing the whole design exists to control before you design anything.
- Cut three identical strips of kraft paper about 150 × 25 mm.
- Leave one at room humidity, dry the second in an oven at 105 °C for two hours, and lightly mist the third.
- Clamp each between two flat metal electrodes 50 mm apart and measure insulation resistance with a 1000 V megohmmeter.
- Record all three, then re-measure the oven-dried strip after it has sat in the room for an hour.
The three readings will span several orders of magnitude, and the dried strip will start falling within minutes of leaving the oven. That last observation is the important one. Paper is hygroscopic — it does not merely get wet, it actively pulls water out of the air and holds it. An insulation system built on paper is therefore not finished when the paper is dry; it is finished when the paper can never meet air again.
This is also why the finished cable is never left with an open end. A drum of cable in a store yard has both ends capped and soldered, and a length cut in the morning is jointed the same day. An open end wicks moisture along the cores like a paper towel dipped in water.Матеріали для цього кроку:
 Сувій крафтового паперу (бурого)1 рулон
 Пакетики силікагелю1 пакет
Необхідні інструменти ({count})
 Вимірювач опору ізоляції
 Цифровий штангенциркуль 6 дюймів
 Інфрачервоний термометр
 Прозорі захисні окуляри
Strand the conductor, and find out why it is not a solid rod
Strand the conductor, and find out why it is not a solid rod
A solid copper rod would be cheaper to make and worse in every way that matters.
- Take nineteen lengths of 1.5 mm bare copper wire and lay them up as a rope: one core, six around it, twelve around those.
- Twist each layer in the opposite direction to the one beneath, with a lay length of roughly twelve times the finished diameter.
- Measure the finished diameter with a micrometer and compare it with a solid rod of the same copper cross-section.
- Bend both around a 200 mm former and compare the force needed, and whether either takes a permanent set.
The stranded conductor bends easily and springs back; the solid rod of equal copper area fights you and stays bent. Stranding buys flexibility, which matters because a cable must be coiled onto a drum, hauled round bends in a duct and pulled into a trench without cracking the insulation wrapped on top of it. Opposing lay directions stop the rope untwisting itself when tension comes off.
Reverse-engineering note: real distribution cables went further and made each core a sector — a wedge shape, not a circle — so three cores pack into a round lead sheath with almost no wasted space. A round three-core cable wastes about a fifth of its cross-section on the gaps between the cores. Shaping the conductor to fill the space is cheaper than making the sheath bigger, and lead was the expensive part.Матеріали для цього кроку:
 Мідний дріт в емалевій ізоляції20 m
Необхідні інструменти ({count})
 Слюсарні лещата
 МікрометрЦифровий штангенциркуль 6 дюймів
 Обтискний інструмент
 Набір напилківПрозорі захисні окуляри
Lap the paper tapes, and leave a gap on purpose
Lap the paper tapes, and leave a gap on purpose
The gaps in the wrapping look like defects. They are the reason the cable can bend.
- Slit your kraft paper into tapes about 12 mm wide.
- Wind the first tape helically along the conductor, butted edge to edge with a deliberate gap of roughly 1 mm — do not overlap.
- Wind each subsequent layer in the opposite direction, and rotate the starting point so no two butt gaps ever line up radially.
- Build up eight to ten layers, then bend the assembly around a 300 mm former and unwrap it to inspect.
The tapes will have slid over one another at the bend rather than tearing. A continuous overlapped wrap would be a rigid tube; it would split on the outside of every bend and buckle on the inside. Butt-gapped tapes let the wall shear internally like a deck of cards.
The staggering rule is what makes the gaps safe. A gap is a weak spot only if it sits directly above another gap, because that would give the electric field a clear radial run. Rotate every layer and the weak spots never queue up, so the field always has to cross solid paper somewhere.
This is a general trick worth stealing: when a wall must be both flexible and continuous, build it from overlapping discontinuous layers and make sure the discontinuities never align. Brickwork bonds, plywood plies and laminated armour all use the same idea.Матеріали для цього кроку:
Сувій крафтового паперу (бурого)1 рулонНеобхідні інструменти ({count})
Цифровий штангенциркуль 6 дюймів Комбінований кутникНабір напилківПрозорі захисні окуляри
Dry under vacuum, then impregnate with oil
Dry under vacuum, then impregnate with oil
This step is the entire invention. Everything before it is preparation and everything after it is packaging.
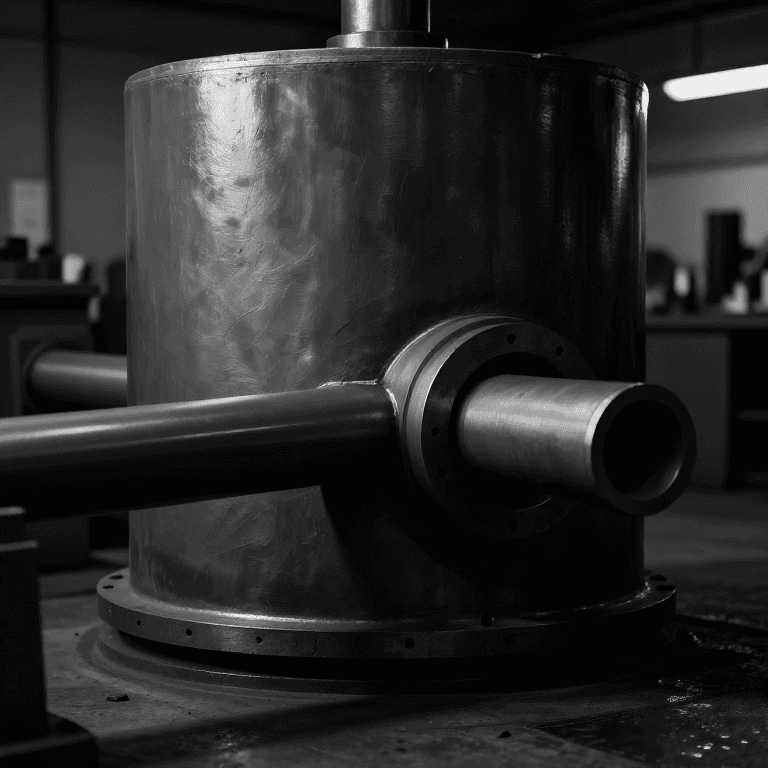
- Put the taped assembly in a vacuum chamber and pump down, warming it to about 100 °C with a heat gun on low or a warming plate.
- Hold the vacuum for at least an hour. Watch the gauge: it will keep drifting as water leaves the paper.
- With the vacuum still applied, admit warm mineral oil until the assembly is completely submerged.
- Release the vacuum to atmosphere and let the oil be pushed into the paper. Leave it for an hour, then remove and drain.
- Re-measure insulation resistance and compare it with the dry-paper figure from step 1.
Order matters absolutely: vacuum first, then oil, then release. If you flood with oil at atmospheric pressure the oil seals the outside and traps air inside the wall. Those trapped bubbles are the failure mechanism of the whole technology — gas has a much lower breakdown strength than oil, so the field concentrates in the void, ionises the gas, and produces a tiny sustained discharge that slowly carbonises a track through the paper. It is called partial discharge, it is invisible, it takes years, and it always wins in the end.
The vacuum is not there to dry the paper alone. It is there so that when the oil arrives there is nothing else in the pores for it to compete with, and then atmospheric pressure does the pushing for free.Матеріали для цього кроку:
 Вазелінова олія харчової якості2 літрівПакетики силікагелю1 пакет
 Нітрилові рукавички1 pair
Необхідні інструменти ({count})
 Вакуумний насос (2 ступені, 140 л/хв)
 Вакуумна камера дегазації
 ТермофенІнфрачервоний термометрВимірювач опору ізоляціїПрозорі захисні окуляри
Seal it in lead, and test whether the seal is real
Seal it in lead, and test whether the seal is real
The lead sheath is not armour. It is a hermetic bag that happens to be made of metal.
- Form a lead tube around the impregnated core — extruded seamlessly in industry, and for bench work wrapped from lead sheet with a soldered longitudinal seam.
- Work the lead down onto the core so there is no annular air space.
- Close and solder both ends, leaving no pinholes.
- Warm the finished length gently and watch the seam under a film of soapy water for escaping bubbles.
- Weigh it, leave it a week, and weigh it again.
A hermetic sheath neither gains nor loses weight. Weight gain means moisture is getting in; weight loss means oil is getting out, which is just as fatal because the paper it leaves behind is full of gas.
Lead was chosen for a specific and unusual combination: it is impermeable to water vapour, it is soft enough to be extruded continuously in a seamless tube around a moving core, it resists soil corrosion tolerably, and it will take solder. Almost nothing else in 1890 did all four. Its cost is that it is heavy, it creeps under its own weight in vertical runs, and it fatigues and cracks if the cable is allowed to vibrate.
Lead is toxic. Do not eat, drink or smoke while handling it, keep the work below its melting point unless you have proper fume extraction, and wash your hands before you touch anything else. Modern cable uses aluminium sheath or polyethylene for exactly this reason as much as for cost.Матеріали для цього кроку:
 Зливок свинцю 99,9 %, 450 г1 ingotНітрилові рукавички1 pair
 Безсвинцевий водопровідний припій1 рулон
 Сантехнічний флюс1 рулон
Необхідні інструменти ({count})
 Пропановий пальникСлюсарні лещатаНабір напилківІнфрачервоний термометр
 Захисний щиток для обличчя
 Респіратор P100Прозорі захисні окуляри
Armour, serve, and then make the joint that will fail first
Armour, serve, and then make the joint that will fail first
Every buried cable fails at a joint long before it fails in the middle of a run.
- Wrap the sheathed cable with a bedding of bitumen-soaked tape, then helically applied steel tape armour, then an outer serving of bitumen and jute.
- Now cut the finished cable in half and joint it back together: strip back each layer in a long stepped taper, reconnect the conductors, rebuild the paper insulation by hand, and enclose the whole joint in a filled housing.
- Re-test insulation resistance across the joint and compare with the unjointed cable.
- Leave the jointed sample somewhere damp for a week and test again.
The joint will read lower than the cable, and it will drift with time in a way the cable does not. That is the honest result and it is the whole reason cable jointing was a specialist trade with its own apprenticeship. In the factory the paper is wrapped by machine, dried in a vacuum oven and sealed within hours. In a trench, in the rain, a jointer opens all of that up and rebuilds it by hand.
The stepped taper exists because the electric field crowds wherever the insulation thickness changes abruptly. Spreading the transition over a long cone keeps the field gradient gentle. Cut the layers off square and the joint fails at the step, every time.
The armour has a second job nobody mentions: it is an earthed metallic layer, so a spade driven into the cable finds earth before it finds the conductor. It protects the person digging at least as much as it protects the cable.Матеріали для цього кроку:
 Кабельна стрічка, просочена бітумом1 рулон
 Оцинкований сталевий дріт5 m
 Джутовий шпагат1 клубокВазелінова олія харчової якості1 літр
Необхідні інструменти ({count})
Вимірювач опору ізоляціїПропановий пальникЦифровий штангенциркуль 6 дюймівНабір напилківСлюсарні лещата Установка для випробування ізоляції змінною напругоюПрозорі захисні окуляри
Матеріали
11- Заповнювач
- 1 пакетЗаповнювач
- Заповнювач
- 3 літрівЗаповнювач
- 1 pairЗаповнювач
- 1 ingotЗаповнювач
- Заповнювач
- 1 рулонЗаповнювач
- Заповнювач
- Заповнювач
- 1 клубокЗаповнювач
Необхідні інструменти
16- Заповнювач
- Заповнювач
- Заповнювач
- Заповнювач
- Заповнювач
- Заповнювач
- Заповнювач
- Заповнювач
- Заповнювач
- Заповнювач
- Заповнювач
- 1 vendor sell this, none ship to you yetЗаповнювач
- Заповнювач
- Заповнювач
- Заповнювач
Пов'язані креслення
Ці креслення діляться знаннями — техніки, матеріали або принципи


CC0 Суспільне надбання
Це креслення випущено під ліцензією CC0. Ви можете вільно копіювати, змінювати, поширювати та використовувати цю роботу для будь-яких цілей без запиту дозволу.
Підтримайте мейкера, купуючи продукти через його креслення, де він отримує Комісію мейкера встановлену вендорами, або створіть нову ітерацію цього креслення та включіть його як зв'язок у власне креслення для розподілу доходу.