Harvesting beeswax — wax harvest and melting from the beehive
A complete guide to extracting beeswax from honeycomb cappings wax. Beeswax (Cera alba) is secreted by honeybees (Apis mellifera) from wax glands on the underside of the abdomen. The purest source of wax is the wax cappings (cappings wax), which are removed during honey extraction. This guide covers collecting the wax cappings, melting in a water bath at 62-65°C, filtering multiple times through fine cloths, pouring into molds, and proper storage.
A strong bee colony produces 1-2 kg of cappings wax per year. To produce 1 kg of wax, bees consume approximately 6-7 kg of honey. Pure beeswax is yellow to golden in color, smells of honey, and burns cleanly. It is used for candles, cosmetics, wood care, beeswax wraps, and leather care. German beekeeping tradition with its beekeeping associations and traveling associations has preserved this knowledge for centuries.
Instructions
Understanding Beeswax
Understanding Beeswax
Beeswax is a natural wax produced by honeybees (Apis mellifera). Worker bees aged 12-18 days secrete wax platelets from eight wax glands on the underside of their abdomen. These tiny platelets are shaped by the bees with their mandibles and used for honeycomb construction. The melting point of beeswax is 62-65°C. Beeswax consists mainly of esters, fatty acids, and long-chain alcohols. To produce 1 kg of wax, bees must consume approximately 6-7 kg of honey.
Know wax sources in the beehive
Know wax sources in the beehive
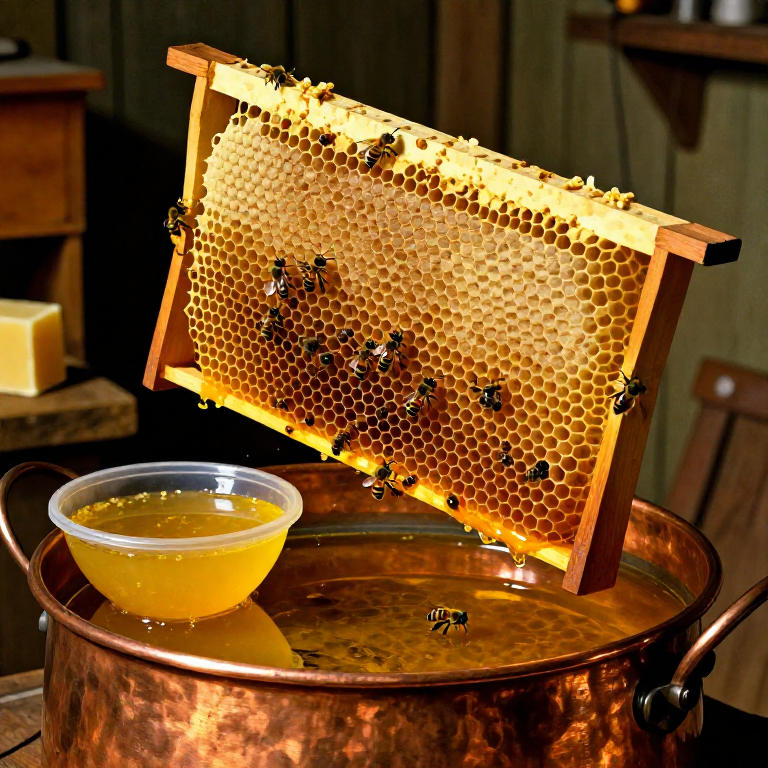
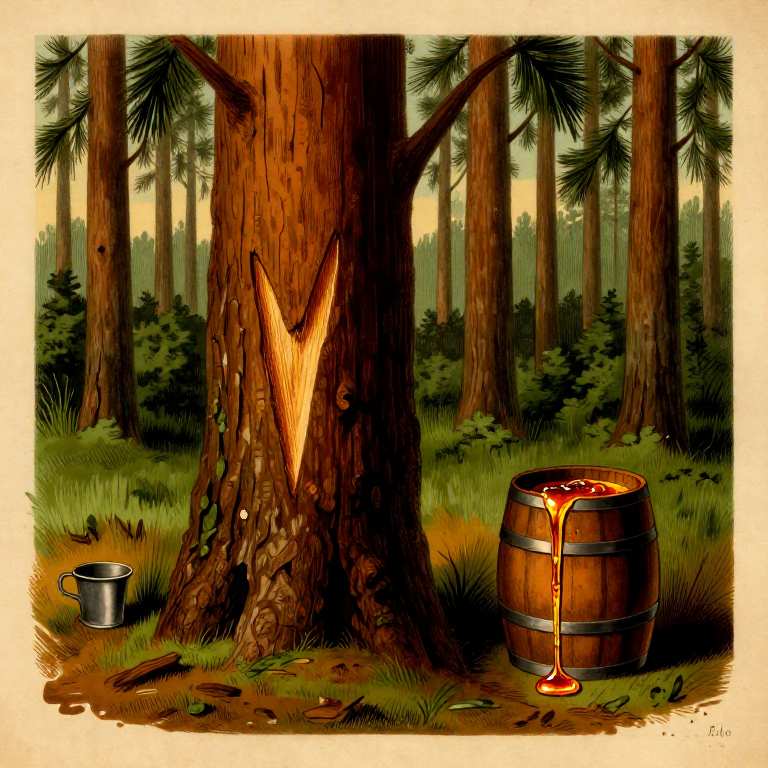
The purest and best source of wax is uncapping wax — the thin wax cappings that the beekeeper cuts from the capped honey combs before spinning. This wax is light, clean and almost free of impurities. Other sources of wax are wild comb (burr comb), damaged combs and spent brood combs. However, brood combs contain cocoon remnants and propolis and yield darker wax of lower quality. A strong bee colony produces 1-2 kg of uncapping wax per year.
Collecting cappings wax when extracting honey
Collecting cappings wax when extracting honey
When harvesting honey, the capped honeycomb frames are opened with an uncapping fork or uncapping knife. The separated wax cappings fall into an uncapping container or uncapping dish. The adhering honey drips downward while the wax remains on top. Collect the wax cappings immediately in a clean bucket. Do not leave them open for too long — bees and wasps will be attracted.
Materials for this step:
 Honeycomb Cappings (from harvest)1 batch
Tools needed:
 Uncapping Fork
 Uncapping Tray
 Clean Collection Bucket
Separating wax from honey residue
Separating wax from honey residue
The collected uncapping wax still contains considerable amounts of honey. Place the wax in a coarse sieve and let the honey drain off overnight. Alternatively, rinse the wax with cold water to wash out the honey. Use cold water as warm water softens the wax and makes separation difficult. The drained honey can be used as drip honey — it is somewhat cloudier than extracted honey, but tastes perfectly fine.
Materials for this step:
Tools needed:
 Coarse Mesh Sieve
Prepare water bath (double boiler)
Prepare water bath (double boiler)
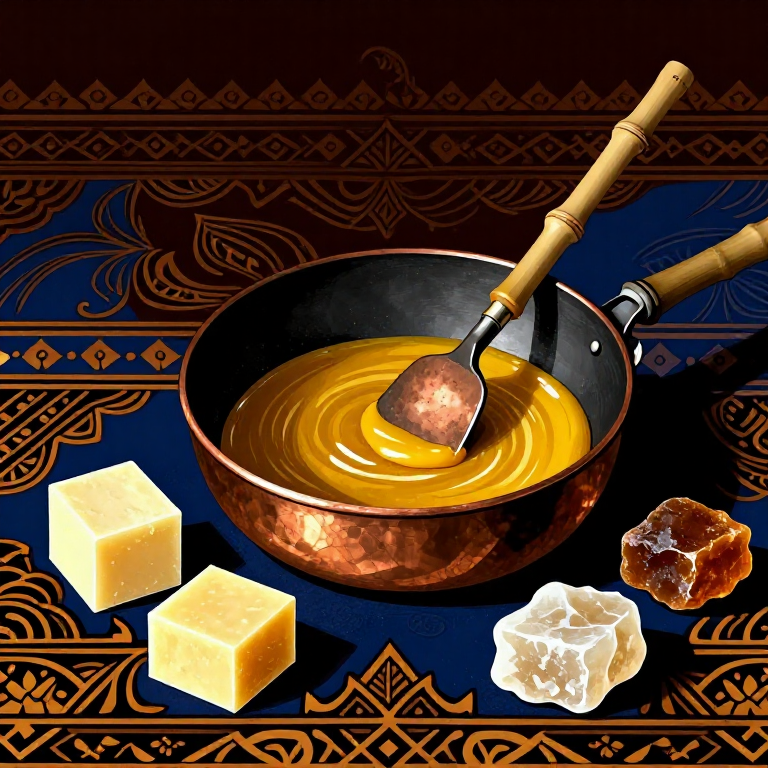
Beeswax must never be melted over an open flame or directly on a hot stove plate — wax is highly flammable and can ignite spontaneously at around 250°C. The safe method is using a water bath (double boiler, bain-marie): Fill a large pot about one third with water and place it on the stove. Set a smaller pot or stainless steel bowl on top. Place the wax in the upper container. Heat the water in the lower pot to a maximum of 80°C — the wax melts at 62-65°C. Never heat above 85°C, as the wax will darken and lose quality.
Materials for this step:
Tools needed:
 Large Pot (lower, for water bath)
 Stainless Steel Pot (upper, for wax)
 Kitchen Thermometer
Melt wax in a water bath
Melt wax in a water bath
Place the prepared uncapping wax in the upper pot of the water bath. Heat slowly until the wax is completely melted at 62-65°C. Stir occasionally with a wooden spoon or stainless steel rod. Do not use a plastic spoon — wax adheres strongly to plastic. During melting, impurities (propolis, cocoon remnants, dead bees) float in the liquid wax. These will be filtered out in the next step. Do not leave the pot unattended.
Tools needed:
 Wooden Stirring SpoonKitchen Thermometer
Filter liquid wax through cloth
Filter liquid wax through cloth
Pour the melted wax through a fine-mesh cloth to remove impurities. Suitable filter materials are gauze, an old linen cloth, or a fine nylon stocking. Stretch the cloth over a clean container and secure it with rubber bands or string. Pour the liquid wax slowly and evenly through the cloth. Caution: The wax is hot. Wear heat-resistant gloves. The cloth will clog quickly — have a second cloth ready if needed.
Materials for this step:
 Muslin Cloth (fine weave)2 pieces
Tools needed:
 Heat-Resistant Gloves
 Clean Collecting Container
 Rubber Bands
Second melting and pouring into the mold
Second melting and pouring into the mold
Melt the once-filtered wax again in a water bath and pour it a second time through a fresh cloth. This double filtration produces significantly purer wax. Pour the twice-filtered, liquid wax into prepared silicone molds or lightly oiled metal molds. Silicone molds are ideal because the cooled wax can be easily removed. Place the molds on a level, stable surface so that the wax blocks solidify evenly.
Tools needed:
 Silicone Mold
Let the wax cool down and remove it from the mold
Let the wax cool down and remove it from the mold
Let the wax cool slowly and evenly — do not place it in the refrigerator as rapid cooling causes cracks. At room temperature, a wax block requires 4-12 hours depending on its size to fully solidify. Carefully remove the cooled wax from the mold. For silicone molds, slightly bend back the edges and push out the block. The underside of the wax block is often darker — heavier impurities have settled there.
Scrape off contaminants from the underside
Scrape off contaminants from the underside
The underside of the cooled wax block often has a thin layer of dirt, propolis and fine particles that have settled on the bottom during solidification. Carefully scrape off this layer with a knife or spatula until clean, light-colored wax is visible. The scraped-off residue can be cleaned again during the next melting process. After scraping, the wax block should be uniformly yellow to golden.
Tools needed:
 Flat Scraping Knife
Quality testing of wax
Quality testing of wax
Pure beeswax can be identified by the following characteristics: The color is uniformly yellow to golden (cappings wax) or dark brown (brood comb wax). The smell is pleasantly honey-like. When broken, it shows a matte-granular fracture (no glassy fracture like paraffin). Pure beeswax can be scratched with a fingernail and leaves a matte streak. It burns with a bright, steady flame and produces hardly any soot. Adulterations with paraffin can be detected by the absence of honey smell and the glassy, brittle fracture.
Store wax blocks
Store wax blocks
Store finished wax blocks in a cool, dry and dark place. Beeswax is virtually unlimited in shelf life if protected from light and dust. Wrap the blocks in paper or cotton cloths — do not use plastic, as the wax may otherwise sweat. With longer storage, a fine white coating sometimes forms on the surface (so-called bloom). This is a natural process and not a quality defect — the wax can still be used perfectly. Uses: candle making, cosmetics, wood polish, beeswax wraps as a cling film substitute and leather care.
Materials for this step:
 Paper Wrapping Sheets4 pieces
Materials
5- Placeholder
- 2 piecesPlaceholder
- 4 piecesPlaceholder
Tools Required
14- Placeholder
- Placeholder
- Placeholder
- Placeholder
- Placeholder
- Placeholder
- Placeholder
- Placeholder
- Placeholder
- Placeholder
- Placeholder
- Placeholder
- Placeholder
Related blueprints
Other builds that share materials, tools, or techniques with this one.


CC0 Public Domain
This blueprint is released under CC0. You are free to copy, modify, distribute, and use this work for any purpose, without asking permission.
Support the Maker by purchasing products through their Blueprint where they earn a Maker Commission set by Vendors, or create a new iteration of this Blueprint and include it as a connection in your own Blueprint to share revenue.