ART
BEAUTY & WELLNESS
CRAFT
CULTURE & HISTORY
ENTERTAINMENT
ENVIRONMENT
FOOD & DRINKS
GREEN FUTURE
REVERSE ENGINEERING
SCIENCES
SPORTS
TECHNOLOGY
WEARABLES

Translated
BLUEPRINT NFT

Blinking LED — Your First Arduino Project
The classic first electronics project! Build a blinking LED circuit using an Arduino, a breadboard, a resistor, and a single LED. Perfect for absolute beginners — no soldering required.
Instructions
1
1
Gather Your Components
Gather Your Components
Collect all components listed below. No soldering needed — everything plugs into the breadboard.
Materials for this step:
 SparkFun Inventor's Kit - V3.21 kit
Arduino Uno R31 piece
5mm LED (any color)1 piece
 220 ohm Resistor (1/4W)1 piece
Breadboard1 piece
Jumper Wires (Male-to-Male)2 pieces
USB-B Cable1 piece
Tools needed:
Computer with Arduino IDE
2
2
Circuit Schematic
Circuit Schematic
Signal flows from Arduino Pin 13 → 220Ω resistor (R1) → LED (D1) → GND. The resistor limits current to protect the LED.
Materials for this step:
Arduino Uno R31 piece
5mm LED (any color)1 piece
220 ohm Resistor (1/4W)1 piece3
3
Wire It Up
Wire It Up
- Insert the LED into the breadboard — long leg (anode +) in one row, short leg (cathode −) in the next.
- Insert one leg of the 220Ω resistor into the same row as the LED cathode. Other leg in a separate row.
- Jumper wire from LED anode row → Arduino Pin 13.
- Jumper wire from resistor free row → Arduino GND.
Materials for this step:
5mm LED (any color)1 piece
220 ohm Resistor (1/4W)1 pieceBreadboard1 piece
Jumper Wires (Male-to-Male)2 pieces
4
4
Upload the Blink Code
Upload the Blink Code
Connect Arduino via USB. Open Arduino IDE, select Tools → Board → Arduino Uno, paste the code, and click Upload.
blink.inoarduino
Materials for this step:
Arduino Uno R31 piece
USB-B Cable1 piece
Tools needed:
Computer with Arduino IDE
5
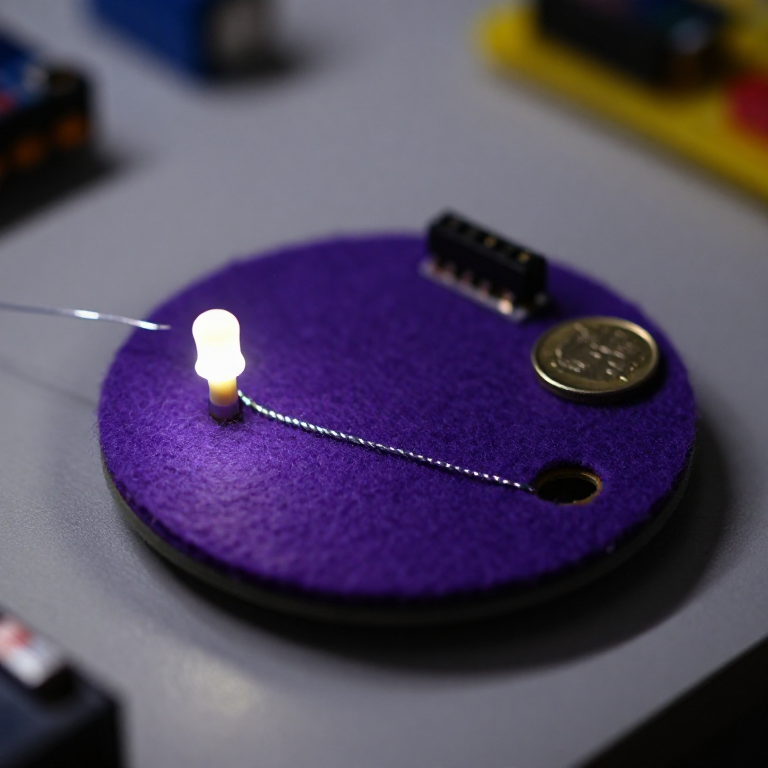
5
PCB Layout (Reference)
PCB Layout (Reference)
This shows the circuit as a PCB layout. Not needed for this project — the breadboard works perfectly — but shows how the same circuit would look if manufactured as a real board.
6
6
Test and Experiment
Test and Experiment
LED blinks? Congratulations! You just programmed hardware.
Troubleshooting:
Next experiments:
Troubleshooting:
- LED does not light up? Flip the LED — long leg toward Pin 13.
- LED stays on? Check code uploaded successfully.
- Nothing happens? Verify wiring matches the schematic in Step 2.
Next experiments:
- Change
delay()values to control blink speed - Add a second LED on Pin 12
- Replace with an RGB LED (see SIK Circuit 3)
Materials
7- $105.00
- Placeholder
Estimated Total
$105.00Related blueprints
Other builds that share materials, tools, or techniques with this one.

Using a Shift Register — SIK Circuit 14electronics/active
Blinking an LED with LilyPad Arduinoelectronics

Making Charcoal — The First Chemical Processmaterials

The Spinning Jenny — Multi-Spindle Yarn Productiontextiles

Starting Seeds Indoors — Raising Seedlings for a Head Start

Driving a Motor — SIK Circuit 12electronics/electromech
CC0 Public Domain
This blueprint is released under CC0. You are free to copy, modify, distribute, and use this work for any purpose, without asking permission.
Support the Maker by purchasing products through their Blueprint where they earn a Maker Commission set by Vendors, or create a new iteration of this Blueprint and include it as a connection in your own Blueprint to share revenue.