Collaboration
ART
BEAUTY & WELLNESS
CRAFT
CULTURE & HISTORY
ENTERTAINMENT
ENVIRONMENT
FOOD & DRINKS
REVERSE ENGINEERING
SCIENCES
SPORTS
TECHNOLOGY
WEARABLES
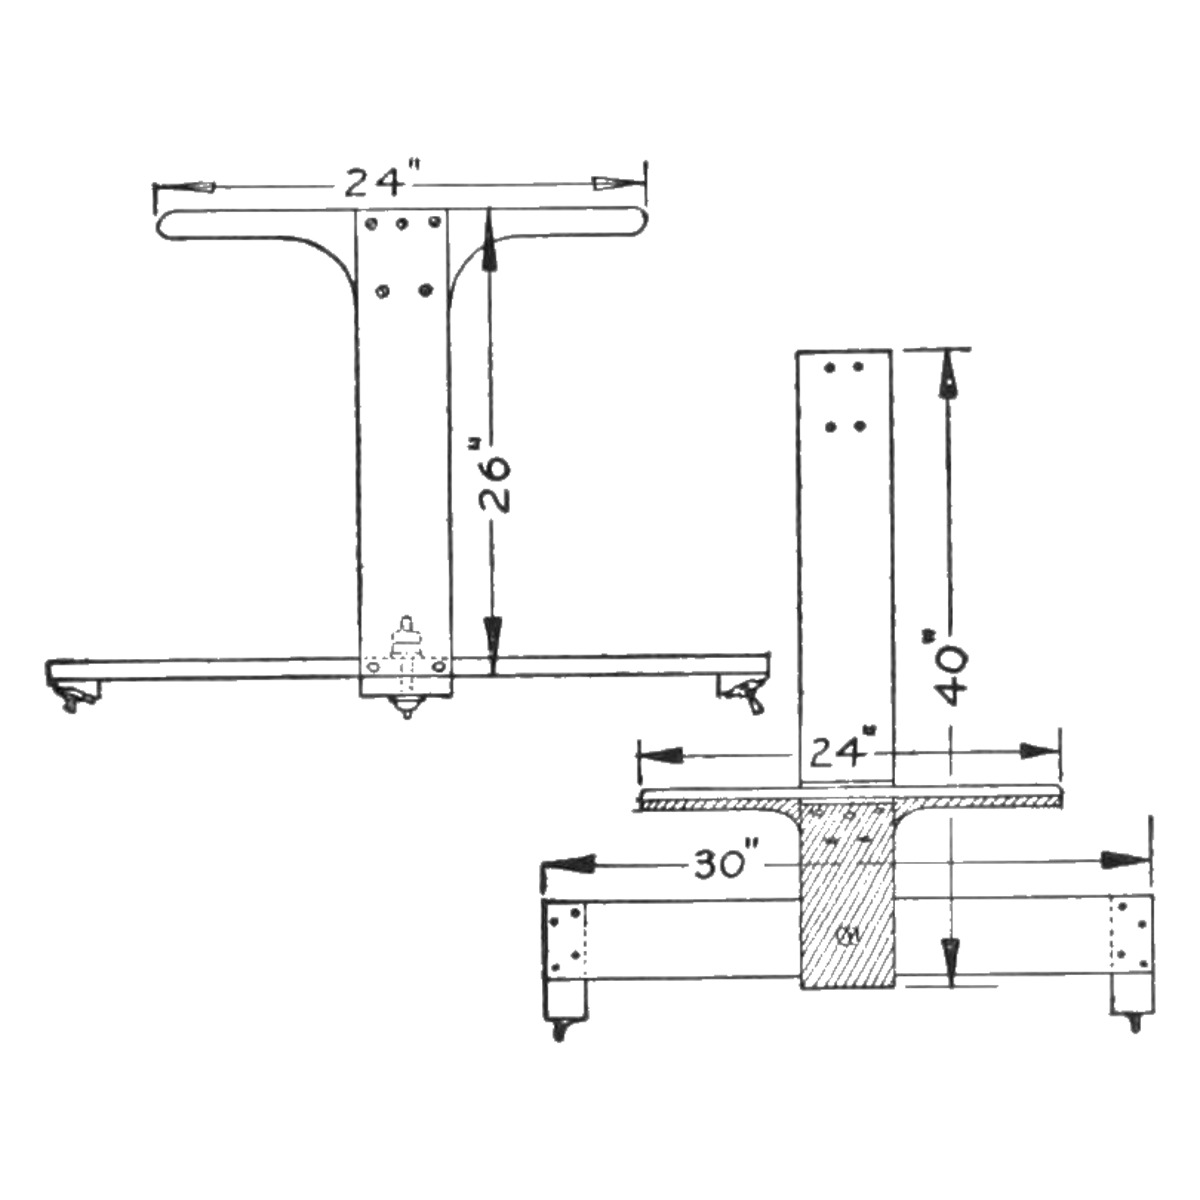


Ice Glider: Three-Skate Push Scooter With a Steering Crosspiece and Spiked Pusher (Boy Mechanic, 1915)
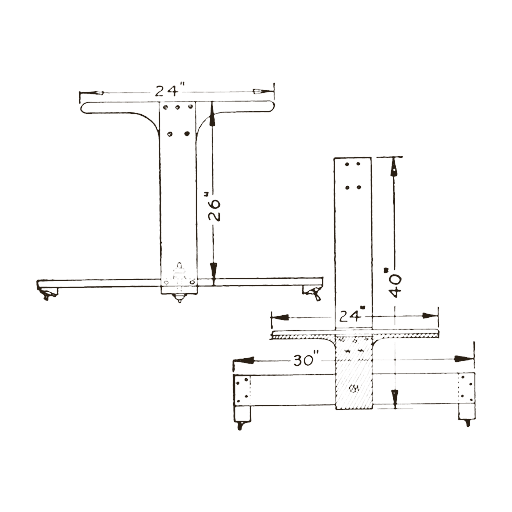
Mildred E. Thomas's ice glider from The Boy Mechanic, Book 2 (1915), "similar to an ice yacht, only a great deal smaller": a 40 in rear board on one skate, bolted to a 30 in front crosspiece on two skates tilted about 30 deg, with a 26 in upright and a handle to steer. It is pushed along with a spiked block strapped to one shoe.
Beginner
About 1 day
Instructions
1
1
Her sizes, and the skate angle
Her sizes, and the skate angle
Loading Jupyter Notebook...
2
2
Read The Boy Mechanic, Book 2
Read The Boy Mechanic, Book 2
"The enthusiastic pushmobilist need not put aside his hobby during the winter, as an amusement device for use on ice, which will surpass the very best pushmobile, can be easily made as shown in the illustration."
3
3
Make the front crosspiece
Make the front crosspiece
Cut the front crosspiece 30 in long and about 8 in wide, with its front and back edges cut on a slant. Fasten a tapering block to each end so that the skates on them stand at an angle of about 30 deg, edges outward, and fix a skate to each block with screws through holes drilled in the top plates (or with straps).
Materials for this step:
 Pine Board1 piece
 Hardwood Board1 piece
 Ice Skate2 pieces
 Wood Screws1 piece
Tools needed:
 Hand Saw
 Hand Plane
 Protractor
 Hand Drill
 Pencil
 Tape Measure
4
4
Build the upright and handle
Build the upright and handle
In the centre of the crosspiece build an upright 26 in high: nail a piece to its front and back edges so that, on the slanted edges, they stand sloping toward the rear. Fasten a handle 24 in long between the two uprights at the top.
Materials for this step:
Pine Board1 pieceHardwood Board1 piece Nails1 pieceWood Screws1 piece
Tools needed:
Hand Saw HammerHand Drill
5
5
Make the rear board and join it
Make the rear board and join it
Cut the rear board 8 in wide and 40 in long and fasten the third skate in a perfectly straight position on its rear end. Bore a hole in the front end of the board and bolt it to the centre of the front crosspiece, so the crosspiece turns to guide the glider.
Materials for this step:
Pine Board1 pieceIce Skate1 piece Carriage Bolt1 piece
 Flat Washer2 piecesWood Screws1 piece
Tools needed:
Hand Saw Brace and BitHand Drill
6
6
Make the pusher
Make the pusher
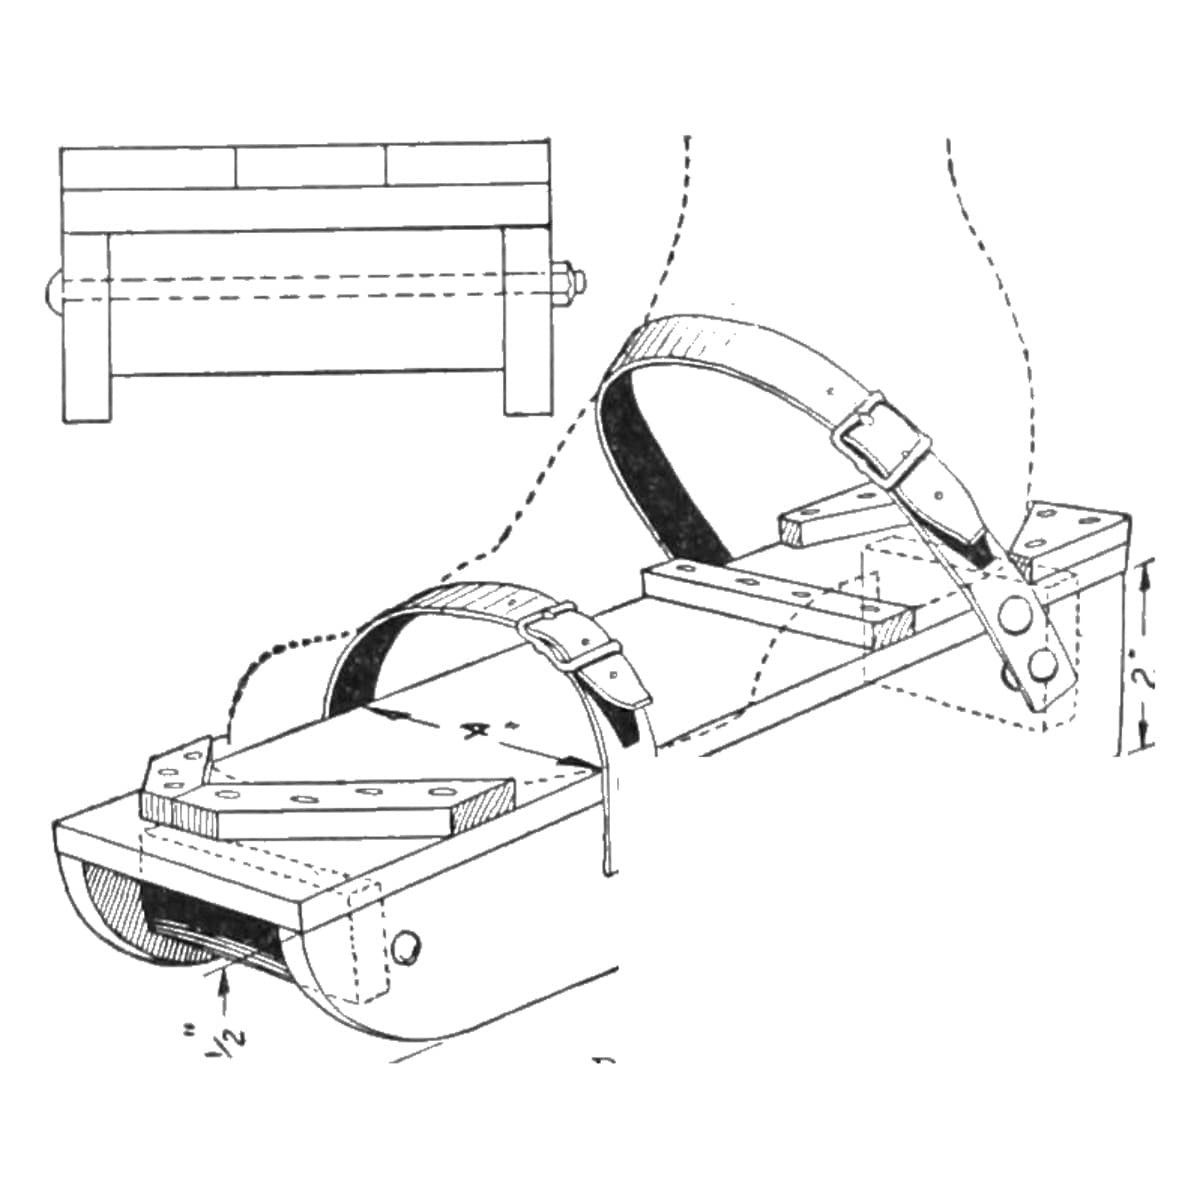
Drive nails through a block of wood so their points project on the underside, and strap the block to one shoe. Or use sole leather instead of the block, with small slots cut in the sides for the straps and nails driven through so the points project. Push the glider along like a pushmobile.
Materials for this step:
Hardwood Board1 pieceNails1 piece Leather Strap1 piece
Tools needed:
Hand SawHammer7
7
Troubleshooting
Troubleshooting
Ice glider troubleshooting.
Flow
Loading...
8
8
History and honest limits
History and honest limits
From "An Ice Glider" by Mildred E. Thomas, in **The Boy Mechanic, Book 2**, Popular Mechanics, 1915 (Project Gutenberg 44585; checked on the archive.org scan boymechanicbook200chic2, pp. 31-32). She gives no board thicknesses, bolt size or block taper, only the 30 deg skate angle. The tools and metric figures are ours.
Materials
8- 1 piecePlaceholder
- 1 piecePlaceholder
- 2 piecesPlaceholder
- 3 piecesPlaceholder
- 2 piecesPlaceholder
- 1 piecePlaceholder
- 2 piecesPlaceholder
- 1 piecePlaceholder
This blueprint makes
Related Blueprints
These blueprints share knowledge with this one — techniques, materials, or principles that connect them in the learning graph.
CC0 Public Domain
This blueprint is released under CC0. You are free to copy, modify, distribute, and use this work for any purpose, without asking permission.
Support the Maker by purchasing products through their Blueprint where they earn a Maker Commission set by Vendors, or create a new iteration of this Blueprint and include it as a connection in your own Blueprint to share revenue.