Collaboration
ART
BEAUTY & WELLNESS
CRAFT
CULTURE & HISTORY
ENTERTAINMENT
ENVIRONMENT
FOOD & DRINKS
REVERSE ENGINEERING
SCIENCES
SPORTS
TECHNOLOGY
WEARABLES
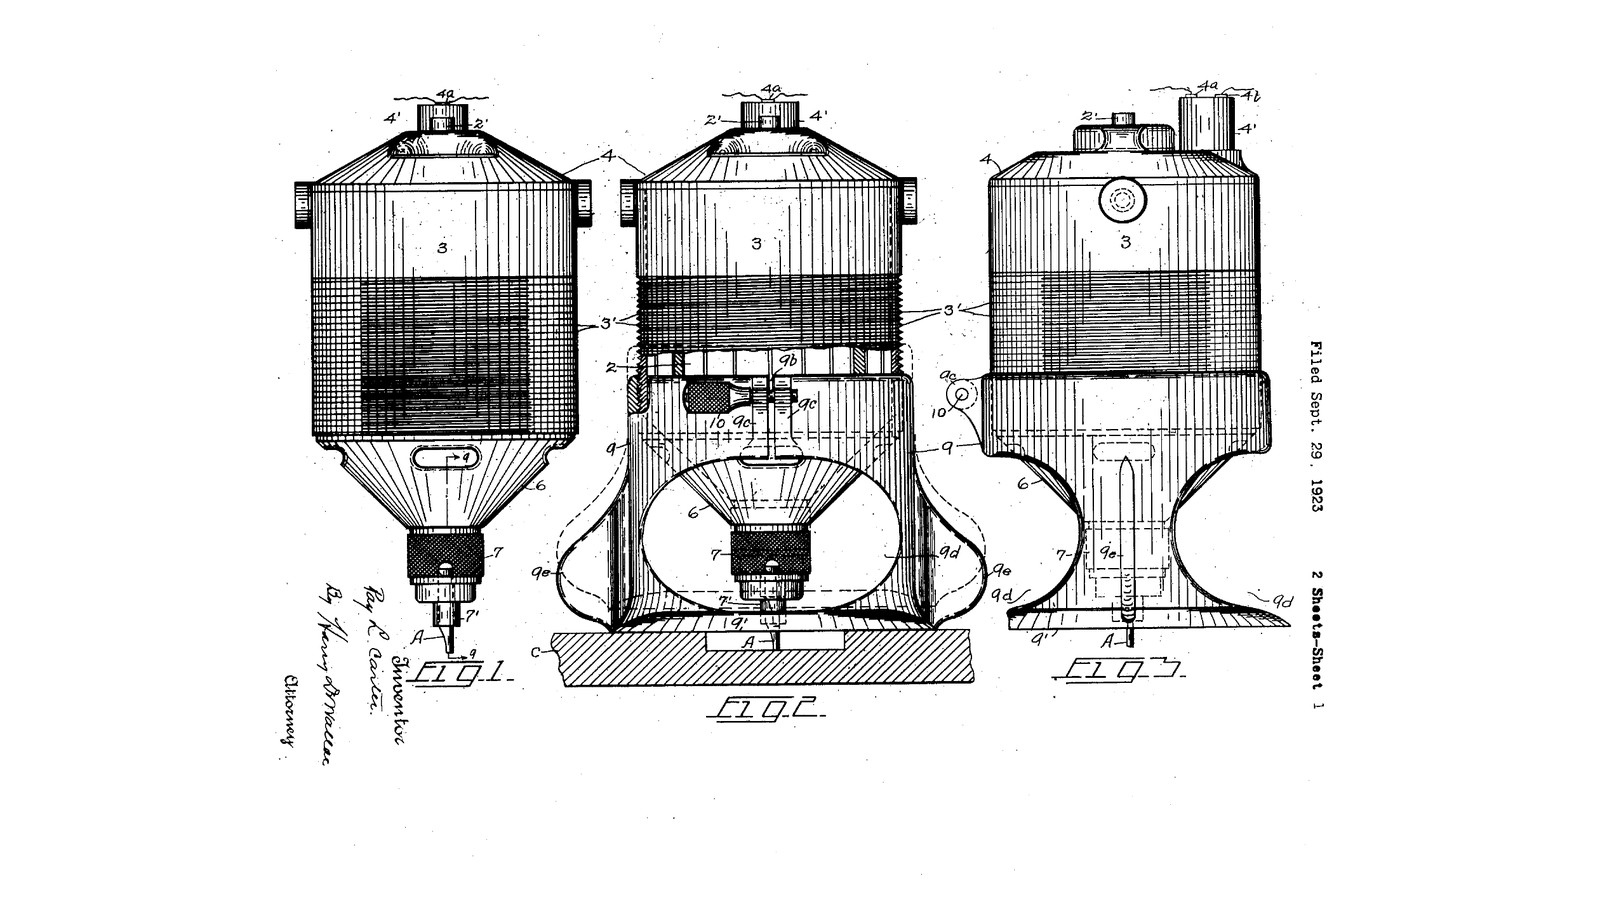


Screw-Depth Portable Router: The Motor's Threaded Casing Screws Into a Split Base, One Turn per Sixteenth (Carter, 1924)
Ray L. Carter of Syracuse, New York, received US 1,514,894, dated 11 November 1924, for the portable electric router: a small high-speed motor in an insulated casing light enough to hold in one hand, with a cutter in a chuck on its shaft. The casing is threaded outside and screws into the split, threaded top of a hollow base with a flat bottom. Each turn moves the cutter 1/16 inch, and a clamp screw across the split locks it. The base is cut away so the cutter can be seen and the chips can get out.
We print the casing and base in PETG at his pitch, round a small DC motor. The other sizes are ours.
Intermediate
About 2 days
Instructions
1
1
One turn, one sixteenth
One turn, one sixteenth
Loading Jupyter Notebook...
2
2
Read US 1,514,894
Read US 1,514,894
"In practice, the threads of the shell 3 and support 9 are preferably about one-sixteenth inch pitch, so that each revolution of the motor or support in either direction moves the tool A correspondingly."
3
3
Print the motor casing
Print the motor casing
The casing 3: a tube for a 42 mm motor with a 60 mm thread at 1/16 inch pitch, an 18 mm hole and air slots in its bottom, and two holes 29 mm apart for the motor's face screws. Print it bottom down. PETG, 0.2 mm layers, 40 % infill, 5 walls; no supports.
4
4
Print the base
Print the base
The support 9: a hollow base with a flat plate 140 mm across and an opening 50 mm wide, its sides cut away, two wings, and the split, threaded top with clamp lugs. Print it plate down. PETG, 0.2 mm layers, 40 % infill, 5 walls; no supports.
5
5
Print and fit the parts
Print and fit the parts
Print the casing and the base in PETG. Clean the threads and screw the casing into the base by hand; it should turn smoothly all the way. If it is tight, run it in and out a few times. Check the base's bottom is flat by rubbing it on abrasive paper on a flat board.
Materials for this step:
 PETG Filament1 piece
Tools needed:
 FDM 3D Printer
 Deburring Tool
 Digital Caliper 6-Inch
6
6
Motor, collet and wiring
Motor, collet and wiring
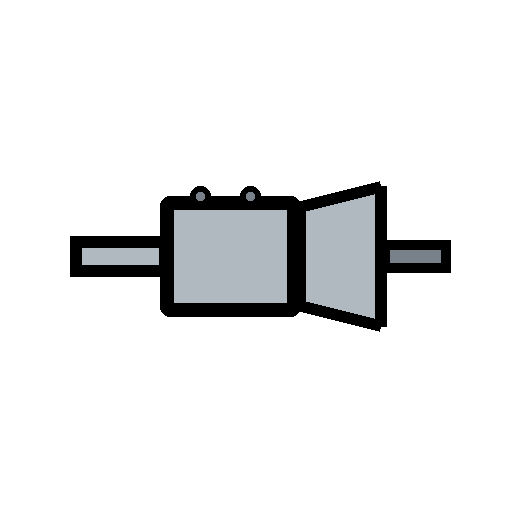
Fit the collet adapter on the motor's shaft and tighten its set screws. Push the motor down into the casing so its face sits on the casing's bottom with the collet through the hole, and screw it in with its two M4 face screws. Solder the supply leads through a toggle switch, sleeve the joints, and lead the cable out through the casing's open top. Set the DC supply to the motor's rated voltage.
Materials for this step:
 Electric Motor1 piece
 Motor Shaft Collet Adapter1 piece
 Socket Head Cap Screw2 pieces
 Toggle Switch1 piece
 Hook-Up Wire1 piece
 Heat Shrink Tubing1 piece
Tools needed:
 DC Power Supply
 Electric Soldering Iron
 Hex Key Set
 Adjustable Spanner
7
7
Set the depth and lock it
Set the depth and lock it
Fit a straight bit in the collet. Screw the casing into the base until the bit's end is level with the base's bottom on a flat board, then screw it in four more turns for a 1/4 inch (6.35 mm) deep cut. Put an M5 screw through the lugs with a wing nut and tighten it, closing the split on the thread.
Materials for this step:
Socket Head Cap Screw1 piece Wing Nut1 piece
Tools needed:
 Router Bit SetHex Key SetDigital Caliper 6-Inch
8
8
Rout a groove
Rout a groove
Clamp a board down. Hold the router by its casing and wings, base flat on the board, switch on, and move it along a clamped straightedge so the bit cuts a groove. Take deep grooves in two or three passes, a few turns deeper each time.
Tools needed:
 Hardwood Board
 Bar Clamp
 Safety Glasses
9
9
Troubleshooting
Troubleshooting
Router troubleshooting.
Flow
Loading...
10
10
History and honest limits
History and honest limits
**Ray L. Carter** of Syracuse, New York, US 1,514,894, dated 11 November 1924, filed 29 September 1923. He claimed a motor with a threaded casing, "a hollow cylinder having a split threaded portion adapted to engage the threaded portion of said casing whereby said tool may be moved relatively to the work", a plane bottom to move over the work, and means for locking. His motor ran on mains through a lamp socket at over 7,000 r.p.m.; ours is a small DC motor on a bench supply, a light-duty router. His casing was insulating material; ours is printed PETG. His fan and baffle disk are left out. The pitch is his; the other sizes are ours.
Materials
8- 1 piecePlaceholder
- 1 piecePlaceholder
- 1 piecePlaceholder
- 3 piecesPlaceholder
- Placeholder
- Placeholder
- 1 piecePlaceholder
- 1 piecePlaceholder
Tools Required
11- Placeholder
- Placeholder
- Placeholder
- Placeholder
- Placeholder
- Placeholder
- Placeholder
- 1 vendor sell this, none ship to you yetPlaceholder
- Placeholder
- Placeholder
- Placeholder
Design Files
2This blueprint makes

Related Blueprints
These blueprints share knowledge with this one — techniques, materials, or principles that connect them in the learning graph.

CC0 Public Domain
This blueprint is released under CC0. You are free to copy, modify, distribute, and use this work for any purpose, without asking permission.
Support the Maker by purchasing products through their Blueprint where they earn a Maker Commission set by Vendors, or create a new iteration of this Blueprint and include it as a connection in your own Blueprint to share revenue.